Chapter 2 walkthrough: Eternal Blue (Dilmagia to the Wind Shrine)
Quick answer
Chapter 2, 'Eternal Blue', crosses Dirnado, the Continent of Wind. You go to Dilmagia, the Machinopolis, find Lid at the shipyard and cross Mt. Thunderclap (Recommended Level 13). Lid offers an easy route for 1,000 gil, which adds a ladder; we took it and beat the boss, Liquid Thunder (Lv.13, weak to Earth), at the end. The way on leads to the Dwarven Forge, where Borin asks you to clear out a monster: Mom Bomb (Lv.14, weak to Water), which splits into four Great Bombs. Borin is then kidnapped and taken to the Mobliz Shipyard (Recommended Level 16); we played it through. Throw the power switch in the upper generator room to run the centre elevator, rescue him on the roof, then escape against a 15-minute countdown: add the floor numbers 5, 3 and 8 and pull lever 16, beat Epimetheus (Lv.16) and finish Adrastea (Lv.16, 25,000 HP) on the cargo train. The Wind Shrine lies at the island's north tip; inside, light each tower's lamp to raise a lift, ride the floating pads, and follow the route in the walkthrough section to the save balcony. The Tsukiyo no Tachi chest, which halves Wind damage, is on a dead-end floor along the way. At the end you fight Aether (Lv.18), one of the Sworn Six: Ice is his weakness, he summons minions and hits the whole party with Heavenly Wind. We needed three attempts at Lv.19-20 and won with a big Phoenix Down stock (2,982 EXP, 4,780 gil, 65 MRP and Sylph's Tiara). Afterwards Lid reveals Aether was the first Cid, you talk to Lid on a Dilmagia rooftop, the Chapter 2 complete card shows and Lid gains 3 Strength on the airship (our play; a video reported Magic +3). From creator videos, the airship then makes an emergency landing and Chapter 3 opens with 'Go to Olderion, the aquapolis'.
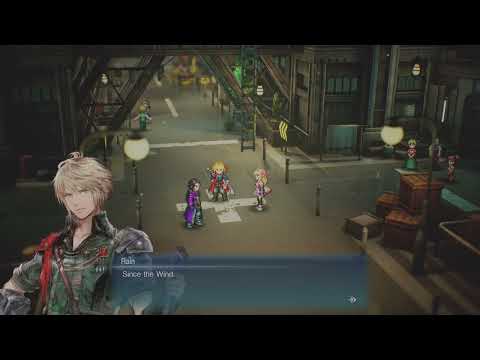 Spoiler0:08–0:20Dilmagia, the Machinopolis
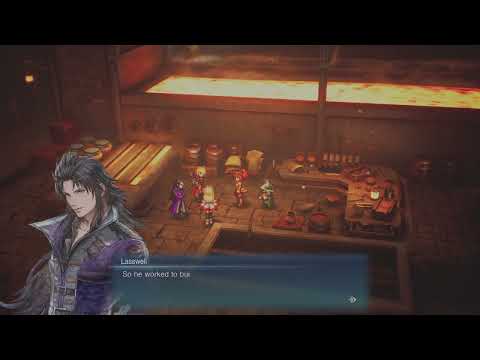 Spoiler4:05–4:51The Dwarven Forge: layout, Borin and the monster request
 Spoiler1:38:32–1:38:56How to reach Mom Bomb
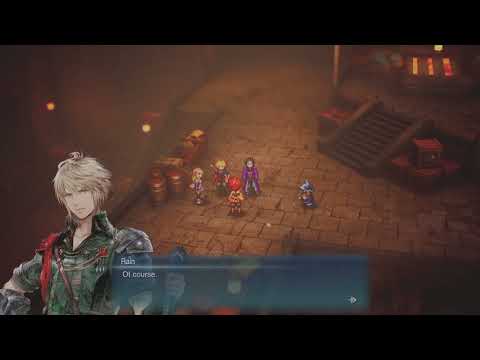 Spoiler0:23–1:18Borin is kidnapped
- Spoiler1:58:39–1:58:51Leaving the Forge and the road to the Mobliz Shipyard
- Spoiler2:01:10–2:01:20Leaving the Forge and the road to the Mobliz Shipyard
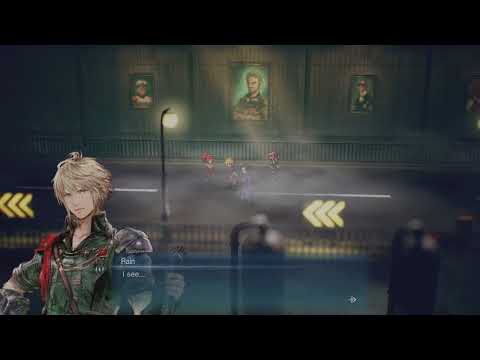 Spoiler0:03–0:19Saving Borin at the Mobliz Shipyard (Recommended Level 16)
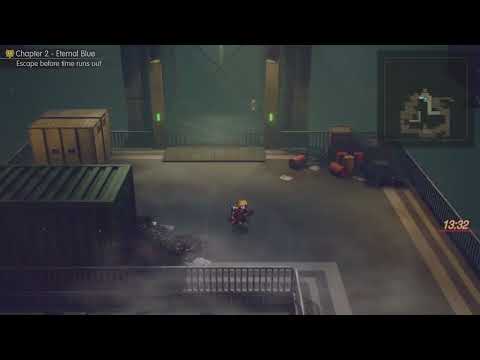 Spoiler1:02–1:18The timed escape from the Mobliz Shipyard (15 minutes)
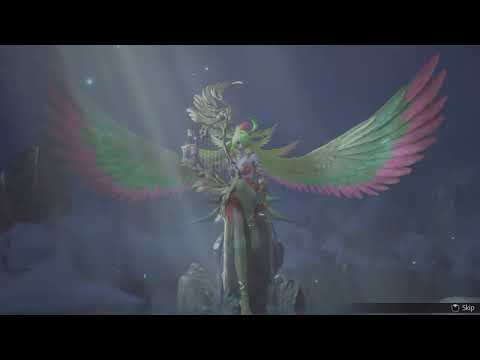 Spoiler9:41–9:52Aether (Lv.18): weakness, minions and how to beat him
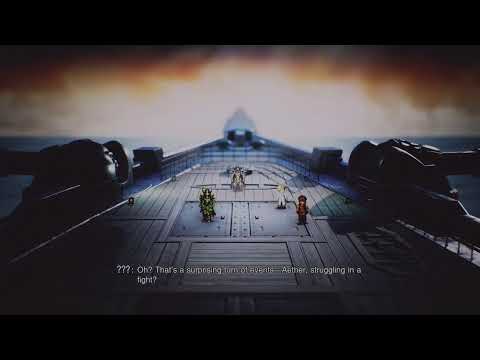 Spoiler11:58–12:53Back to Dilmagia and the end of the chapter
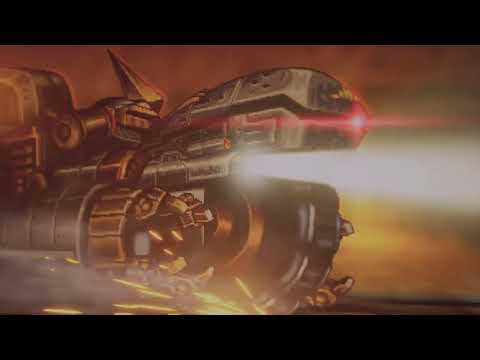 Spoiler9:04–9:17Boss weaknesses and what to watch for
Before you start
Dilmagia, the Machinopolis
Reveal solution / story details
The chapter opens on a pier on Dirnado, the Continent of Wind. The captain says the capital, Dilmagia, is a city of steel through the plains to the west, and the objective reads 'Go to Dilmagia, the machinopolis'. On the pier Fina speaks as if she remembers Rain from long ago, then briefly collapses (story spoiler). To walk it, follow the dirt path west from the pier, then north up the scaffolding below the cliffs; the 'Dilmagia, the Machinopolis' town card with a Proceed prompt sits at the top of the stairs between two tall tanks. Our one random fight on the way was three Footpads (Lv.12). Footpads steal gil: in one later fight we saw banners for 287 and 272 gil stolen.
Inside, Lasswell goes to stock up and Fina to explore, and the objective becomes 'Gather information in Dilmagia'. The entrance street runs north to a cross street. West end: the inn, a notice board with a newspaper, a Moogle and a marked NPC. East end: an item shop (money-bag sign), a sub-quest board and, further east, the armor and weapon shop. The north end is a closed gate with soldiers, and the shipyard lies through it. Prices are in the next section.
The three yellow-marker leads that finish the objective: an older man on the entrance street, who says the road to the Wind Shrine is full of monsters and he'd only go by air; a woman at the west end, who says to ask at the shipyard since most airships are state-owned; and a youth at the east end by the armor and weapon shop (you have to stand just above and left of him to get the prompt), who says someone at the shipyard builds her own airship, 'Lid'. The first two leads autosaved. The notice board's newspaper has not much on the Wind Shrine, though one headline is 'Thundering Mt. Thunderclap'. After the third lead the objective becomes 'Find Lid at the shipyard'.
- Travel to Dilmagia, the Machinopolis (west along the dirt path and up the scaffolding from the landing pier).0:08–0:20Spoiler clip
Spoiler clip · The walk up to the Dilmagia town card · reveal
Checked on screen · Oct 25, 2026
0:08–0:20 · 12 sThe walk up to the Dilmagia town cardFollow the dirt path up toward the scaffold towers and climb to the top of the stairs between the tall tanks, where the 'Dilmagia, the Machinopolis' card and a Proceed prompt take you into the city.
PanyapiN GamingFull video ↗Credits
“Chapter 2 (Eternal Blue): Go to Dilmagia, the machinopolis – MQ | Final Fantasy Resonance PS5” by PanyapiN Gaming · Oct 22, 2026 · Full game on PS5, uploaded Oct 22, 2026; difficulty and version not shown
Independent creator · no partnership implied
- Talk to the three marked NPCs (entrance street, west end, east end) until the objective changes; buy gear at the shops if you like.
- Go through the north gate to the shipyard and find Lid.
Sources for this section
- Kingy (first-hand play test): Kingy play test: Final Fantasy Resonance full game, demo save transfer to Felicitas · Checked 2026-10-26 · Published 2026-10-24
- PanyapiN Gaming (YouTube creator): Chapter 2 (Eternal Blue): Go to Dilmagia, the machinopolis – MQ | Final Fantasy Resonance PS5 · Checked 2026-10-24 · Published 2026-10-22
- PanyapiN Gaming (YouTube creator): Chapter 2 (Eternal Blue): Gather information in Dilmagia – Main Quest | Final Fantasy Resonance PS5 · Checked 2026-10-24 · Published 2026-10-22
- PanyapiN Gaming (YouTube creator): Chapter 2 (Eternal Blue): Find Lid at the shipyard – Main Quest | Final Fantasy Resonance PS5 · Checked 2026-10-24 · Published 2026-10-22
The shipyard and Lid joining
Dilmagia shops: item, armor and weapon prices
Crossing Mt. Thunderclap
Reveal solution / story details
Mt. Thunderclap is a cave-and-ledge mountain northeast of Dilmagia (area card: Recommended Level 13). From Dilmagia, fast travel to the town, walk out the south exit, then follow the dirt path south, east and north-east up the slopes; the cave entrance is just west of a cliff by a raised wooden bridge. Random fights on the way: two Wood Eyes (Lv.11). We saved at the entrance and there is a save point right at the start of the mountain.
Lid's offer comes as you enter: she'll show an 'easy-peasy' route with hardly any monsters for 1,000 gil, or you can take the normal route full of monsters (she comes along either way). We first declined. The offer isn't one-time: a glowing green patch with an F Examine prompt just inside the entrance re-opens it ('Pay 1,000 gil' or 'Don't pay'), so you can buy it later. In PanyapiN's video (Community-reported (video)) the party has only 798 gil, is told it can't afford it and has to come back with more.
What paying does: the screen fades, it autosaves and a long wooden ladder now stands on the rock column right above the green patch. The ladder isn't there before you pay (we searched that column first), and Shiney's video (Community-reported (video), about 31:28-35:00) shows the same: pay, then climb it. After that: a narrow rock ridge north with a fight (three Footpads and a Thief Boss), then a ledge above a basin. The ledge has a chest with the Cape of the Raiju (we didn't record its stats) and a glinting spot by a pine; ladders from it lead down to the basin's second save point (its first use says you can return to the entrance save point) and up to a higher ledge. The upper ladder and the cave mouth beside the chest couldn't be used from below.
From the second save point, go west under the rock overhang to a grassy ledge with a pine, then keep west along the stone floor south of the pine; north of the pine is a dead-end ledge. Liquid Thunder stands in the open floor to the west. After the fight the boss floor has an F Proceed prompt at its west edge. Taking it plays a short scene outside: Lid explains the Dwarven Forge is where dwarves make airship parts, she has parts on order there, and it's on the way to the Wind Shrine. Then you're on the world map with 'Quest Updated' and the new objective 'Visit Borin at the Dwarven Forge', and the game autosaves.
The normal (unpaid) route isn't mapped by us. Before paying we explored the first area for about 25 minutes without finding a way up. What we did find there: from the first save point go north to the first open area, then east along a corridor above the starting loop (a grassy ledge with a big pine on the right) and north-east between rock outcrops past a waterfall chasm. A small nook at the top has a glinting spot (F Examine) that gives one Tablet Shard and triggers the 'Tablet Shards' tutorial card. That branch is a dead-end spiral. The stone steps left of the path north of the first fight can't be climbed.
Leaving the mountain autosaves and updates the objective to 'Visit Borin at the Dwarven Forge'; the route to the Forge is in the next section. Shiney's video shows a side quest, 'Elven Maven', active on the mountain, with the goal of delivering evidence left by elves to Silvia in Dilmagia (Community-reported (video); we didn't take that quest).
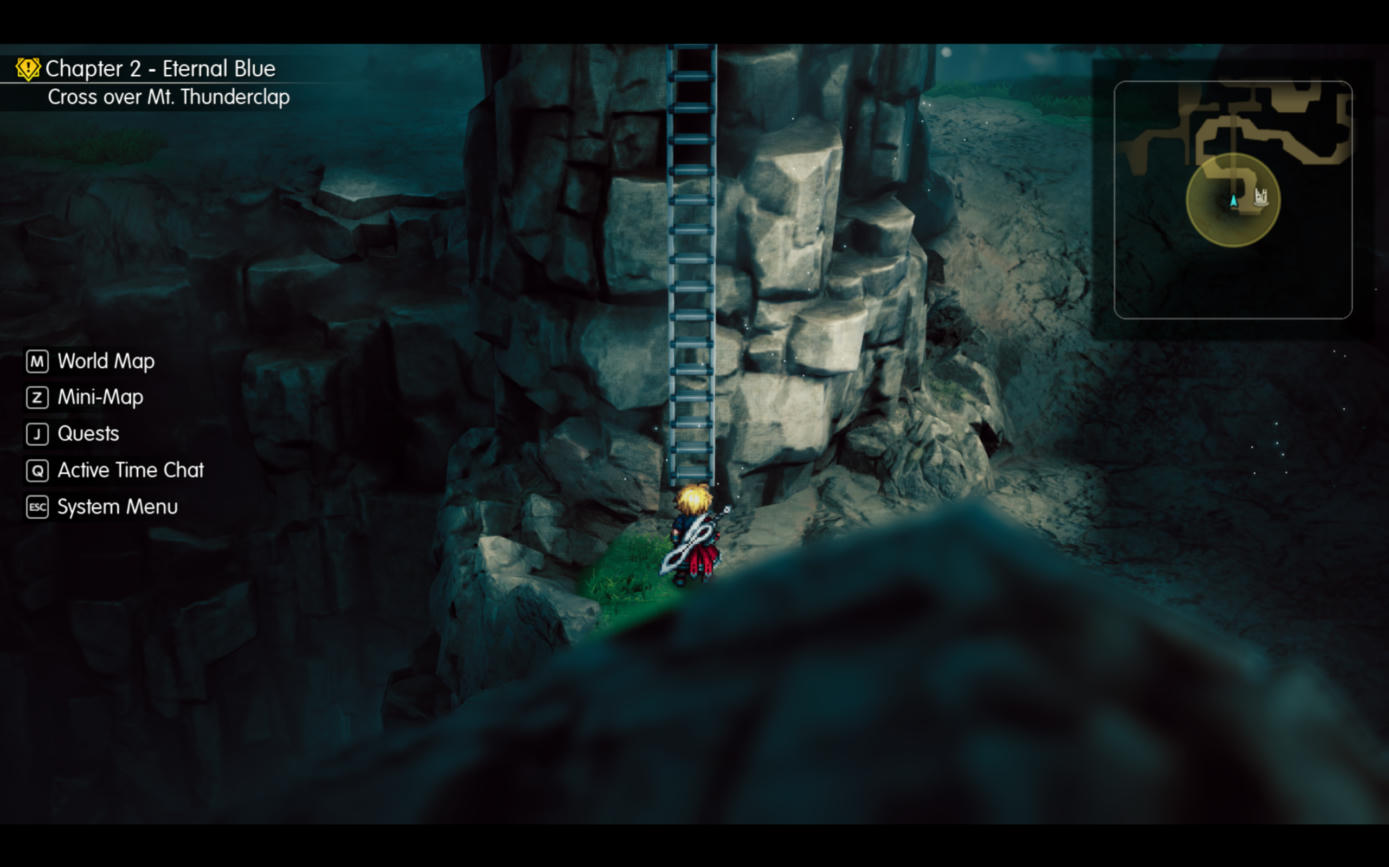
- Fast travel to Dilmagia, leave by the south exit and follow the path south, then east and north-east, to the Mt. Thunderclap cave.
- Decide on Lid's 1,000-gil route. To buy it later, examine the green patch just inside the entrance; the ladder above it appears only after you pay.
- Climb the ladder, fight along the north ridge to the ledge with the Cape of the Raiju chest and take the ladder down to the second save point.
- From that save point go west under the overhang, then west along the stone floor south of the pine to Liquid Thunder.
- Beat Liquid Thunder (Earth is its weakness), then use the Proceed prompt at the west edge of the floor.
| Enemy | Level | What we saw |
|---|---|---|
| Wood Eye | 11 | Tree monsters on the way up; two in a fight paid 38 EXP each and 90 gil in total |
| Footpad | 12 | Steals gil (two thefts, 287 and 272, in one fight); a group of three with a Thief Boss paid 87 EXP, 890 gil, 15 MRP and a Potion |
| Thief Boss | 13 | Appears with Footpads on the ridge |
| Captain | 13 | Green-armored axe knight; two affinities, both still unrevealed |
| Warlock | 12 | Weak to Earth: Stone and Lid’s Mechabo Kick both showed Weak +200%, and Stone staggered it. Its spell hit the whole party for 147 to 315 |
| Wolf | 11 | Packs of up to four; a fight of four paid 68 EXP, 180 gil and 15 MRP |
| Bomb | 12 | Ice (Blizzara) didn’t reveal a weakness; staggered by Blizzara plus attacks. Warlock plus two Bombs paid 137 EXP, 310 gil and 24 MRP in one fight |
| Damia | 12 | Whirlwind monster, met with two Wolves; two affinities, unrevealed |
| Liquid Thunder | 13 | The boss; see the next section |
Sources for this section
- Kingy (first-hand play test): Kingy play test: Final Fantasy Resonance full game, demo save transfer to Felicitas · Checked 2026-10-26 · Published 2026-10-24
- Shiney (YouTube creator): Final Fantasy Resonance Part 3 Chapter 2 Eternal Blue · Checked 2026-10-25
- PanyapiN Gaming (YouTube creator): Chapter 2 (Eternal Blue): Cross over Mt. Thunderclap pt. 1 – MQ | Final Fantasy Resonance PS5 · Checked 2026-10-24 · Published 2026-10-22
- PanyapiN Gaming (YouTube creator): Chapter 2 (Eternal Blue): Cross over Mt. Thunderclap pt. 3 – MQ | Final Fantasy Resonance PS5 · Checked 2026-10-24 · Published 2026-10-23
- PanyapiN Gaming (YouTube creator): Chapter 2 (Eternal Blue): Cross over Mt. Thunderclap pt. 4 – MQ | Final Fantasy Resonance PS5 · Checked 2026-10-24 · Published 2026-10-23
Liquid Thunder (Lv.13): weakness, attacks and rewards
Reveal solution / story details
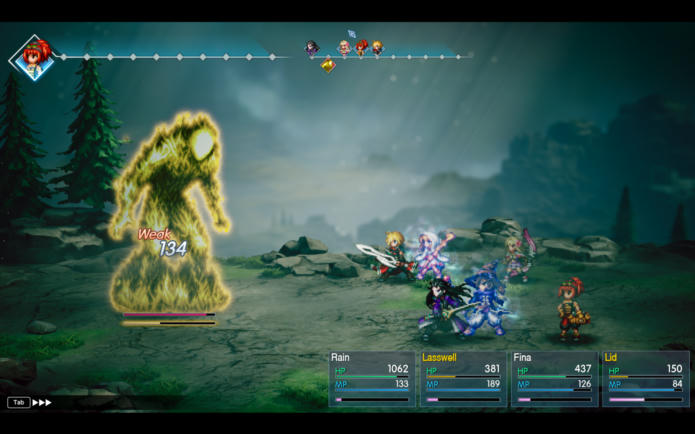
Walking up to the yellow lightning elemental starts an event: Rain says this one doesn't seem like the other monsters, and Lid answers back about what use a bodyguard is if they can't fend off monsters like this. Liquid Thunder is Lv.13 (Normal). Its info panel shows two affinity icons. Earth is a weakness: Lid's Mechabo Kick (Earth physical, 5 MP) showed 'Weak' with 134 damage and revealed the Earth icon. The second icon, a shield-type symbol, stayed '?'.
Attacks we saw: Megavolt on one ally (313 on Fina), a lightning attack on the whole party that knocked out Lid (Lv.11) twice and Lasswell once, and 'Charging electricity!', a telegraph shown before a bigger hit. Our approach: Lid's Earth kicks (they staggered it twice), we cast Shellga from Rain's Leah Vision before the charged turn (we didn't measure what it saved), and three Phoenix Downs, going from 8 to 5. We used Limit Bursts from Lid (March of the Machines, which can Confuse), Fina (Holy Ray) and Lasswell (Null Moon), plus two Hibernal Fury resonances. Earth is the weakness to bring: we used Mechabo Kick; Lid's Stone (Earth magic) and Earth Scroll I from the Dilmagia item shop weren't tried on it.
- Heal up and save at the second save point before walking west.
- Hit it with Earth: Mechabo Kick on turn one reveals the weakness.
- Watch for 'Charging electricity!' before a bigger hit; we cast Shellga then, and kept Phoenix Downs ready for Lid.
- Expect about 1,350 EXP and 1,500 gil; the video run got a larger gil and MRP payout with a Stagger Finish Bonus.
Sources for this section
- Kingy (first-hand play test): Kingy play test: Final Fantasy Resonance full game, demo save transfer to Felicitas · Checked 2026-10-26 · Published 2026-10-24
- Shiney (YouTube creator): Final Fantasy Resonance Part 3 Chapter 2 Eternal Blue · Checked 2026-10-25
Liquid Thunder rewards and what comes after
Reveal solution / story details
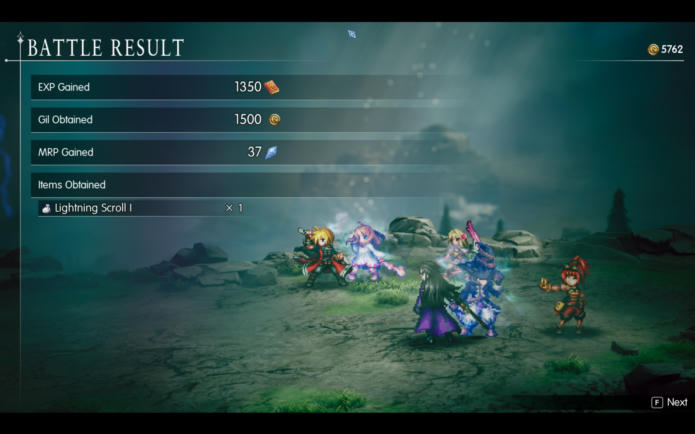
Result: 1,350 EXP, 1,500 gil, 37 MRP and a Lightning Scroll I. Our last hit was a plain kick, not a stagger finish. In Shiney's video (Community-reported (video)) the result showed 1,570 gil and 49 MRP with a Stagger Finish Bonus (the bonus came from how the fight ended; we didn't test it ourselves). Afterwards Fina reached Lv.15 and Lid Lv.12, and Lid says there's a path straight to the Wind Shrine now.
Sources for this section
- Kingy (first-hand play test): Kingy play test: Final Fantasy Resonance full game, demo save transfer to Felicitas · Checked 2026-10-26 · Published 2026-10-24
- Shiney (YouTube creator): Final Fantasy Resonance Part 3 Chapter 2 Eternal Blue · Checked 2026-10-25
From Mt. Thunderclap to the Dwarven Forge
The Dwarven Forge: layout, Borin and the monster request
Reveal solution / story details
Inside, a long dark entrance corridor runs north to a lift platform on the right; examine the panel at its yellow arrow to ride up to the main hall, which is full of dwarves. From the hall go down the open floor, then take the staircase on the right up to the upper forge floor, where Borin stands at a workbench beside the big furnace (Talk). The shop row, with the inn, save point and a Moogle of Light, is east of the hall (next section). Fast travel works inside the Forge: pick it on the map, answer 'Proceed to Dwarven Forge?' and you arrive in the main hall at the top of the lift.
Borin has Lid's parts ready. The talk is mostly story: the 'first Cid' built the first airship centuries ago and taught the dwarves, the Cid name now goes to the greatest airship engineer of each era, and Lid's dream is to inherit it. Borin asks after Lid's brother Evan and Lid deflects. Then he asks a favor: a monster has taken up residence in the forge, and he'll waive the cost of the parts Lid owes if it's dealt with. Lid volunteers the group. It autosaves and the objective becomes 'Defeat the monster at the forge' (PanyapiN's PS5 video shows the same objective).
One chest: from the main hall go south down the stairs past the lift, then down the right-hand stairs onto a wooden walkway over the drop. The chest at its end gave three Phoenix Downs. The walkway is a dead end, so don't try to leave the Forge that way.
- Take the lift, cross the main hall and climb the right-hand staircase to Borin at the furnace.
- Accept the monster request; the objective becomes 'Defeat the monster at the forge'.4:05–4:51Spoiler clip
Spoiler clip · Borin's offer and the 'Defeat the monster at the forge' goal · reveal
Checked on screen · Oct 25, 2026
4:05–4:51 · 46 sBorin's offer and the 'Defeat the monster at the forge' goalTalk to Borin at the furnace and take his request: he offers to waive the cost of the airship parts, and your goal becomes 'Defeat the monster at the forge'.
PanyapiN GamingFull video ↗Credits
“Chapter 2 (Eternal Blue): Visit Borin at the Dwarven Forge – MQ | Final Fantasy Resonance PS5” by PanyapiN Gaming · Oct 23, 2026 · Full game on PS5, uploaded Oct 23, 2026; difficulty and version not shown
Independent creator · no partnership implied
- Optional: the Phoenix Down chest on the wooden walkway south of the lift, and the shop row east of the hall.
Sources for this section
- Kingy (first-hand play test): Kingy play test: Final Fantasy Resonance full game, demo save transfer to Felicitas · Checked 2026-10-26 · Published 2026-10-24
- PanyapiN Gaming (YouTube creator): Chapter 2 (Eternal Blue): Visit Borin at the Dwarven Forge – MQ | Final Fantasy Resonance PS5 · Checked 2026-10-24 · Published 2026-10-23
- PanyapiN Gaming (YouTube creator): Chapter 2 (Eternal Blue): Defeat the monster at the forge – Main Quest | Final Fantasy Resonance PS5 · Checked 2026-10-24 · Published 2026-10-23
- PanyapiN Gaming (YouTube creator): Chapter 2 (Eternal Blue): Report back to Borin – Main Quest | Final Fantasy Resonance PS5 · Checked 2026-10-24 · Published 2026-10-23
Dwarven Forge shops, inn and Moogle: weapon, armor and item prices
From the fast-travel arrival point in the main hall, walk north-east: the shop row has a weapon and armor counter (crossed-swords sign), an item counter (money-bag sign), a Moogle of Light, an inn (bed sign) and a save point. The weapon dwarf says everything there was forged on the spot; the inn charged 100 gil for a full HP and MP restore. Prices and stats are as the menus showed them on October 25 (full game 1.0.1.0). Buying gear opens an 'Equip now?' prompt with a before-and-after card.
For comparison, Rain's Iron Armor was 60 Phys. Def. and 41 Mag. Def. with Speed -11 and HP +70, his Flamberge 41 Phys. Atk. and 19 Mag. Atk. with HP +140, and Lasswell's Iwakirimaru 37 and 27 with MP +20. We bought Phalanx and Flametongue for Rain, Ashura for Lasswell and three Phoenix Downs; that took our gil from 11,037 to 187. Stock-limited items show a 'Remaining' count.
The Moogle of Light is the same Vision Enhancement menu as in Grandport; Zidane's first star cost one Magicite Shard here (see the awakening page).
Where the shops are and what to buy
The Moogle of Light and awakening costs
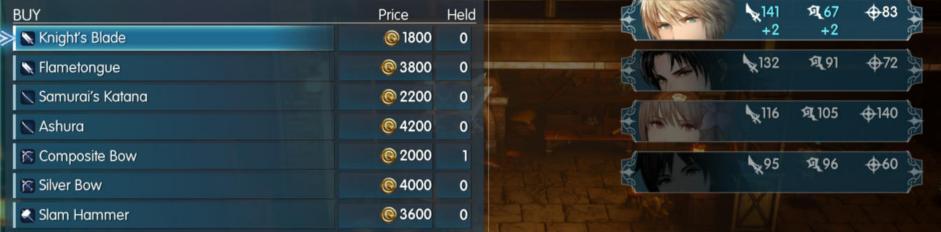
| Shop | Item | Price (gil) | Stats or effect shown |
|---|---|---|---|
| Weapons | Knight's Blade | 1800 | Phys. Atk. 43, Mag. Atk. 21 |
| Weapons | Flametongue | 3800 | Phys. Atk. 52, Mag. Atk. 24; Fire attacks deal 20% more damage |
| Weapons | Samurai's Katana | 2200 | Phys. Atk. 39, Mag. Atk. 28; HP +30 |
| Weapons | Ashura | 4200 | Phys. Atk. 49, Mag. Atk. 34, Speed 10 |
| Weapons | Composite Bow | 2000 | Stats 37 / 31, Sanctity 36 |
| Weapons | Silver Bow | 4000 | Stats 43 / 39, Sanctity 41 |
| Weapons | Slam Hammer | 3600 | Stats 39 / 40 |
| Armor | Power Vest | 2500 | Phys. Def. 57, Mag. Def. 48 |
| Armor | Phalanx | 2250 | Phys. Def. 72, Mag. Def. 48, Speed -16; HP +90 |
| Armor | Silk Robe | 2750 | Phys. Def. 45, Mag. Def. 57, Sanctity 16 |
| Items | Potion | 100 | |
| Items | Mist Potion | 500 | Restores 200 HP for all allies |
| Items | Ether | 500 | Restores 50 MP |
| Items | Mist Ether | 2500 | |
| Items | Phoenix Down | 200 | Revives a KO’d ally with 25% HP |
| Items | Eye Drops | 200 | |
| Items | Unicorn Horn | 500 | |
| Items | Gold Needle | 800 | |
| Items | Smoke Bomb | 300 | Remaining 3 |
| Items | Tent | 300 | |
| Items | Knife of Blind | 1000 | Remaining 5 |
| Items | Knife of Silence | 1000 | Remaining 5 |
| Items | Earth Scroll I | 1000 | Remaining 3 |
| Inn | One night | 100 | Full HP and MP |
Sources for this section
- Kingy (first-hand play test): Kingy play test: Final Fantasy Resonance full game, demo save transfer to Felicitas · Checked 2026-10-26 · Published 2026-10-24
How to reach Mom Bomb
Reveal solution / story details
From Borin's upper floor go back down the staircase to the lower hall, then north along the west corridor past a dwarf to a short staircase that goes down onto the coal floor under the walkway. The walkway above only lets you look at the monster. A glinting spot on the corridor ledge on the way (F Examine) gave a Tablet Shard and replayed the Tablet Shards tutorial, and a second glint by the fence on the coal floor south of the boss spot is another shard.
On the coal floor a frozen dwarf (he says his legs turned to jelly) stands beside the monster, and another dwarf in the corridor mentions an abandoned shipyard to the north-west where Lid and Evan used to watch the dwarves work as children. The fight starts when you stand just south-west of the monster and see the F Examine prompt; we didn't find that spot ourselves and used Shiney's video (about 98:35-98:55, Community-reported (video)).
- From Borin's floor go down to the lower hall, then north along the west corridor.
- Take the short staircase down onto the coal floor, picking up the Tablet Shards on the ledge and by the fence.
- Stand just south-west of the monster and press F Examine to start the fight; heal and save at the shop-row save point first.1:38:32–1:38:56Spoiler clip
Spoiler clip · The spot that starts the Mom Bomb fight · reveal
Checked on screen · Oct 25, 2026
1:38:32–1:38:56 · 24 sThe spot that starts the Mom Bomb fightWalk down onto the coal floor beside the flaming monster and stand just south-west of it until the Examine prompt appears, then use it to start the fight.
ShineyFull video ↗Credits
“Final Fantasy Resonance Part 3 Chapter 2 Eternal Blue” by Shiney · Oct 23, 2026 · Full game with Xbox-style button prompts, uploaded Oct 23, 2026; platform and version not shown
Independent creator · no partnership implied
Sources for this section
- Kingy (first-hand play test): Kingy play test: Final Fantasy Resonance full game, demo save transfer to Felicitas · Checked 2026-10-26 · Published 2026-10-24
- Shiney (YouTube creator): Final Fantasy Resonance Part 3 Chapter 2 Eternal Blue · Checked 2026-10-25
Mom Bomb (Lv.14): weakness, moves and the Great Bomb split
Reveal solution / story details
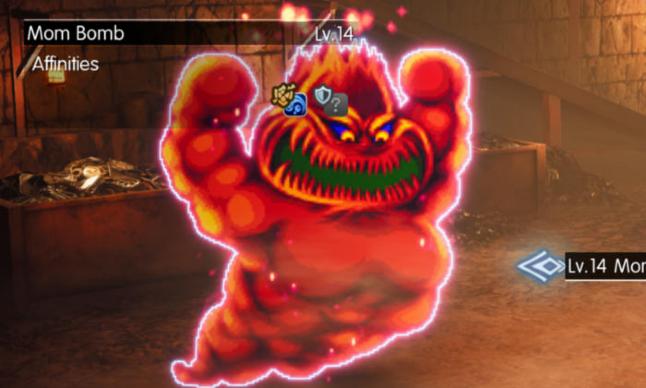
Mom Bomb is a large red fire monster, Lv.14 on Normal. Its info panel shows two affinity icons. Water is a weakness: Lid's Free Energy (Water magic, from the Zidane Vision) revealed the Water icon. The other icon, a shield-type symbol, stayed '?'. Ice (Blizzard and Blizzara, 210 damage in total), Lightning (Thunder) and Earth (Mechabo Kick, 94) didn't reveal an icon, so bring Water if you can.
A fifth, silver-haired figure appears on our side of the field for the fight; we couldn't control it and didn't see its name (PanyapiN's video, Community-reported (video), shows a robed figure with a staff on your side in the same fight, and we haven't matched the two). Moves we saw: a big fire hit on the whole party, Body Slam, Fira on all of us and Firestorm on all of us. Lid was knocked out twice and Fina came close to KO once.
We staggered it twice; the second time the banner read 'SWEEPING STAGGER'. The Resonance wheel then offered three Visions: Hibernal Fury (Tronn), Healing Wind (Leah) and Climax Edge (Zidane). Climax Edge did 736 in total on the staggered Mom Bomb. At about 40% HP it split into four Great Bombs (Lv.14, labelled A to D, with the same two affinity icons).
This fight is where we first summoned an Esper: Fina's Summon Esper command called Siren for 50 MP, and on her own turns she hit Mom Bomb for 625 in total (the pop-up read 'Resisted') and later hit all four Great Bombs for about 188 each, with one 280 critical, which ended the fight. The details are on the Full Break, Limit Burst and Espers page.
- Open with Water (Free Energy from Zidane) to reveal and exploit the weakness.
- Keep Phoenix Downs or Mist Potions ready: Lid was knocked out twice for us.
- Stagger it, then use Resonance; expect the Great Bomb split at about 40% HP and use a party-wide attack on the four.
Sources for this section
- Kingy (first-hand play test): Kingy play test: Final Fantasy Resonance full game, demo save transfer to Felicitas · Checked 2026-10-26 · Published 2026-10-24
- PanyapiN Gaming (YouTube creator): Chapter 2 (Eternal Blue): Defeat the monster at the forge – Main Quest | Final Fantasy Resonance PS5 · Checked 2026-10-24 · Published 2026-10-23
Mom Bomb rewards and what comes next
Reveal solution / story details
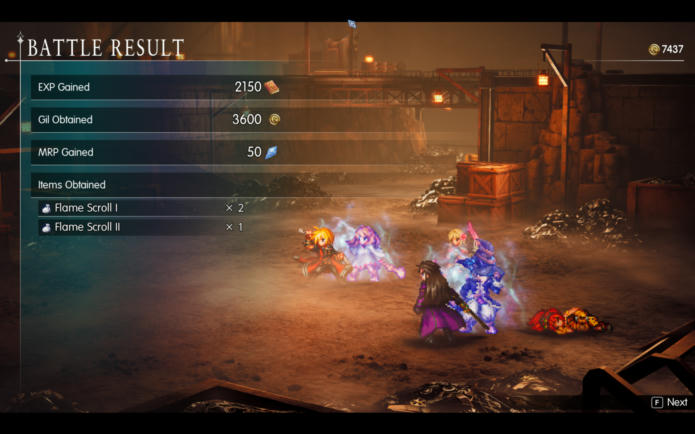
Result: 2,150 EXP, 3,600 gil, 50 MRP and Flame Scroll I x2 and Flame Scroll II x1 (the gil counter went from 7,437 to 11,037). Level-ups: Rain, Lasswell and Fina to Lv.16 and Lid to Lv.13; Lid was knocked out at the end of the fight and still levelled. Lid's Zidane went from Mastery Rank 0 to 2 in this one fight, unlocking Steal (AP 15) and Stamina+5 (permanent). In PanyapiN's PS5 video Rain was Lv.18 afterwards.
A knocked-out ally stays knocked out after the battle ends: Lid was still down in a later world-map fight west of the Forge and a Phoenix Down brought her back. After Mom Bomb, Rain wants to head back to Borin and the quest log reads 'Report back to Borin' at the Dwarven Forge.
Sources for this section
- Kingy (first-hand play test): Kingy play test: Final Fantasy Resonance full game, demo save transfer to Felicitas · Checked 2026-10-26 · Published 2026-10-24
- PanyapiN Gaming (YouTube creator): Chapter 2 (Eternal Blue): Defeat the monster at the forge – Main Quest | Final Fantasy Resonance PS5 · Checked 2026-10-24 · Published 2026-10-23
Borin is kidnapped
Reveal solution / story details
Walking back toward Borin's floor from the lower hall triggers a scene instead: a dwarf says Borin has been kidnapped by an armored goon who grabbed him and left, and that the kidnapper said he'd be put to work at the Mobliz Shipyard. Rain suspects the Sworn Six, Lasswell is curious about the 'armored goon', and Lid says to follow her. The quest updates to 'Save Borin at Mobliz Shipyard'. The story is the same in PanyapiN's video.
Spoiler clip · Borin is taken to the Mobliz Shipyard · reveal
Checked on screen · Oct 25, 2026
0:23–1:18 · 55 sBorin is taken to the Mobliz ShipyardWalk back toward Borin's floor to trigger the scene; afterwards your objective is 'Save Borin at Mobliz Shipyard'.
PanyapiN GamingFull video ↗Credits
“Chapter 2 (Eternal Blue): Report back to Borin – Main Quest | Final Fantasy Resonance PS5” by PanyapiN Gaming · Oct 23, 2026 · Full game on PS5, uploaded Oct 23, 2026; difficulty and version not shown
Independent creator · no partnership implied
Sources for this section
- Kingy (first-hand play test): Kingy play test: Final Fantasy Resonance full game, demo save transfer to Felicitas · Checked 2026-10-26 · Published 2026-10-24
- PanyapiN Gaming (YouTube creator): Chapter 2 (Eternal Blue): Report back to Borin – Main Quest | Final Fantasy Resonance PS5 · Checked 2026-10-24 · Published 2026-10-23
Leaving the Forge and the road to the Mobliz Shipyard
Saving Borin at the Mobliz Shipyard (Recommended Level 16)
Reveal solution / story details
On the world map the card reads 'Mobliz Shipyard' with 'Recommended Level 16' and a Proceed prompt. It sits at the top of the road loop north-east of the Noctis sanctum, a wooden scaffold tower by the cliff with a ruined building and a lift tower to its west. We arrived with Rain and Lasswell at Lv.17, Fina at Lv.16 and Lid at Lv.14.
The entrance is a hall lined with portraits. Lid explains they show every Cid over the years, all excellent airship engineers, though the first Cid will always be the best to her; his motto is what made her and her brother want to mass-produce airships so anybody could fly. Her brother vanished one day, and she guesses he got tired of the money struggle. Then two anti-monster security mechs announce 'MONSTER TARGETS IN SIGHT' and attack; Lid says someone has been messing with their sensors. Escape is greyed out.
The fight is two Security Eyes (Lv.14, one unrevealed affinity each). Thundara on all did 193 and 197 with no Weak tag. Lid's Steal (from Zidane, 0 MP) just told us there was nothing to steal. It paid 90 gil (our gil went from 1,481 to 1,571), and Lid's Zidane stayed at MR 3 with 50 MRP to the next rank. Afterwards Lid suggests, and Lasswell thinks it likely, that the Sworn Six are building a ship here, which is why they took Borin, and Lid hopes he's safe. It autosaves.
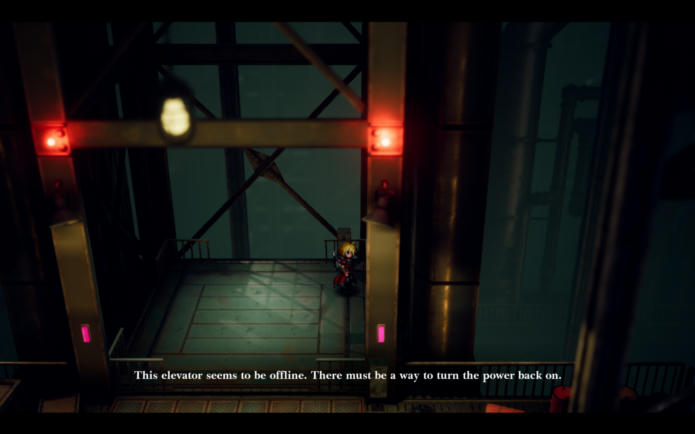
Route inside, from our own play (full game 1.0.1.0, Normal): from the entrance hall go west along the portrait hall (yellow chevrons), then north over a bridge onto the main floor. At the east end of the portrait hall a pink glow on a railing balcony is a save point; we walked east along the hall to reach it. Straight ahead on the main floor is the centre elevator. Its panel (F Examine) says it seems to be offline and there must be a way to turn the power back on, so the elevator is the goal and the power switch is the puzzle.
Go up first by the lift north of the west walkway (green lights, F Examine on its panel); it works without power. Upstairs is an open floor with lamp posts. The fenced generator room is east of it, and you enter through a gap in its west fence. The switch is inside; the next section gives the exact spot. North of the open floor is a fenced cage holding a golden urn. The Chocobo Down Charm chest sits in that cage's north-east corner. We pressed F beside the urn from several sides and it gave no prompt.
Once the switch is thrown, the centre elevator takes you to the top floor. The painted floor numbers you need for the escape are up there (see the escape section). A second save point stands in front of another elevator on that floor (Save progress, Rest in a tent, Teleport). Its first use told us we could now return to the save point at the entrance. That elevator warns that a unique event plays beyond it and tells you to save manually first; it rises to a sunlit roof with an airship and Borin. Save at that point before riding it.
Fights on the way (all with Rain, Lasswell, Fina and Lid): Epimetheus (Lv.16) with two Pawns (Lv.15) beside the offline elevator, paying 648 EXP, 1,118 gil and 55 MRP; Pawns with Security Eyes (Lv.14), paying about 140 to 168 EXP, 350 to 454 gil and 23 MRP, with Potion x2 once and Eye Drops once as drops; Centipedes with Iron Bats or other Centipedes, paying about 98 to 103 EXP and 260 to 265 gil with Mist Potion x2 once. Thundara needs Q to hit all targets. Once the Pawns and Security Eyes were targeted that way, the target panel showed Weak tags with a Lightning icon on all four (+350% and +260% shown), so bring Lightning. In the earlier entrance fight against the two Security Eyes alone we saw no Weak tag, and in the Epimetheus fight the Lightning icon appeared on the panel without a Weak tag, so treat Epimetheus's Lightning weakness as unconfirmed. A ground-floor fight with two Pawns and two Iron Bats showed Pawns taking about 1.5x Lightning from Thundara (191 to 194 against 124 to 133 on the Iron Bats) but no Weak tag.
Two dangers worth planning for. A Centipede's Laser knocked out Fina and Lid in a single hit, and Leah's Vision list (Banish, Banishra, Cure, Cura, Esuna, Shell, Shellga, Libra) has no Raise, so carry Phoenix Downs and revive from Items. An enemy attack also left Rain greyed out with a red status icon and cost her a turn; Fina's Esuna cleared it.
- Arrive at the 'Mobliz Shipyard' card (Recommended Level 16) with a healed party and a save.0:03–0:19Spoiler clip
Spoiler clip · Arriving at Mobliz Shipyard · reveal
Checked on screen · Oct 25, 2026
0:03–0:19 · 16 sArriving at Mobliz ShipyardMobliz Shipyard (Recommended Level 16) opens on a hall of portraits of every Cid.
PanyapiN GamingFull video ↗Credits
“Chapter 2 (Eternal Blue): Save Borin at Mobiliz Shipyard pt. 1 – MQ | Final Fantasy Resonance PS5” by PanyapiN Gaming · Oct 23, 2026 · Full game on PS5 per the title, uploaded Oct 23, 2026; version not shown
Independent creator · no partnership implied
- Beat the two Security Eyes (Lv.14) in the portrait hall; there is nothing to steal from them.
- Walk east along the portrait hall to the save point at its east end if you want to save before the main floor.
- Go west, then north over the bridge to the main floor; the centre elevator is offline.
- Take the lift north of the west walkway up to the open floor, then follow the next section to the power switch.
Sources for this section
- Kingy (first-hand play test): Kingy play test: Final Fantasy Resonance full game, demo save transfer to Felicitas · Checked 2026-10-26 · Published 2026-10-24
Mobliz Shipyard: where is the power switch for the offline elevator?
Reveal solution / story details
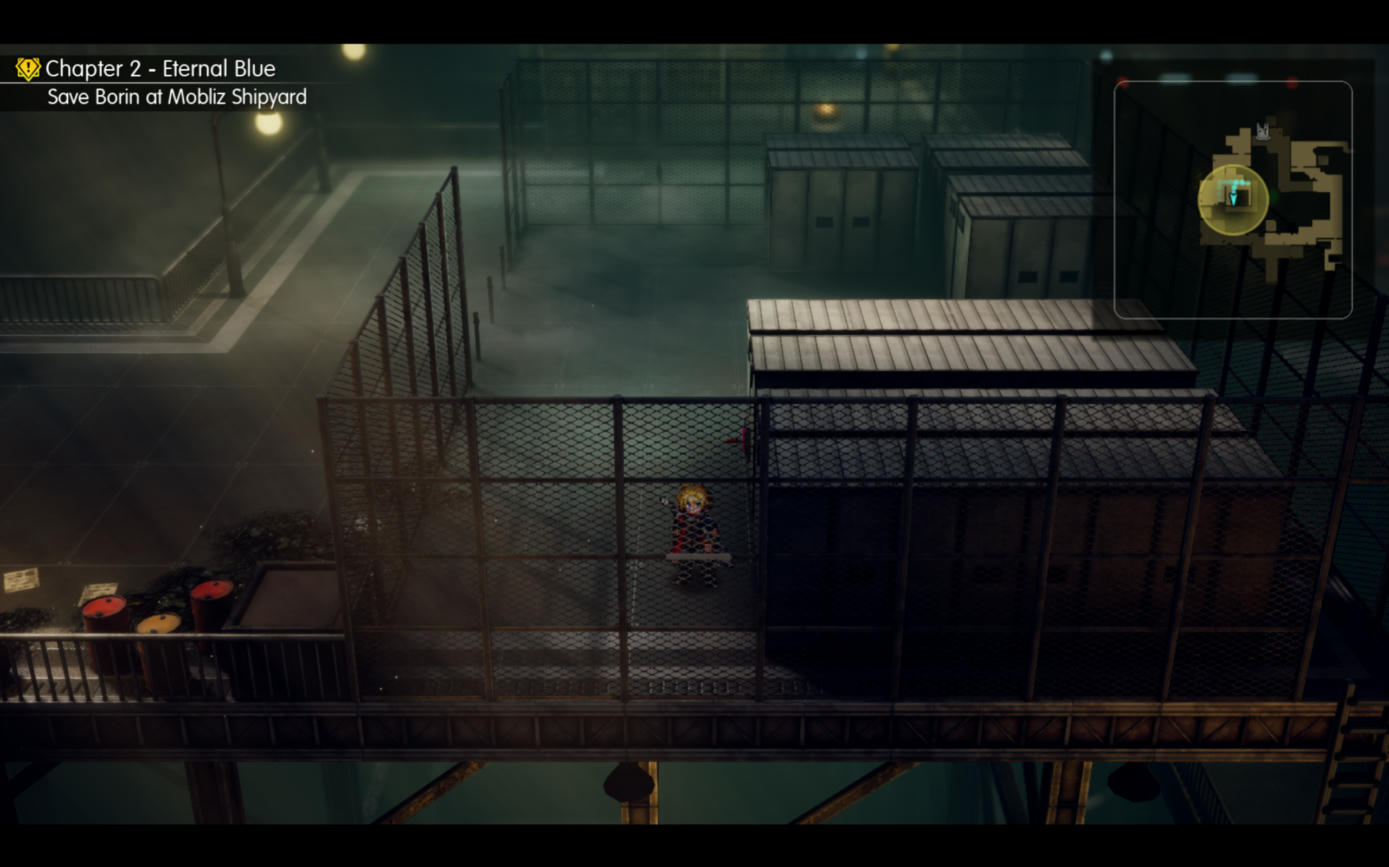
The switch is in the fenced generator room on the upper floor (the one reached by the west lift). Look at the southernmost long container, just inside the room's south fence. On its west end is a small red light. Stand next to it facing east and the F Examine prompt appears. Pressing it cuts to the ground-floor elevator, whose side lights turn green, and the switch light turns green too.
Two pickups are in the same generator room. In its south-east corner a narrow lane runs south to a ladder down to a lower walkway. A chest on a short spur north of that walkway holds Protective Overcoat x1, and at the walkway's west end a sparkle (F Examine, only when you stand right on it) gave a Tablet Shard. The walkway's east end is a dead end.
- From the open floor north of the west lift, enter the fenced generator room through the gap in its west fence.
- Go to the southernmost long container just inside the south fence.
- Stand at its west end facing east and press F Examine on the small red light.
- Wait for the cut to the ground-floor elevator; its side lights are now green and the centre elevator goes up.
Sources for this section
- Kingy (first-hand play test): Kingy play test: Final Fantasy Resonance full game, demo save transfer to Felicitas · Checked 2026-10-26 · Published 2026-10-24
Mobliz Shipyard floor numbers 5, 3 and 8, Tablet Shard and save point
Reveal solution / story details
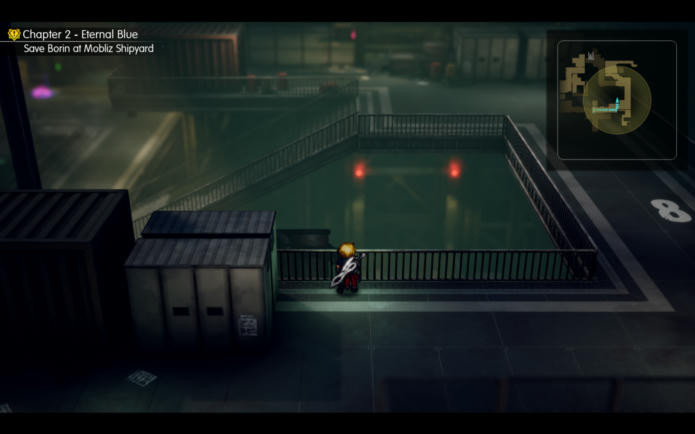
With the elevator powered, ride the centre elevator up. The three numbers painted on the floor are: 5 just outside the centre elevator's top stop, 3 on a walkway reached by a staircase down, and 8 on the east road of the upper floor. They add up to 16, which is the lever you need during the timed escape.
On the same upper floor a sparkle at the west end of the red container gave a second Tablet Shard on our run. The save point in front of the next elevator is where we saved before the Borin scene.
- Ride the powered centre elevator up and note the painted 5 right outside its top stop.
- Take the staircase down to the walkway with the painted 3.
- Find the painted 8 on the upper floor's east road.
- Add them: 5 + 3 + 8 = 16.
Sources for this section
- Kingy (first-hand play test): Kingy play test: Final Fantasy Resonance full game, demo save transfer to Felicitas · Checked 2026-10-26 · Published 2026-10-24
The timed escape from the Mobliz Shipyard (15 minutes)
Reveal solution / story details
Spoiler level: Chapter 2 story. The roof elevator brings you to Borin, who says the Invincible (an old airship Lid calls a very faithful replica) was dug up from the ground and needs the Heart of Babel to run, and that the Heart will be revived soon. The party is then identified as trespassers and warned the security system will attack at once unless they get out within 15 minutes. The objective becomes 'Escape before time runs out' with a 15:00 countdown (we saw 14:56 right after the scene) and the game autosaves.
The timer keeps running in fights and on the field. It pauses during dialogue and while the Esc menu is open. Escape in ordinary fights can fail (it then greys out for that battle). It took us several attempts: we lost time looking for the control panel, then walked into the blocked portrait hall.
Step one: ride the roof elevator down, go back to the centre elevator's top stop and let the scene play. Rain and Lid find that the power to the elevator has been cut and Lid says there must be a control panel nearby. This scene must play before anything else works. On a retry we went straight to the gate and it stayed shut until we had seen it.
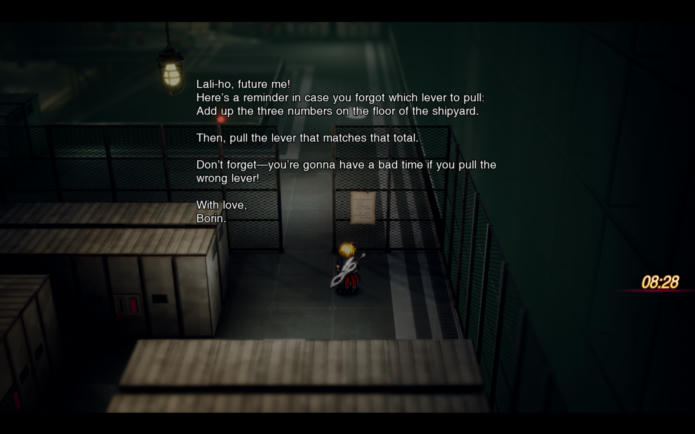
The control room is the fenced enclosure just south of the painted '8'. At its gate Lid has Mechabo break the fence, and inside Lid complains about how many levers there are. Borin's note on the fence by the gate (F Examine) tells you to add the three floor numbers and pull the lever matching the total, warning of a bad time if you pull the wrong one. Levers are on the containers (pink lights, F Examine, then a Yes/No prompt). We saw levers 10, 12 and 16. Pulling 16, which is 5 + 3 + 8, cuts to the centre elevator with Rain saying it is back online, and the lever light turns green. We did not pull a wrong lever, so we can't say what one does.
- Find the numbers 5, 3 and 8 on the floors (see the previous section) and add them: 16.
- Go back to the centre elevator's top stop and watch the power-cut scene before anything else.
- Go to the fenced control room south of the painted 8 and read Borin's note on the fence.1:02–1:18Spoiler clip
Spoiler clip · Borin's lever note, with a floor number behind it · reveal
Checked on screen · Oct 25, 2026
1:02–1:18 · 16 sBorin's lever note, with a floor number behind itOn screen: Borin's note on the shipyard wall: add up the three numbers on the shipyard floor, then pull the lever that matches that total; the wrong lever means trouble. The countdown reads 13:59 to 13:58, and when the note fades around 76 a large painted '8' is visible on the floor behind it, before the note reopens.
PanyapiN GamingFull video ↗Credits
“Chapter 2 (Eternal Blue): Escape before time runs out pt. 1 – MQ | Final Fantasy Resonance PS5” by PanyapiN Gaming · Oct 23, 2026 · Full game on PS5, uploaded Oct 23, 2026; difficulty and version not shown
Independent creator · no partnership implied
- Pull lever 16 (pink-lit levers on the containers; answer Yes to the prompt).
Sources for this section
- Kingy (first-hand play test): Kingy play test: Final Fantasy Resonance full game, demo save transfer to Felicitas · Checked 2026-10-26 · Published 2026-10-24
Mobliz Shipyard lever puzzle: which lever do you pull?
Reveal solution / story details
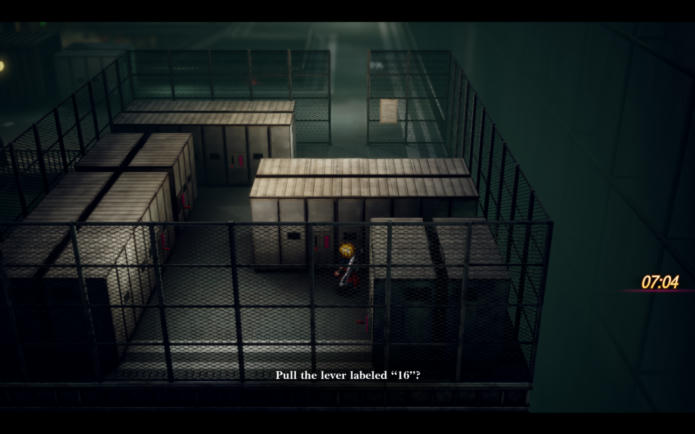
Pull the lever labelled 16. Its prompt asks whether to pull the lever labeled 16, and answering Yes cuts to the centre elevator and restores its power. The 16 comes from the three floor numbers 5, 3 and 8. We also saw levers labelled 10 and 12 in the same room but did not try them.
Sources for this section
- Kingy (first-hand play test): Kingy play test: Final Fantasy Resonance full game, demo save transfer to Felicitas · Checked 2026-10-26 · Published 2026-10-24
After the lever: the blocked portrait hall, Epimetheus and the cargo train
Adrastea (Lv.16): HP, weakness and the charged blast
Reveal solution / story details
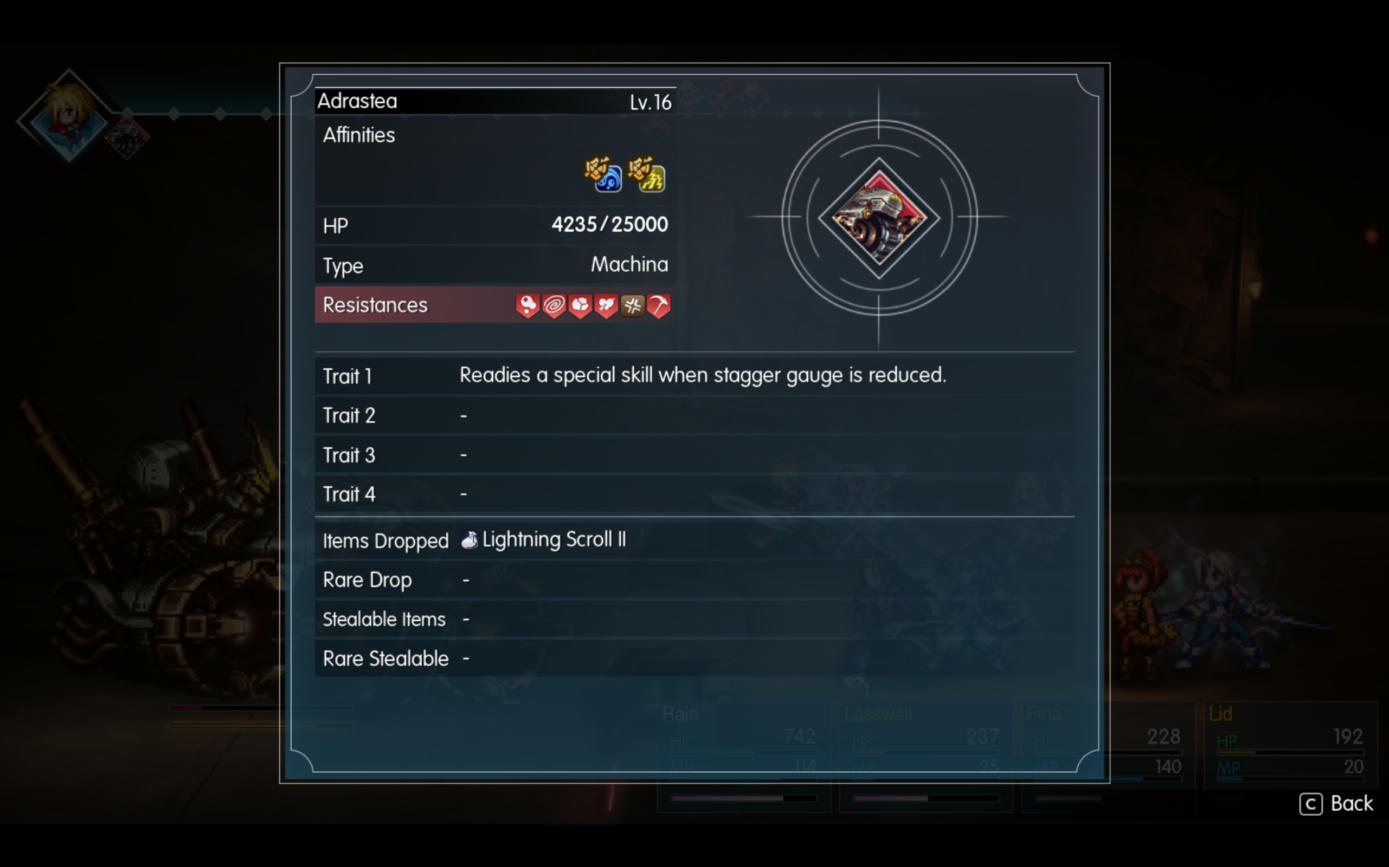
Spoiler level: Chapter 2 boss. On the moving train Lasswell warns that the machine behind you is pursuing, and Lid says you are done for if it hits you with its blast, so get it before it charges. The fight is Adrastea (Lv.16, type Machina); Escape is greyed out. Libra (Rain's Leah Vision, 1 MP) showed 25,000 HP, Machina, and six resistance icons we did not decode. Its Trait 1 reads 'Readies a special skill when stagger gauge is reduced.' Its drop is Lightning Scroll II, with no rare drop and nothing stealable.
Weakness: Thundara on it showed +50%, and after Thundara and Free Energy the affinity panel showed Water and Lightning icons. The datamine in the boss weaknesses section lists the same two elements.
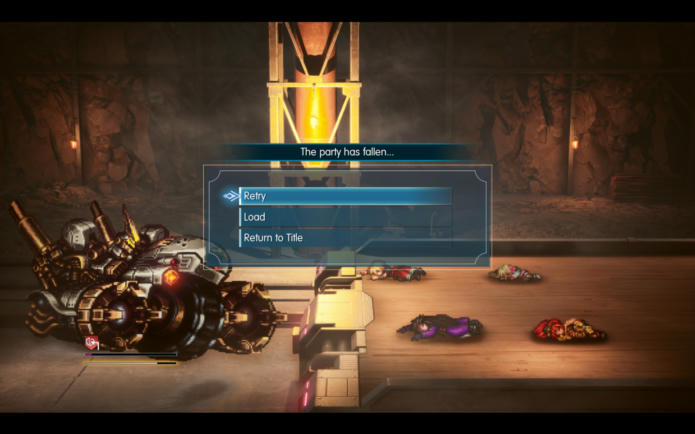
The charge: Adrastea turns red and charges. Staggering it cancels the charge. When a charge went off on our first attempt it knocked out Lasswell, Fina and Lid in one hit; Rain then fell alone and the game showed 'The party has fallen...' with Retry, Load and Return to Title. Retry asks 'Retry this battle from the beginning?' and restarts the boss at full HP with the party restored.
What won on the second attempt: Shellga first (Rain with Leah, all allies), Siren (one summon hit 1,463 and inflicted Sleep), Thundara and Free Energy to build stagger, Climax Edge when staggered, Lid's Limit Burst March of the Machines and Lasswell's Null Moon (which makes the target easier to stagger for 3 turns), and Defend before the second charged blast. The party survived on 237 to 786 HP. Plan for a heavy hit and bring Phoenix Downs.
- Open with Shellga for the whole party.
- Use Libra if you want the HP and drop list.
- Build stagger with Thundara and Free Energy; stagger cancels the charge.
- Finish with Climax Edge and Limit Bursts; Defend before a charge you cannot cancel.
Sources for this section
- Kingy (first-hand play test): Kingy play test: Final Fantasy Resonance full game, demo save transfer to Felicitas · Checked 2026-10-26 · Published 2026-10-24
Party fallen against Adrastea: Retry and rewards
Reveal solution / story details
Retry is the first choice on the 'The party has fallen...' menu. In our run it brought up the confirmation 'Retry this battle from the beginning?' (the capture shows only the three-option menu) and restarted this boss fight from the start (Adrastea at full HP, your party restored).
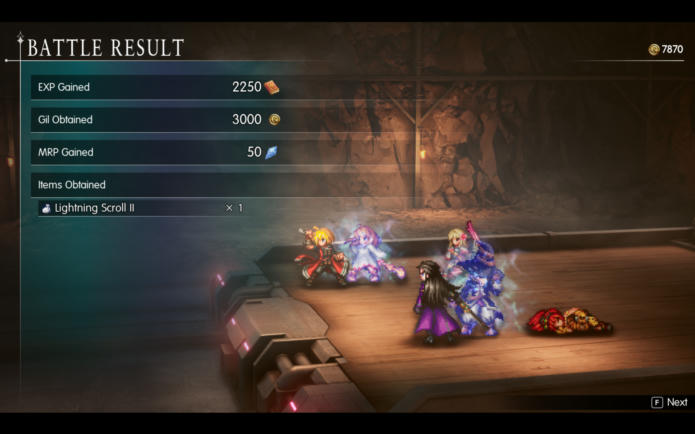
Winning gave 2,250 EXP, 3,000 gil, 50 MRP and Lightning Scroll II x1. Fina was Lv.18 and Lid Lv.16 afterwards.
Sources for this section
- Kingy (first-hand play test): Kingy play test: Final Fantasy Resonance full game, demo save transfer to Felicitas · Checked 2026-10-26 · Published 2026-10-24
After Adrastea: the crash, Lazarov and the Wind Shrine objective
Reveal solution / story details
Spoiler level: Chapter 2 story. The brakes fail and the party braces for impact. A short cutaway shows Dr. Lazarov in a lab, with Evan watching, saying his soldiers are used for his experiments and that he got to test new toys. The train crashes into the Dwarven Forge, where Lid recalls an old tunnel that carried materials to Mobliz. Rain guesses the Sworn Six are heading for the Wind Shrine.
You then choose between going after them right away and resting to prepare first. Lid says to head north-east, the quest updates and the objective becomes 'Go to the Wind Shrine'. The game autosaves, and the System Menu here has Load but no Save. We took the first option; we did not test what the second option does.
Sources for this section
- Kingy (first-hand play test): Kingy play test: Final Fantasy Resonance full game, demo save transfer to Felicitas · Checked 2026-10-26 · Published 2026-10-24
How do you get to the Wind Shrine? The world-map road from the Mobliz Shipyard
Wind Shrine entrance: the scene, the first fight and the objective
Wind Shrine walkthrough: the route to the save point and the Wind Crystal
Reveal solution / story details
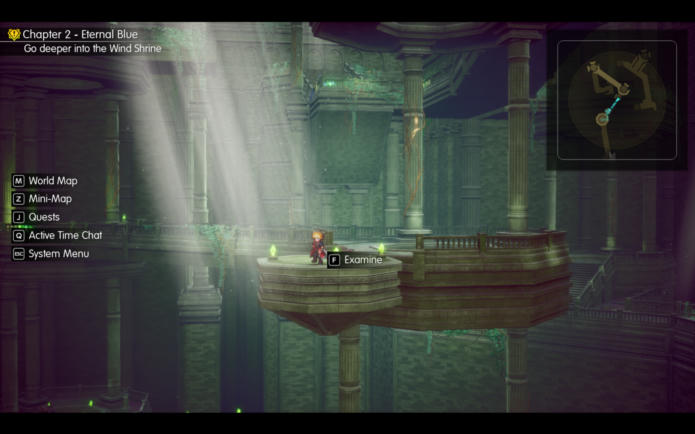
Verified (first-hand, our play-test). We walked this route three times in all (the last two as replays, about 35 and 25 minutes), and it held each time. The shrine is a vertical maze of round towers joined by walkways, and the minimap reads as an 'L' on the west and a 'Y' on the east. Our wrong turns cost about an hour: the floor with the Tsukiyo no Tachi chest is a dead end, and the way on is the long stem of the Y going south.
The long straight staircase going south in step 7 also appears in Shiney's video at about 4:58:38 (Community-reported (video)); we did not use the video to find it. Lamps, lifts and floating pads are explained in the next section.
- From the entrance stairs, go to the first tower. Examine its lamp post to raise a lift, then ride the lift up.
- On the upper floor, take the floating pad across the gap to a junction landing beside a second hole.
- Walk north-west along the walkway to a tower with another lamp, light it and ride the lift up.
- Take the corridor south (there is a fight here), then east, and ride a floating pad up to the crystal landing.
- Climb the big staircase going north-east to a tower with a third lamp, light it and take the lift up. The chest with Tsukiyo no Tachi is on this floor, in an alcove on the west side. This floor is a dead end, so come back down.
- From the foot of the crystal-landing staircase, take the lower walkway under the stairs: east, then south along the right-hand rail.
- Follow the long straight staircase south into a second room with two crystal planters and pillars.
- Go west past the left pillar. The floating octagon pad sits beyond a low ledge; board it by walking south-west from just south of the pillar, then Examine to ride it across to a platform with two octagons.
- Walk north onto the upper octagon and Examine to ride the lift up. Off the lift go east across the bridge a step, then take the stairs on the left up to a balcony.
- The save point is on that balcony, at the foot of a long staircase going north. Climb the stairs and ride one more octagon lift up to reach the Wind Crystal chamber and Aether.
Sources for this section
- Kingy (first-hand play test): Kingy play test: Final Fantasy Resonance full game, demo save transfer to Felicitas · Checked 2026-10-26 · Published 2026-10-24
- Shiney (YouTube creator): Final Fantasy Resonance Part 3 Chapter 2 Eternal Blue · Checked 2026-10-25
Wind Shrine lamps, lifts and floating pads: how do they work?
Reveal solution / story details
Verified (first-hand, our play-test). Each tower top has a hole in the floor with an unlit lamp post, a stone pillar, beside it. Examining the lamp lights it and raises a round lift with four green lights into the hole. Stand in the middle of the lift and Examine to ride it up.
Some lifts are floating pads that carry you across a gap to the next landing. To step off a pad onto the landing, walk off its top-right edge. We lost about 20 minutes trying other edges before that worked, so if you are stuck on a pad, try the top-right edge first.
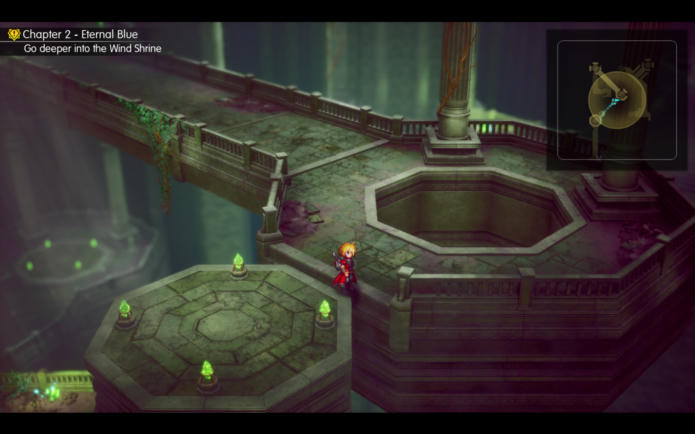
- Examine the lamp post next to a hole to raise the lift.
- Stand in the middle of the lift and Examine to ride it.
- On a floating pad, ride across, then walk off the top-right edge onto the landing.
Sources for this section
- Kingy (first-hand play test): Kingy play test: Final Fantasy Resonance full game, demo save transfer to Felicitas · Checked 2026-10-26 · Published 2026-10-24
Wind Shrine enemies and what they paid
Tsukiyo no Tachi: where is the Wind Shrine chest and what does it do?
Reveal solution / story details
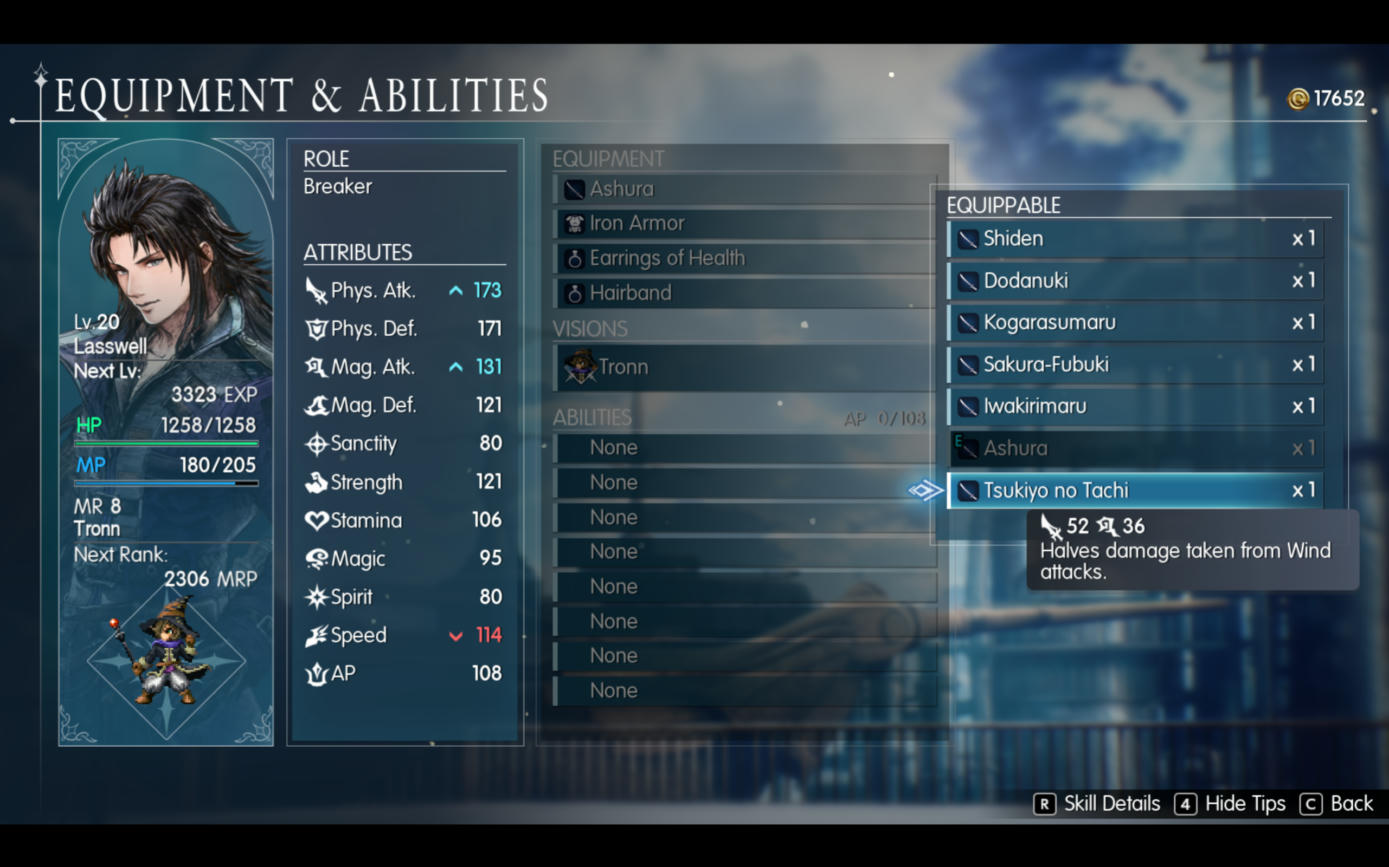
Verified (first-hand, our play-test). Spoiler level: mentions the Chapter 2 boss Aether. The chest is on the floor at the top of the third-lamp tower (route step 5), in an alcove on the west side. Opening it gives 'Tsukiyo no Tachi x1'. It showed up in Lasswell's equip list with Phys. Atk. 52 and Mag. Atk. 36, and its tooltip says it halves damage taken from Wind attacks.
On Lasswell at Lv.20, compared with his equipped Ashura, Phys. Atk. went from 170 to 173 and Mag. Atk. from 129 to 131, but Speed dropped from 124 to 114. With it equipped, his affinities window showed a wind-resist icon. Aether's big attack is Wind, and Lasswell took noticeably less from it than the others did, so we fought Aether with it on.
Sources for this section
- Kingy (first-hand play test): Kingy play test: Final Fantasy Resonance full game, demo save transfer to Felicitas · Checked 2026-10-26 · Published 2026-10-24
Wind Shrine save points: where they are and what the menu offers
Reveal solution / story details
Verified (first-hand, our play-test). There are two save points we used: one by the stairs in the entrance hall and one on the balcony before the Wind Crystal chamber (route step 10). They are pink rings on the floor. Stand in the middle of the ring until 'Examine' appears; it only shows when you are in the middle, and our first tries on the edge did nothing.
The Save Point menu has three options. 'Save progress' saves the game. 'Rest in a tent' uses one Tent and fully restores HP and MP for the party. 'Teleport' returns you to the dungeon entrance. The save balcony is the place to rest and save before Aether.
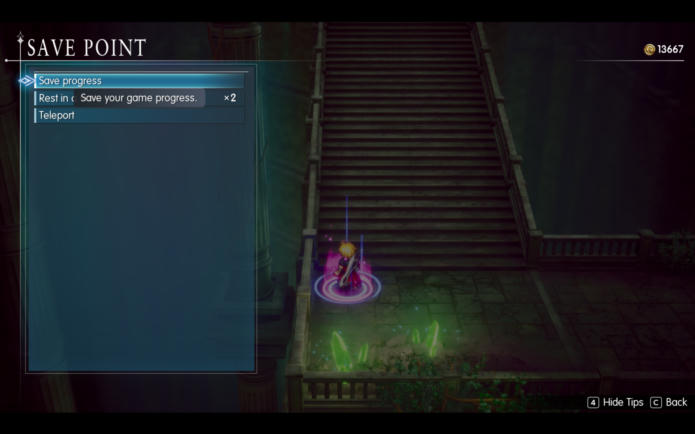
- Stand in the middle of the pink ring and press Examine.
- Choose 'Rest in a tent' to refill HP and MP, if you have a Tent.
- Choose 'Save progress' and pick a slot. Check the slot number before confirming; once we saved into a different slot than we meant to.
- Choose 'Teleport' to go back to the entrance if you need to restock.
Sources for this section
- Kingy (first-hand play test): Kingy play test: Final Fantasy Resonance full game, demo save transfer to Felicitas · Checked 2026-10-26 · Published 2026-10-24
Can you fast travel out of the Wind Shrine? Restocking at the Dwarven Forge
Reveal solution / story details
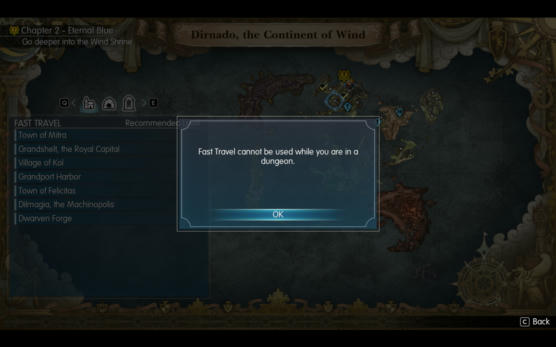
Verified (first-hand, our play-test). Spoiler level: mentions the Chapter 2 boss Aether. No. Trying to fast travel from the world-map view while inside the shrine gives the message 'Fast Travel cannot be used while you are in a dungeon.' The Quest log's 'To World Map' entry only opens the map view. Once you have been inside, the Destination List does list 'Wind Shrine 18', and fast travelling to it lands you in the entrance hall.
To leave, use the save point's Teleport option, walk out of the entrance with F Proceed, then fast travel from the world map. We fast travelled to the Dwarven Forge. Our shopping before the third Aether attempt: Phoenix Down x15 (20 held afterwards), Mist Potion x4, Tent x2, a Silk Robe for Fina (2,750 gil; comparison figures 45/57/16 against her White Dress's 37/51/14) and a Power Vest for Lid (2,500 gil; 57/48 against the Engineer's Jacket's 48/41). We had 8,417 gil left after the two armour pieces, before buying the Phoenix Downs, Mist Potions and Tents.
The Forge item shop's list on that visit is in the table. Prices are as our menus showed them on October 25 and may differ later.
| Item | Price (gil) | Effect shown |
|---|---|---|
| Potion | 100 | Restores 200 HP |
| Mist Potion | 500 | Restores 200 HP for all allies |
| Ether | 500 | Restores 50 MP |
| Mist Ether | 2500 | Restores 50 MP for all allies |
| Phoenix Down | 200 | Revives a KO'd ally with 25% HP |
| Eye Drops | 200 | Cures Blind |
| Unicorn Horn | 500 | Not noted |
| Gold Needle | 800 | Not noted |
| Smoke Bomb | 300 | Not noted (stock 3) |
| Tent | 300 | Fully restores HP and MP at a save point or on the field map |
| Knife of Blind | 1000 | Not noted (stock 5) |
| Knife of Silence | 1000 | Not noted (stock 5) |
| Earth Scroll I | 1000 | Not noted (stock 3) |
Sources for this section
- Kingy (first-hand play test): Kingy play test: Final Fantasy Resonance full game, demo save transfer to Felicitas · Checked 2026-10-26 · Published 2026-10-24
Before the fight: what Aether says at the Wind Crystal
Aether (Lv.18): weakness, minions and how to beat him
Reveal solution / story details
Verified (first-hand, our play-test, Normal, party Rain, Lasswell and Fina at Lv.19-20 and Lid at Lv.18-19). Spoiler level: Chapter 2 boss. Aether is Lv.18. His affinities start as '?' icons; after our first Blizzara hits, Ice showed 'Weak' (Blizzara on one target previewed +200% stagger). Every few turns the game says Aether summons a minion. Two kinds showed up: 'Aether's Minion' (Lv.18, a green wind elemental that Blizzara all also hit as Weak) and 'Aether's Guardian' (Lv.18). He also stacks buff icons on himself during the fight.
We never saw an HP number for him in our own play. A creator video's info card shows Lv.18, type Humanoid and 34,000 maximum HP, with a gold Weak badge on Ice and a null badge on Wind (Community-reported (video), PS5, PanyapiN Gaming); that matches the Ice weakness we saw, and we did not test Wind against him. A '[Counter] Magic Counter' banner appears right after a Gravity cast in that video; it doesn't show whose counter it is, and we did not see it. PanyapiN's Rain, Lasswell and Fina were Lv.22 at the end of the shrine in the video; ours were Lv.19-20.
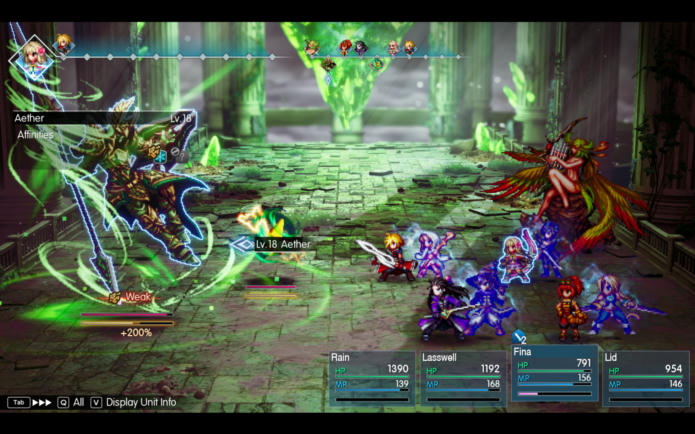
- Open Display Unit Info on Aether to check the card.
- Hit the Ice weakness (we used Blizzara; the video clip uses Ice Splitter); skip Wind attacks, which the video card shows him nullifying.9:41–9:52Spoiler clip
Spoiler clip · Aether's info card marks Ice as a weakness; an Ice Splitter hit follows · reveal
Checked on screen · Oct 25, 2026
9:41–9:52 · 11 sAether's info card marks Ice as a weakness; an Ice Splitter hit followsOn screen: Ice Splitter is picked from the skill list ('Deal Ice physical damage to an enemy'), then Display Unit Info shows Aether's card: Lv.18, Humanoid, HP 23006/34000, a gold Weak badge on the Ice icon and a null badge on the Wind icon; the hit then lands for a total of 2691.
PanyapiN GamingFull video ↗Credits
“Chapter 2 (Eternal Blue): Go deeper into the Wind Shrine – Main Quest | Final Fantasy Resonance PS5” by PanyapiN Gaming · Oct 23, 2026 · Full game on PS5, uploaded Oct 23, 2026; difficulty and version not shown
Independent creator · no partnership implied
- Kill minions fast with Blizzara on all targets; we did not record the Guardian's weakness.
- Heal up: it's a long fight.
Sources for this section
- Kingy (first-hand play test): Kingy play test: Final Fantasy Resonance full game, demo save transfer to Felicitas · Checked 2026-10-26 · Published 2026-10-24
- PanyapiN Gaming (YouTube creator): Chapter 2 (Eternal Blue): Go to the Wind Shrine – Main Quest | Final Fantasy Resonance PS5 · Checked 2026-10-24 · Published 2026-10-23
- PanyapiN Gaming (YouTube creator): Chapter 2 (Eternal Blue): Go deeper into the Wind Shrine – Main Quest | Final Fantasy Resonance PS5 · Checked 2026-10-24 · Published 2026-10-23
Aether's Heavenly Wind and what we lost to: Retry, Phoenix Downs and the winning plan
Reveal solution / story details
Verified (first-hand, our play-test). Spoiler level: Chapter 2 boss. His big attack is a party-wide Wind move named 'Heavenly Wind'. On Rain, Fina and Lid it took roughly 500 to 700 HP each and knocked out anyone below that; Lasswell with Tsukiyo no Tachi took noticeably less. Those figures are from our Lv.19-20 party on Normal.
We lost twice. In attempt 1 we got him to about a third of his HP bar with Blizzara from Lasswell and Fina, Siren, Lid's Limit Burst March of the Machines, Rain's Infinity Drive and Lasswell's Null Moon, which staggered him, but we ran out of our 5 Phoenix Downs. In attempt 2 (Retry) we got him near half, and two more party-wide wind attacks emptied the Phoenix Downs again. On the 'The party has fallen...' menu, Retry restarts the fight from the beginning with full HP and MP and the items you used in that attempt restored; we saw Phoenix Down back to x5 and Ether back to x10.
We won on attempt 3 after restocking to 20 Phoenix Downs and using 7 of them. Lasswell with Tsukiyo no Tachi cast Blizzara every turn. Fina alternated Cura on all and Blizzara, with Siren when MP allowed. Rain cast Cura on all whenever two or more allies were hurt. Lid dealt with minions. Anyone knocked out got a Phoenix Down right away, Ethers and Mist Ether went to Fina and Lasswell, and Limit Bursts (Null Moon, March of the Machines, Infinity Drive, Holy Ray) and Hibernal Fury were saved for staggers. It took roughly 25 minutes of turns. Fina's Medic list only unlocks Raise at Lv.23, so Phoenix Downs are what you have at this level.
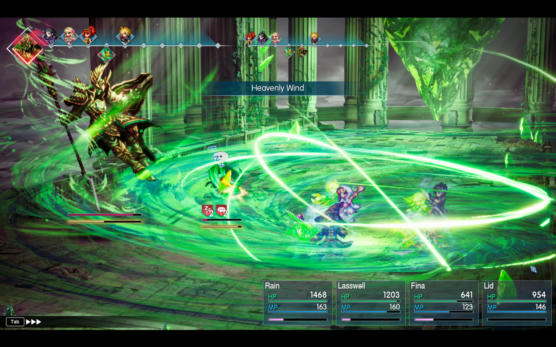
- Restock before you go in: we won with 20 Phoenix Downs in the bag (7 used) and some Mist Potions, after resting in a tent at the save balcony.
- Equip Tsukiyo no Tachi (Lasswell took less Wind damage with it) and keep everyone above about 800 HP.
- Blizzara every turn, with Blizzara on all to clear minions (we did not record the Guardian's weakness).
- Keep Limit Bursts for a stagger.
- Phoenix Down anyone who is knocked out at once; on a wipe, Retry restores your items.
Sources for this section
- Kingy (first-hand play test): Kingy play test: Final Fantasy Resonance full game, demo save transfer to Felicitas · Checked 2026-10-26 · Published 2026-10-24
Aether rewards: EXP, gil, MRP and Sylph's Tiara
Reveal solution / story details
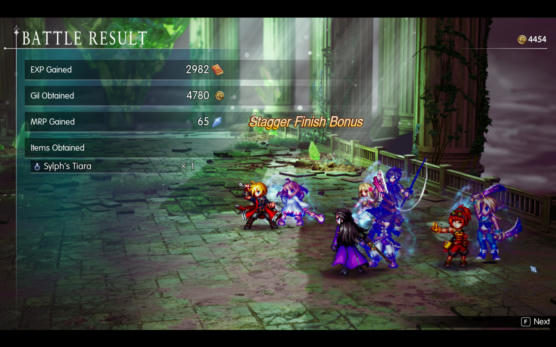
Verified (first-hand, our play-test, Normal). Spoiler level: Chapter 2 boss. Beating Aether paid 2,982 EXP, 4,780 gil and 65 MRP, with a Stagger Finish Bonus, and one Sylph's Tiara. Afterwards Fina was Lv.20 (she learned Spicy Pose), Lid was Lv.19 and Fina's Noctis Vision reached Mastery Rank 4 (AP +8). We have not tested what Sylph's Tiara does or whether the drop is guaranteed.
Sources for this section
- Kingy (first-hand play test): Kingy play test: Final Fantasy Resonance full game, demo save transfer to Felicitas · Checked 2026-10-26 · Published 2026-10-24
Back to Dilmagia and the end of the chapter
Reveal solution / story details
Verified (first-hand, our play-test) for the scene after Aether. Spoiler level: Chapter 2 ending, including who Aether is. Aether collapses and drops his spear, and Lid stares at his face. The Wind Crystal flares into a whirlwind and Aether fades away in light. Far off, the Invincible airship lifts out of its dock and flies away. Fina asks Lid who Aether was, and Lid says it was the first Cid: she has looked at his portrait all her 18 years and could not mistake the face. Rain says the Invincible was heading toward Olderion, and Lasswell names it as the home of the shrine with the Water Crystal. Lid says she will go with them to find out what is happening with Cid, that they need an airship, and that she will power hers with this crystal, so they should head back to Dilmagia.
Verified (first-hand, our play-test). Back on the world map outside the shrine the game shows 'Quest Updated: Chapter 2 - Eternal Blue - Go to Dilmagia, the machinopolis' and autosaves. Fast travelling to Dilmagia plays a scene on the entrance street where Lid says she only needs a few last adjustments to the airship and walks off. The quest updates to 'Talk to Lid' and the game autosaves.
Verified (first-hand, our play-test). Lid is on a rooftop at the top of the industrial area. From the entrance street walk north up the main street through the loading fade, go right, up the stairs, then left and north to the rooftop; the minimap marker sits at the top. In the scene (spoiler summary) Lid says building airships is the one thing she can lose herself in, and that she was sure Evan felt the same. She asks why the first Cid is still alive, how he became Aether and what is going on with Evan. Fina tells her not to torture herself. Lid looks at the sky and says that even if Aether has changed his mind, she won't let his old words be denied. The card 'Chapter 2 Eternal Blue COMPLETE' then appears.
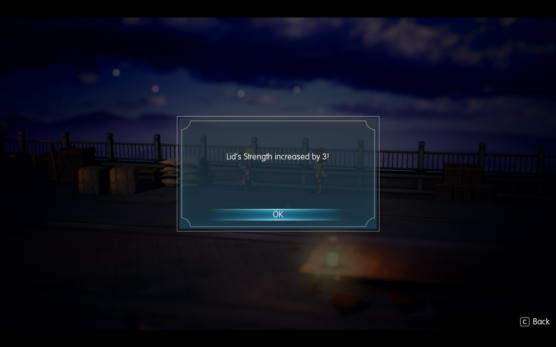
Straight after, Lid says the adjustments are done and they can take off at any time, and you get a choice to Rain's thought about being ready to leave: 'Ok!' or 'Hold on!'. We chose 'Ok!' and did not test 'Hold on!'. On the airship deck Lid says they will reach Olderion soon, and she and Rain talk about Evan. Then a box reads 'Lid's Strength increased by 3!'.
A creator video (Community-reported (video)) reported Lid's Magic going up by 3 instead. We do not know why the two differ; an earlier dialogue choice might decide which stat rises, but we have not tested that, so treat our Strength +3 as what one playthrough showed.
Our play stopped on the airship deck, heading to Olderion. The rest comes from the creator videos (Community-reported (video)), and we have not played it yet: Fina spots smoke from the back, the party ends up on a sandy shore, and Rain says they're alive thanks to Lid's piloting; the Chapter 3 summary calls it an emergency landing on the continent of Olderion. Chapter 3, 'Wardens of the Aquapolis', begins with 'Go to Olderion, the aquapolis'.
Spoiler clip · The crash landing and the start of Chapter 3 · reveal
Checked on screen · Oct 25, 2026
11:58–12:53 · 55 sThe crash landing and the start of Chapter 3After the airship comes down on the sandy shore, Chapter 3 starts on the Olderion Federation map with the objective 'Go to Olderion, the aquapolis'.
PanyapiN GamingFull video ↗Credits
“Chapter 2 (Eternal Blue): Go to Dilmagia, the machinopolis – MQ | Final Fantasy Resonance PS5” by PanyapiN Gaming · Oct 24, 2026 · Full game on PS5, uploaded Oct 24, 2026; difficulty and version not shown
Independent creator · no partnership implied
- Fast travel to Dilmagia, the Machinopolis, and watch the scene; the objective becomes 'Talk to Lid'.
- Walk north up the main street, go right, up the stairs, then left and north to the rooftop.
- Watch the rooftop scene until the 'Chapter 2 Eternal Blue COMPLETE' card.
- Choose 'Ok!' when asked if you are ready to leave (we did not test 'Hold on!').
Sources for this section
- Kingy (first-hand play test): Kingy play test: Final Fantasy Resonance full game, demo save transfer to Felicitas · Checked 2026-10-26 · Published 2026-10-24
- PanyapiN Gaming (YouTube creator): Chapter 2 (Eternal Blue): Go deeper into the Wind Shrine – Main Quest | Final Fantasy Resonance PS5 · Checked 2026-10-24 · Published 2026-10-23
- PanyapiN Gaming (YouTube creator): Chapter 2 (Eternal Blue): Go to Dilmagia, the machinopolis – MQ | Final Fantasy Resonance PS5 · Checked 2026-10-24 · Published 2026-10-24
Boss weaknesses and what to watch for
Reveal solution / story details
These weaknesses and traits come from NiaMeowDB's datamine (Community-reported; built from the game's files, no version stated); its levels and HP match the info cards above. NiaMeowDB lists the Lightning element as Thunder.
Adrastea (Lv.16) is weak to Thunder and Water, and readies a special skill when its stagger gauge is reduced; our own play showed Water and Lightning icons on its affinity panel and Thundara +50%. Aether (Lv.18) is weak to Ice and immune to Wind in the datamine, so leave Wind attacks out; it summons minions. Our own play confirmed the Ice weakness (Weak showed on Aether after Blizzara hit him) and the minions; we did not test Wind against him.
From our own play: Liquid Thunder (Lv.13) is weak to Earth and Mom Bomb (Lv.14) is weak to Water; each came from the weakness icon its info panel showed after we used that element. Neither is in the datamine list above, and we only tested the elements named in their sections.
Spoiler clip · Adrastea's info card with two affinities marked · reveal
Checked on screen · Oct 25, 2026
9:04–9:17 · 13 sAdrastea's info card with two affinities markedOpen Display Unit Info on Adrastea (Lv.16, Machina) to see its two marked affinities, then hit it while it's staggered.
PanyapiN GamingFull video ↗Credits
“Chapter 2 (Eternal Blue): Escape before time runs out pt. 2 – MQ | Final Fantasy Resonance PS5” by PanyapiN Gaming · Oct 23, 2026 · Full game on PS5, uploaded Oct 23, 2026; difficulty and version not shown
Independent creator · no partnership implied
Sources for this section
- NiaMeowDB (unofficial fan database): Enemies: story bosses (NiaMeowDB) · Checked 2026-10-25
- PanyapiN Gaming (YouTube creator): Chapter 2 (Eternal Blue): Escape before time runs out pt. 2 – MQ | Final Fantasy Resonance PS5 · Checked 2026-10-24 · Published 2026-10-23
- PanyapiN Gaming (YouTube creator): Chapter 2 (Eternal Blue): Go deeper into the Wind Shrine – Main Quest | Final Fantasy Resonance PS5 · Checked 2026-10-24 · Published 2026-10-23
- Kingy (first-hand play test): Kingy play test: Final Fantasy Resonance full game, demo save transfer to Felicitas · Checked 2026-10-26 · Published 2026-10-24
You’re ready when…
Did this answer your question?