Tablet Shards: all 99 by area, rewards and unresolved locations
Quick answer
There are 99 Tablet Shards, sparkling gold pickups in almost every town and dungeon: 12 in Chapter 1, 15 each in Chapters 2 and 3, 16 in Chapter 4, 17 in Chapter 5, 12 in Chapter 6, 8 in Chapter 7 and 4 in Chapter 8. Return them to the Enigmatic Princess at Oblivion Palace to open chests: 76 gets the Ancient Firearm, 80 and 89 an Adamantite each, and 84 the Ancient Whip. PowerPyx says none are missable and trophies need 89, so you can skip any 10.
Open marked sections to reveal solutions or story details.
Before you start
Full-game content with spoilers for every chapter's areas. The chapter and area for each shard come from PowerPyx's list (Community-reported), checked against the world map in 100% Guides' video uploaded October 22, 2026 (Community-reported (video)), which agrees for most groups; the exceptions are listed below. Kingy has picked up only the few marked Verified below.
1
How many shards each chapter has
Reveal solution / story details
Counts from PowerPyx's chapter list. The running total is how many you can hold by the end of each chapter if you collect every one as you go.
Spoiler clip · Tablet Shard #99, the last one · reveal
“Final Fantasy Resonance All Tablet Shard Locations” by 100% Guides · Oct 22, 2026 · Full game, uploaded Oct 22, 2026; platform, difficulty and version not shown
This is PowerPyx's numbered area checklist, not 99 individually verified pickup directions. The numbers belong to that guide. The sampled starts of 100% Guides' video segments show map destinations, which often match the area list; a destination highlight alone does not verify the pickup's room or position.
The unresolved groups are listed below. The existing area rows retain PowerPyx's assignments; neither the video's numbering nor its map highlights should silently replace them. For these groups, follow the source's complete pickup route and check your inventory counter instead of assuming the two sources number the same pickup identically.
Verified (first-hand, our play-test, full game on PC via Steam, Normal difficulty, October 26, 2026). Olderion, the Aquapolis (rows 28 to 31 in PowerPyx's list): one shard is on the railed walkway under the aqueduct, west of the tree plaza, as a sparkle by a flower pot; it is on the same walkway as the third purification spot. We did not read which number it is, so we don't say which of the four it is.
Verified (first-hand, our play-test, full game on PC via Steam, Normal difficulty, October 26, 2026). Lake Dorr route: after the crystal-chamber scene in the Cave of Waters, one shard sits on the second ledge of the climbing shaft, reached by the left ladder, shown as a sparkle with the message 'Tablet Shard x1'. We did not read which numbered shard it is, and we do not know which area the game files it under, so we don't say it is one of the Cave of Waters rows' three. We recorded no shard at Lake Dorr itself. The route is in the Chapter 3 walkthrough.
Spoiler clip · Tablet Shard #1 in Grandshelt, the Royal Capital · reveal
“Final Fantasy Resonance All Tablet Shard Locations” by 100% Guides · Oct 22, 2026 · Full game, uploaded Oct 22, 2026; platform, difficulty and version not shown
Waterfall Way and Amore shards we picked up ourselves
Reveal solution / story details
Verified (first-hand, our play-test, full game on PC via Steam, Normal difficulty, October 26, 2026). Waterfall Way: one shard is at the sparkle just right of the first ladder on the east side, and one is on a flat rock in the plunge pool west of the bridge behind the upper waterfall. We did not read their numbers. The walkthrough has the route.
Verified (first-hand, our play-test, full game on PC via Steam, Normal difficulty, October 31, 2026). Town of Amore: one shard is by the rocks under the tree just south-east of the north bridge. We did not read its number.
PowerPyx's text guide was re-read October 24. The video observations below are the recorded October 24 map-frame checks; the intervening pickups have not been independently reviewed. These are verification gaps, not confirmed missing or bugged shards.
For #19, PowerPyx gives a concrete route: leave Mt. Thunderclap for the world map, go south past Zidane's shrine and enter the mountain's upper entrance on the Ramuh route; search behind the rocks below the small stone ramp. This remains a text-guide direction, not a Kingy pickup check or a resolution of the video's Airship highlight.
The #19 row was checked at pickup level on October 26: the video's 'Airship' highlight there is how it travels, not where the shard is, and the area card it then reaches agrees with PowerPyx. The other groups still need that check.
For shard #19 the video starts from the airship and walks a crystal-lined mountain path to the rocks where an Examine prompt appears; check your counter after the pickup.
“Final Fantasy Resonance All Tablet Shard Locations” by 100% Guides · Oct 22, 2026 · Full game, uploaded Oct 22, 2026; platform, difficulty and version not shown
Checked October 26 at pickup level: 'Airship' is only how the video travels. In the #19 segment (6:26–6:46) it flies to a point on the Dirnado map, the area card reads 'Mt. Thunderclap', Recommended Level 13, and the Tablet Shard pop-up follows behind rocks. This agrees with PowerPyx's Mt. Thunderclap assignment.
48–49
Imperial Capital underground tunnel
The sampled video map highlights Rebel Hideout. The pickup route and numbering need comparison.
54–57
Dungeon (54–55) and Zoldaad Castle (56–57)
The sampled video map highlights the Imperial Capital. It does not resolve the individual interior rooms.
62–63
Arcane Library
The sampled video map highlights Mysidia. The library interiors need pickup-level comparison.
68–75
Fina's Psyche and Tower of Mysidia
One video segment starts at the Tower of Mysidia; the sampled frames do not establish the split between these areas.
PowerPyx says the Enigmatic Princess is at Oblivion Palace, just south-east of Grandport Harbor in the Kingdom of Grandshelt, from Chapter 1. Returning shards opens chests in four treasure rooms: three open the first (trophy 'Princess's Reward'), and 60 trigger her second memory (trophy 'Memento').
Four chests matter for other collections. 100% Guides' and Gamer Guru's Adamantite videos show the 80- and 89-shard chests and 100% Guides' Legendary Arms video the 76- and 84-shard ones, and PowerPyx agrees on every count and chest. Door 3 holds the Ancient Firearm in chest 4 (76 shards), an Adamantite in chest 5 (80) and the Ancient Whip in chest 6 (84); door 4's chest 1 holds another Adamantite (89).
By PowerPyx's chapter list there are 75 shards up to the end of Chapter 5 and 87 up to the end of Chapter 6, so the 76-, 80- and 84-shard chests need shards from Chapter 6 or later, and the 89-shard chest needs at least two from Chapter 7 or 8. PowerPyx says trophies need 89 shards, so you can skip any 10 of the 99.
Practical target: if you are collecting the two Adamantite rewards, track 89 total rather than treating any particular numbered shard as mandatory. PowerPyx's 89-of-99 requirement leaves ten optional pickups, so an unresolved group can be left for later; the guide reports that collection remains available after the story.
“Final Fantasy Resonance - All 8 Adamantite Locations (And Where To Use Them)” by Gamer Guru · Oct 23, 2026 · Full game with PlayStation button prompts, uploaded Oct 23, 2026; version not shown
Sources · 10Reported · Walkthrough · checked 31 Oct 2026 · Research checked 31 Oct 2026
Kingy play test: Final Fantasy Resonance full game, demo save transfer to Felicitas ↗First-hand play of the full game on Steam (app 3259780, Steam build 24250053, title screen 1.0.1.0) on the same Windows 11 PC and Steam account as the October 21 and 22 demo tests, keyboard, Normal difficulty, October 24, 2026. Covers the first launch of the full game with demo saves on the PC (automatic transfer), loading the demo autosave after Hell's Rider, the rest of the capital (shops and pickups), the sub-quest Dream of an Idealist from start to reward, Fina joining, the desert crossing to the Village of Kol and its chocobos, and the road to the Town of Felicitas and its equipment shop, with the party at Lv.9-11 and Fina at Lv.6-10. Screenshots of the game window, other windows masked; story cutscenes were skipped with the skip key. Play then went on that afternoon and evening through the Kolobos Ruins and its boss, The Hunger (party Lv.11, Fina Lv.9), back to Felicitas, its item shop and the start of the sub-quest Secrets Unearthed. Later that evening: Secrets Unearthed through to its reward, the desert crossing to Grandport Harbor (party Lv.12, Fina Lv.10-11), an optional Antlion battle we fled, Grandport's shops and notice board, the ship's captain who sets 'Visit Siren', and the sub-quest The Weight of Mercy from start to reward; Tronn's and Leah's Vision Details screens were read again. Play then reached the Grandport inn and the first floors of Siren's Tower (party Lv.11-13), where Leah reached Mastery Rank 6. Late that night: the rest of Siren's Tower, Gilgamesh (party Lv.13/13/12), Siren (Lv.14/14/13), the Moogle of Light in Grandport, the end of Chapter 1 and the start of Chapter 2 on Dirnado (Lv.15); from Siren's Tower onward, cutscene dialogue was read on screen. Later still: The Weight of Mercy completed in Felicitas, and its reward, the Iwakirimaru, inspected in Lasswell's weapon list; the tooltips of the weapons the party was wearing (Crimson Saber, Shiden, Reincarnation; likely their starting weapons, not confirmed) were read on the Equipment & Abilities screen. Fina on joining (Lv.6): Role Medic, skills Shining Arrow, Cure and Esuna, Limit Burst Holy Ray (Light magic damage to all enemies, scaling with sanctity). Played October 24-25, 2026: Chapter 2 on Dirnado from the landing pier to Dilmagia (shops, the Gather information leads, the shipyard), Lid joining at Lv.11, and Mt. Thunderclap (Recommended Level 13) through its paid 'easy route' to the boss Liquid Thunder (Lv.13); party Lv.15, Lid Lv.11-12, Fina Lv.14-15. The normal (unpaid) route over the mountain was explored for about 25 minutes without finding the way up, so it is not mapped. We used Shiney's video to find the boss's spot after not finding it ourselves. Played October 25, 2026: the Dwarven Forge (Borin, its layout, shops, inn, Moogle of Light, chest and back exit), the Mom Bomb fight (Lv.14) with our first Esper summon (Siren), the two Dirnado Sanctums of Light for the Zidane and Noctis Visions, Zidane's first awakening, and the world-map road to the Mobliz Shipyard (card Recommended Level 16) as far as its entrance scene and the Security Eye fight; party Lv.16-17, Lid Lv.13-14. We used Shiney's video for the Mom Bomb trigger spot and the Forge's back exit after not finding them ourselves, and to see the approach to the second sanctum. Played October 25, 2026: the rest of the Mobliz Shipyard (entrance hall, portrait hall save point, the offline centre elevator, the west lift, the generator-room power switch, the floor numbers 5, 3 and 8, Borin on the roof, the lever room and lever 16, the blocked portrait hall, the Epimetheus event fight, the cargo-train tunnel with Evan and Mechabo, and the Adrastea boss fight, Lv.16), ending at the Dwarven Forge tunnel and the objective 'Go to the Wind Shrine'; party Lv.16-18 and Lid Lv.14-16. The power switch was found and used in game. Later on October 25, 2026 (party Lv.18): the Forge corridor scene with Verun and the Chapter 2 sub-quests Arise, Mechabo! (completed), Lyrical Riddles (completed, including the Mobliz Shipyard portraits and the old man in Dilmagia) and the start of Mechabo Evolved (accepted, no hunt done), plus Quick Heal, field Phoenix Down use and the Dwarven Forge inn. Played October 25, 2026: the world-map road from the Mobliz Shipyard to the Wind Shrine (area card Recommended Level 18), the shrine's entrance scene, its lamps, lifts and floating pads, the route from the entrance to the save balcony (walked three times), the Tsukiyo no Tachi chest, the shrine's enemies, both save points and their menu, the Dwarven Forge restock, the Wind Crystal scene, Aether (Lv.18; lost twice, won on the third attempt) and the scene after him, then (October 26) Dilmagia, the rooftop scene with Lid, the Chapter 2 complete card and the airship deck up to Lid's Strength +3 box; party Lv.18-20 and Lid Lv.18-19. We never saw an HP number for Aether, and we did not test Wind against him or what Sylph's Tiara does. We used Shiney's video only as a cross-check for one staircase and to see a route we could not make connect. Played October 26, 2026 (same Steam install, Normal difficulty, keyboard; party Lv.19-22): the end of Chapter 2 in Dilmagia, the crash and the start of Chapter 3 on the Olderion Federation world map, Olderion (arrival, inn and save point, The Drofox Gazette Vol. 3, the leads, the jump-rope girl, Nichol on the canal pier), the road to the Cave of Waters (Recommended Level 20), Nichol joining and his two tutorials, the cave's boat rooms (Magicite Shard, Shuriken x3, Ice Scroll I x2 and Ninja Gear chests, two Tablet Shards, the pre-boss save point), Nichol's Lv.20 level-up screen, Fina's Lv.21 level-up screen and Noctis's Mastery Rank 5 screen, and five attempts at the Cave of Waters boss, Wave Lopros (four lost, the fifth won at party Lv.22 with Lasswell, Fina, Nichol and Rain; the result screen, rewards and level-ups were read in game). Later that day: the way out of the cave, Lid's Level Up screen at Lv.22, then Olderion again after the boss: the scene with Nichol and Luka, the Moogle of Light's Vision Enhancement screen, the three purification spots, the Olderion Tablet Shard, the scene with El, the point-of-no-return warning for Old Town and, after it, the first forced fight in Old Town against a Ribosome and two small monsters (the Old Town card reads Recommended Level 21). Then, still on October 26 (party Lv.22-24): the rest of Old Town with the party split (Rain, Fina and Lid), four more street fights including the Ogre Mage, an Ether chest, the Old Town save point and the soldier beside it, and the Water Dragon (two lost attempts and a win on the third; the defeat screen, the result screen and the growth screen were read in game), the story scenes after it and the objective 'Go to Lake Dorr'; plus Lid's Level Up screen at Lv.23, the Equipment & Abilities screens and Vision pickers for Rain, Fina and Lid, and the skill texts of Lid and Fina. Then, still on October 26 (party Lv.23-24): the Lake Dorr route (the Cave of Waters crystal chamber scene, the ladder shaft and its Tablet Shard, the world-map walk to Lake Dorr and its area card, Recommended Level 23), Leviathan (Lv.23; lost once with it near 30% HP, won on the second attempt after Retry; the result screen was read in game), the scenes after it and the growth screen, then Olderion again (Lid's scene, the quest-log summary and the inn) and the long Archwitch Fina story sequence. We skipped most of that sequence's text and rely on the quest-log summary for the twist, and we saw no playable battle in it. Last came the new goal 'Go to Waterfall Way', Archwitch Fina's Party screen at Lv.24 and the in-game texts of eight of her skills. We then played Waterfall Way to the Altar on October 26: the route and its two Tablet Shards, the Altar scene, the entrance link, four fights including Destroyer (Lv.24), Olderion's item and weapon prices, the Level 2 Limit Burst tutorial and more of Archwitch Fina's skill texts. We stopped before Warden's Cape. The Olderion inn price, its save point and the gondola Sailor's destinations were also noted. For the route we also glanced at text guides (RPG Site, Game8) that agree with the chest contents; they are not our evidence.Reported ·
Kingy play test: Final Fantasy Resonance full game, Water Shrine, Alluvion and Chapter 4 to the capital (October 31, 2026) ↗First-hand play of the full game on Steam (app 3259780, title screen 1.0.1.0) on the same Windows 11 PC and Steam account as the October 24 to 26 tests, keyboard, Normal difficulty, October 31, 2026, continuing the same save. Covers leaving Waterfall Way, the Town of Amore and its shops, Warden's Cape, the Water Shrine route with its pillars, crystals, crates and three chests, the Viridian Pot encounter, Alluvion (beaten on the first attempt) the scenes after it, and Olderion to the 'Chapter 3 COMPLETE' card and the Steam achievement 'Olderion Blues'. We skipped most of the text of the scenes after Alluvion and rely on the quest-log summary for it. We got stuck in the shrine and read the route summary on NiaMeowDB's Chapter 3 page; it isn't our evidence, and everything here is what we then saw ourselves. Later the same night: the Olderion Federation port and ship, the Zoldaad landing, the route to Mozul Station and its shop, the train's party talks and three soldier fights, the walk to the capital with Red Elemental, Vamplant and Magma Tortoise fights, then Zoldaad's station square, its notice board (The Drofox Gazette Vol. 4), the Imperial Hotel, one esper rumour and the World Map's Destination List (party Lv.26-27). We skipped most train and volcano scene text. We stopped at the goal 'Gather information in Zoldaad' without finding what advances it; while stuck we searched and read KeenGamer's walkthrough summary and NiaMeowDB's Chapter 4 objective list, but neither is our evidence and neither told us the spot.Reported ·
Final Fantasy Resonance Trophy Guide & Roadmap ↗Community-reported (text guide), not a Kingy play test. Its entry for the trophy 'My Name Is Ultima…' (Defeat Ultima Weapon) says reloading a cleared save plays a short airship scene about a new presence in Ardra Crater in the south-east of the map, where Ultima Weapon stands and can be fought on interaction; that it is Level 70 with 3.9 million HP; that it can be beaten at Level 60, with 60–65 suggested as a minimum and the fight best left for last; that its strongest attack, Ultima Beam, is flagged by an exclamation mark on the turn bar and red flames above its HP bar; that it inflicts several status ailments; and that the win rewards an Ultima Reactor accessory along with the trophy. It also describes the magic-based party the author used (Reraise first, Shellga, Dispel against its Bravery, and Sakura's damage-nullifying Limit Break Eternal Veil before each Ultima Beam). It also says the Colosseum opens in Chapter 4 in Grandshelt, The Royal Capital, that crafting a first weapon with Aileen earns 'The Weapon that Suits the User' and crafting for all party members earns 'The Weaponsmith'. Its Legendary Arms entries say the first arm earns 'Ancient Artifact' and all twelve 'Legendary Arms', and place the Chamber of Arms on the mountainous island north-west of Dirnado, the Continent of Wind. On Tablet Shards it says the Enigmatic Princess is at Oblivion Palace, just south-east of Grandport Harbour in the Kingdom of Grandshelt, first visitable in Chapter 1; three shards open the first chest (trophy 'Princess's Reward'); and 60 trigger her second memory (trophy 'Memento'), enough to open everything in the first two treasure rooms. Its roadmap (read again on October 24, 2026) also says: none of the 40 trophies are missable; difficulty doesn't affect them, so Casual is fine; one playthrough is enough, with full free roam of the map, quests and collectibles after the story and no New Game+; there is one autosave and 10 manual save slots; and a platinum takes about 50–60 hours. Other entries: the 8th party member joins automatically during Chapter 5; each of the 8 party members has a substory (regular Sub Quests); the chocobo comes in Chapter 1 at the village of Kol and the airship at the start of Chapter 5; the Colosseum has four leagues of five battles, the Fledgling (leftmost, green), Brawler (second, blue) and Gladiator (third, purple) tables; spending and earning gil count cumulatively, Vaan at MR 9 has Double Gil, and you can save, spend 100,000 gil and reload; the King Gil Snapper (Lv.49, weak to Ice, absorbs other elements, very high physical defence), the Metal Gigantuar (8 HP, very high evasion, runs away) and a Gigantuar (lots of MRP) are random encounters on a small forested island past the optional Dragon's Maw dungeon, on the southern tip of the Kingdom of Pharm, open from the Chapter 5 airship but recommended at Level 55; awakening runs one star at a time with a Magicite Shard, then Magicite, then a Magicite Cryst, from a Moogle of Light in most towns or on the airship, Crysts first appearing in Chapter 5 and Magicite sold at the Colosseum late in the game; max Mastery Rank is MR 9 and is kept per character, while awakening stars apply to every character; 1,000 staggers came naturally by Chapter 4; 400 Resonances may need grinding, for example by repeatedly staggering one leftover enemy and using a healing Resonance such as Leah's or Ayaka's; and Mechabo's upgrades run through the side quests 'Arise, Mechabo!' (two Dynamo Stones from Ipooh outside the Dwarven Forge, Chapter 2), 'Mechabo Evolved' (three each of Dhorme Chimera, Medusa, Destroyer and sandworm) and 'Mechabo Unleashed' (from Chapter 5: three Mahadevas on Mysidia's western island and three Malbodooms in western Gronoa, Chapter 6 on). Rechecked October 24, 2026: it counts no missable trophies and says the game has full free-roam after the story; 'Conscience Renewed' is for clearing all party-member substories; 'Mechabo Mania' (upgrade Mechabo to his ultimate form) runs through Arise, Mechabo! in Chapter 2 (two Dynamo Stones from Ipoohs outside the Dwarven Forge), Mechabo Evolved (three each of Dhorme Chimerae, Medusae, Destroyers and Sandworms) and, after Chapter 5, Mechabo Unleashed (three Mahadevas in Mysidia and three Malbodooms in western Gronoa, from Chapter 6), reporting to Verun on the airship. Its Weaponsmith entry says Aileen is recruited through Forger of Wills in Dilmagia, available in Chapter 6. Read again October 25, 2026: the roadmap's three steps are Finish the story (about 40 hours), Side Content (10–15 hours; substories first for their stat boosts, then Legendary Arms and Adamantite) and Defeat Ultima Weapon and clean-up (1–5 hours); it calls Dragon's Maw's random encounters some of the toughest in the game and suggests returning at the end of the game when much stronger; it ties the Metal Gigantuar to 'Priceless Experience' and the King Gil Snapper to 'Struck Gold', and suggests Dualcast and high-level magic such as Ultima against the Metal Gigantuar.Reported ·
Final Fantasy Resonance - All 8 Adamantite Locations (And Where To Use Them) ↗Community-reported (video), not a Kingy play test. Video IYWZSQi78BM, uploaded October 23, 2026, with the uploader's numbered card for each Adamantite (their captions; HUD Chapter 7 for #1–#3, Chapter 8 for #4–#8). Frames checked October 24: #1 from 0:00, 'Reward for Colosseum Fledgling Battle 1 (Colosseum is available from Chapter 4 onwards)' over the Kingdom of Grandshelt map and the Colosseum; #2 from 0:37, Brawler Battle 2; #3 from 0:49, Brawler Battle 3, with the Colosseum menu at 0:52 showing Recommended Level 41 for Brawler Battle 2 and 43 for Brawler Battle 3; #4 from 1:02, 'Found in a chest inside the Rugged Mountain Path'; #5 from 1:27, one of the Merchant Ship's possible items anywhere at sea, appearing randomly in Chapter 8, with the Trader offering Adamantite for 35,000 gil at 1:40; #6 from 1:47, Oblivion Palace door 3, chest 5 (at least 80 Tablet Shards); #7 from 2:16, door 4, chest 1 (at least 89); #8 from 2:46, get the Magi-tenna from Gaberada, give it to Lid aboard the airship to upgrade the radar, and scan just above Olderion. From 4:12 a card says the side quest appears in Chapter 5 and recruits Aileen; frames show 'Forger of Wills' 'QUEST ACCEPTED' (4:34), 'Aileen x1' obtained (5:06), Aileen crafting on the airship, the message 'Received Save the Vermillion from Aileen!' (5:39), the trophy 'The Weapon that Suits the User' (5:42) and her list of eight party members (5:44). Which character the first weapon was for, the other weapons' names and any craft cost aren't shown.Walkthrough ·
Final Fantasy Resonance All Adamantite Locations ↗Community-reported (video), not a Kingy play test. Video 2KQQdcrHFkk, uploaded October 23, 2026, which its description says is sponsored by Square Enix; the description says Aileen on the airship crafts weapons from them and crafting all 8 earns the trophy 'The Weaponsmith'. Frames checked October 24 (uploader's cards; cards start at #1 0:00, #2 0:48, #3 1:22, #4 1:55, #5 2:10, #6 2:26, #7 2:46, #8 2:58, and the pop-up 'You obtained the following: Adamantite x1' closes each of #1–#6, at 0:48, 1:22, 1:55, 2:10, 2:26 and 2:46): #1 Fledgling Battle 2 at the Colosseum, unlocking during Chapter 4; #2 Brawler Battle 2; #3 Brawler Battle 3; #4 Oblivion Palace 3-star door, chest 5, 80 Tablet Shards; #5 4-star door, chest 1, 89 Tablet Shards; #6 a chest in Rugged Mountain Path; #7 one of the possible items sold at the Merchant Ship roaming the overworld (the Trader offers Adamantite for 35,000 gil at 2:52, then 'Sold!'); #8 the Magi-tenna from Gaberada given to Lid on the airship, letting you scan for treasure, then the Adamantite just north of Olderion.Walkthrough ·
Final Fantasy Resonance All Adamantite Locations ↗Community-reported (text guide), not a Kingy play test. Lists eight: Grandshelt Colosseum Fledgling Battle 2 (recommended level 27), Brawler Battle 2 (41) and Brawler Battle 3 (43); the Merchant Ship for 35,000 gil; Oblivion Palace 3-Star Chamber chest 5 (80 Tablet Shards) and 4-Star Chamber chest 1 (89); the airship's treasure radar in the curved bay on the north of the Olderion continent; and a chest on the main story path in Rugged Mountain Path (Gronoa). It says Aileen crafts one weapon per party member, one Adamantite each, on the airship deck after the sub quest Forger of Wills in Dilmagia, the Machinopolis in Chapter 6, that all can be found after the story, and that the weapons are in most cases the best in the game.Reported ·
Final Fantasy Resonance How To Get All Legendary Weapons ↗Community-reported (video), not a Kingy play test. Video hwhVjPnVQKI, uploaded October 23, 2026, which its description says is sponsored by Square Enix; the description says getting all 12 unlocks the trophy 'Legendary Arms'. Frames checked October 24 (the uploader's card for each Ancient item, over the world map and the place): Accessory 0:19 (found in Quarry Cave); Katana 0:33 (found in Crystal Tower); Cloak 1:30–1:33 and Tome 1:36–1:40 (the roaming overworld merchant, random stock; the Trader offers each for 40,000 and 45,000 gil); Firearm 1:48 (chest 4 behind door 3 in Oblivion Palace, 76 Tablet Shards); Whip 2:06–2:07 (chest 6 behind door 3, 84 Tablet Shards); Greatsword 2:23 (prize for Fledgling Battle 3 at the Colosseum, unlocking during Chapter 4); Cuirass 2:51 (prize for Brawler Battle 5) and 2:58 (Brawler League menu: recommended levels 40, 41, 43, 45 and 48 for Brawler Battles 1–5); Garment 3:13 (talk to the NPC in Gaberada, give the item to Lid to upgrade the ship's radar to Level 1, find the treasure; Gronoa, the Shuttered Land); Hammer 4:09 (card spelled 'Ancinet': get the Resonance Stone from Mt. Reizon, give it to Lid to upgrade the radar to Level 2 after finding the 5 Level 1 overworld treasures, find the treasure); Rod 5:00 (examine the locked hut in Pharm, get the key from the NPC in the Town of Sian); Bow 5:38 (finish the side quest 'Secrets Unearthed' in the Town of Felicitas, talk to Chloe again, then talk to Chloe in the Chamber of Arms). From 6:26: 'Chamber of Arms' in the fast-travel list, with the map title reading 'Dirnado, the Continent of Wind' while it is highlighted; crystallised pedestals; a trial battle; the result screen (7:11) with the party at Lv.67–77; a message that the Ancient Greatsword has become Ragnarok (about 7:19); a message that, if the ancient armament was equipped before the transformation, it has been unequipped (7:21); and the trophy 'Ancient Artifact' (7:26, Chapter 8 HUD). No trial enemy's name or level is shown in the frames we checked (6:41–7:20).Walkthrough ·
Final Fantasy Resonance All Legendary Arms Locations ↗Community-reported (text guide), not a Kingy play test. Says the airship (start of Chapter 5) opens the Chamber of Arms on the mountainous island between Dirnado and Gronoa, where a corridor and portal lead to 12 crystallised pedestals that give hints; an Ancient item is weak until you win a two-stage trial against a Level 50 enemy at its glowing pedestal, after which the arm is renamed; after all 12, Level 75 trials give '+' versions that trophies don't need; nothing is missable. Per arm it gives where to get the Ancient item and the trial enemy and arm: Whip (84 Tablet Shards, Chest VI of Treasure Room 3; Nunki, Fire Birch), Cloak (Merchant Trader in Chapter 8, 40k gil; enemy and arm not given), Accessory (Quarry Cave on the island off Zoldaad's west coast; Brachum, Gold Hairpin), Garment (upgraded radar from an NPC behind the inn in Gaberada, then a cove on Gronoa's east coast; Vindemiatrix, Mirage Vest), Katana (Crystal Tower, Chapter 8, west of the save point at the airship entrance to Middle Reach; Aldhafera, Sasuke's Blade), Hammer (the High-Power Generator from a story-path chest in Mt. Reizan in Chapter 7, then a cove on Dirnado's west coast; Tegmine, Thor's Hammer), Firearm (76 Tablet Shards, Chest IV of Treasure Room 3; Alhena, Arcturus), Tome (Merchant Trader in Chapter 8, 45k gil; Elnath, Last Resort), Rod (locked Abandoned Cabin in north-east Pharm, key from a man by the inn in the Town of Sian; Sheratan, Wizard's Rod), Greatsword (Fledgling Battle 3; Alpherg, Ragnarok), Cuirass (Brawler Battle 5; Sadalsuud, Tatenashi Armour) and Bow (Chloe in the Felicitas item shop, then again in the Chamber of Arms; Dabih, Artemis Bow).Reported ·
Final Fantasy Resonance All Tablet Shard Locations ↗Community-reported (video), not a Kingy play test. Video VxvS3j3wGzA, uploaded October 22, 2026 (Pacific time), which its description says is sponsored by Square Enix; its chapters mark each shard or group from #1 at 0:00 to #99 at 38:10, and most segments open on the world map, with a 'TABLET SHARD #N' banner. Frames checked October 24 at the start of every segment (about 72 frames): the map cursor or fast-travel highlight names the same area as PowerPyx's list for most groups, with on-screen spellings 'Grandport Harbor', 'Dilmagia, the Machinopolis', 'Mysidia, the Magiapolis', 'Gaberada, the Undertown' and 'Research Center Ruins'. #1 highlights Grandshelt, the Royal Capital in the fast-travel list. Exceptions: #19's cursor is on 'Airship'; #48–49's on 'Rebel Hideout'; #54–55 and #56–57 on 'Zoldaad, the Imperial Capital'; #62–63 on 'Mysidia, the Magiapolis'; #51 has no legible label; and #68–75 runs as one segment from 'Tower of Mysidia' (25:42) that the frames don't split between areas. A note at 22:38 says that part of the capital opens during Chapter 4, and #96–98's destination list shows 'Chapter 8 - Beyond Hope'; no other chapter is shown. Oblivion Palace appears only as a fast-travel entry. Pickup-level frames for #19 checked October 26, 2026: in the #19 segment (6:26–6:46) the Airship flies to a point on the Dirnado map, the area card 'Mt. Thunderclap', Recommended Level 13, appears and 'You obtained the following: Tablet Shard' follows behind rocks.Walkthrough ·
Final Fantasy Resonance All Tablet Shard Locations ↗Community-reported (text guide), not a Kingy play test. Lists all 99 Tablet Shards by chapter (1–8) and area, with directions for each; says they are sparkling gold items found in almost all towns and dungeons, returned to the Enigmatic Princess at Oblivion Palace in the Kingdom of Grandshelt to open chests in four treasure rooms; that none are missable and all can be collected after the story; that trophies need 89 of 99, with 60 for the trophy Memento, 76 for the Ancient Firearm and 80 and 89 for two Adamantite. It uses the spellings 'Harbour', 'Research Centre Ruins' and 'Gaberads, the Undertown'. Re-read October 24 for the upper Mt. Thunderclap entrance, the capital underground tunnel and library interior assignments; no new Kingy pickup test.Reported ·
Stuck? Tell us where
Say where you’re stuck in Final Fantasy Resonance. You get one hint at a time from a published kingy.wiki guide, and the answer and its clip stay covered until you ask.
If nothing matches, we keep your words (without emails, links or long numbers) to decide which answers to write next. Privacy
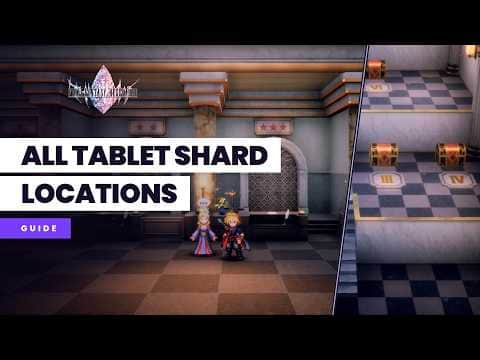 38:10–39:05 · 55 sTablet Shard #99, the last one
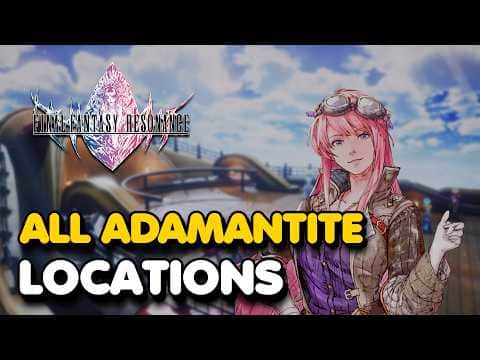 1:49–2:11 · 22 sOblivion Palace door 3, chest 5 (80 shards)