Final Fantasy Resonance official cover art

Chapter 3 walkthrough: Wardens of the Aquapolis (Olderion to the Water Shrine)

Quick answer

Chapter 3, 'Wardens of the Aquapolis', starts when the airship comes down on a beach in the Olderion Federation. You gather information in Olderion, the Aquapolis, find Nichol, the Warden of the Waters, on a canal pier, and take the east road, the north-east fork and then the west branch past a waterfall to the Cave of Waters (Recommended Level 20). Nichol joins you at its entrance. Inside you row a boat through lake rooms, summoning it at stone pedestals (one pedestal lowers the water to reach the Ninja Gear chest), to the boss group Wave Lopros, Azure Snapper and Land Snapper (all Lv.20, all showing +50% for Blizzara). We lost four tries and won on the fifth with physical and Ice attacks (2,700 EXP, 2,700 gil, 78 MRP and a Water Scroll I). Back in Olderion you purify the waters with Luka at three spots, which we played first-hand, followed by the warning that Old Town is a point of no return. In Old Town the party splits: Rain is fixed in the party, Lasswell and Nichol stay behind, and we took Fina and Lid. We fought five groups (a Ribosome, Gigas Worms and Worgen, an Ogre Mage with two Goblin Mages, two Gigas Worms, a Ribosome with two Goblin Mages), found an Ether chest and a save point with a healing soldier, then beat the Water Dragon (Lv.21) on the third attempt after two losses. After the dragon the objective becomes 'Go to Lake Dorr', whose marker sits on the Cave of Waters: you fast travel there, go through its crystal chamber (a scene with Luka and Fina) and climb a ladder shaft with a Tablet Shard to the world map and the lake (Recommended Level 23). Leviathan (Lv.23) is a two-target fight: break the colour-changing Orbs of Light with physical attacks, heal everyone when Leviathan's turn icon glows red, and use Thunder once the game's affinity panel shows it as the weakness. We lost once and won on the second attempt (4,500 EXP, 2,400 gil, 60 MRP and a Magicite Shard). Luka then goes into the lake to pray, and after you rest at the Olderion inn (100 gil) a major story twist brings Archwitch Fina into the party and sets the goal 'Go to Waterfall Way'. We then played Waterfall Way (Recommended Level 24) to the Altar, with its two Tablet Shards and the Destroyer fight (1,800 EXP, 900 gil, 65 MRP). North of it are the Town of Amore and Warden's Cape, then the Water Shrine (Recommended Level 26), a puzzle of water levels and crates with three chests, and Alluvion (Lv.26), weak to Thunder, whose Prism Cores keep coming. We won on the first try (6,850 EXP, 8,700 gil, 70 MRP and an Azure Amulet). Back in Olderion the chapter ends with the achievement 'Olderion Blues'.
How this guide was checked

Coverage: Released October 22, 2026 (Square Enix lists Steam for October 23 · the Steam listing shows October 22) · official sources checked October 23, 2026 UTC · demo (title screen 1.0.0.0) played about 2½ hours on October 21, 2026 (Steam build 24032336) and continued on October 22: prologue, Earth Shrine, Belmodar, Mitra, the first Visions and Grandshelt Castle · full game (title screen 1.0.1.0) played on October 24, 2026: demo save transfer, then the capital through Felicitas, the Kolobos Ruins and The Hunger to Grandport Harbor (including the optional Antlion, which we fled) and on through Siren's Tower, Gilgamesh, Siren, the Moogle of Light and the end of Chapter 1 to the start of Chapter 2 · on October 25 and 26 we played the Mobliz Shipyard, the Wind Shrine, the boss Aether and Dilmagia to the end of Chapter 2, then Chapter 3 through Olderion and the Cave of Waters, its boss Wave Lopros (won on the fifth attempt), the purification of Olderion's waters and Old Town (five fights, its save point, an Ether chest and the Water Dragon, won on the third attempt), the Lake Dorr route, Leviathan (won on the second attempt) and the Olderion story, including the Archwitch Fina twist, up to the goal 'Go to Waterfall Way', then Waterfall Way to the Altar · on October 31 we played Amore, the Water Shrine and Alluvion (won on the first attempt) to the end of Chapter 3, then the start of Chapter 4 to the Zoldaad capital's station square. Research checked 31 Oct 2026. Updated 31 Oct 2026

This guide uses the linked sources and any attributed demonstrations. Platform differences and limitations are noted with the advice they affect.

See the 4 sources
4 sources
Kingy playedCreator clipChecked on screen · 25 Oct 202621 steps7 moments · 2:03
  1. Spoiler20:47–21:01Arriving in OlderionTap to reveal · CGInferno
  2. Spoiler1:27:02–1:27:32Wave Lopros, Azure Snapper and Land Snapper (all Lv.20)Tap to reveal · CGInferno
  3. Spoiler2:12:14–2:12:27Purifying Olderion's waters, the Old Town warning and the Water Dragon (Lv.21)Tap to reveal · CGInferno
  4. Spoiler2:29:13–2:29:27Leviathan at Lake Dorr (Lv.23): the Orbs of Light and what won on our second attemptTap to reveal · CGInferno
  5. Spoiler2:48:44–2:49:14Waterfall Way and GilgameshTap to reveal · CGInferno
  6. Spoiler3:56:46–3:56:54The Water Shrine and Alluvion (Lv.26)Tap to reveal · CGInferno
  7. Spoiler2:09:15–2:09:29Boss weaknesses and what to watch forTap to reveal · CGInferno

Open marked sections to reveal solutions or story details.

Before you start

  • Story spoilers for Chapter 3, including a major twist about Archwitch Fina (flagged in its section). Kingy played Chapter 3 first-hand on October 26, 2026 (full game on PC via Steam, Normal difficulty, same install as our October 24 tests, whose title screen read 1.0.1.0; party Lv.19-26): the crash landing, Olderion, finding Nichol, the road to the Cave of Waters, the cave's boat rooms, its boss Wave Lopros (won on the fifth try), the way out of the cave, the purification of Olderion's waters, the warning before Old Town and Old Town itself through the Water Dragon (won on the third try), the Lake Dorr route, Leviathan (lost once, won on the second try), the story after it, the Olderion inn sequence that brings Archwitch Fina into the party, the goal 'Go to Waterfall Way', and Waterfall Way to the Altar (route, two Tablet Shards, four fights, Olderion shop prices), and on October 31 Amore, Warden's Cape, the Water Shrine and Alluvion, to the end of the chapter. We skipped most of the text of that inn sequence and rely on the quest-log summary for the twist, and we saw no playable battle in it. Gilgamesh's scene and the pirates come from CGInferno's full Chapter 3 playthrough on PlayStation, uploaded October 21, 2026 (Community-reported (video)), checked frame by frame; the objective names are the game's HUD text. The playthrough includes optional detours (Rukh Cave and Mindflayer Cave) that aren't part of the story.
1

Arriving in Olderion

Reveal solution / story details

Spoiler level: Chapter 3 story. The chapter opens on the Invincible's deck, where Alluvion shows a Divine Signet that the group got in Grandshelt Castle and uses it on Lid's airship; Rain screams and the screen goes black. The party wakes on a sandy shore, Lasswell says this should be Olderion, and a pop-up says you can now sail to Olderion from Grandport and from the pier near Dilmagia. The first objective is 'Go to Olderion, the aquapolis'; the city's area card reads 'Olderion, the Aquapolis'.

Our walk from the landing beach (south coast of the Olderion Federation, with the city due north): go right around the rock mound, follow the dirt road north-east, then west along the road to the city's east gate, where the town card and a Proceed prompt wait. The fights on the way were rough for a Lv.19-20 party: Basilisk x2 and a Sorcerer (all Lv.18; Fira showed +50% on both Basilisks) took Lasswell down to 39 HP in two rounds, and in another fight the Escape command was greyed out for the whole party for one turn before it worked later.

In the city the objective is 'Gather information in Olderion'. By our minimap the inn is west of the arrival plaza and shops are east and west. The inn costs 100 gil to stay, and its save point (a pink ring) is by the east wall inside. The notice board beside it holds The Drofox Gazette Vol. 3 with three items: Ruby Cave, in the mountains south of the city, has no gems but a stele whose carvings are said to point to a hidden place; Grandshelt is in ruins after an attack, with rumours that the Earth Shrine's Crystal was shattered and that the Wind Shrine and a huge airship were also stirring; and an ad for 'Mushy Meat'.

The leads that move the quest on: an Olderion Soldier at the foot of the big north stairs off the round fountain plaza says the city's waters protect it from monsters because of the Wardens of the Waters, and that he saw one by the canal in the north-west. A Youth (yellow marker) up those stairs and to the left says you can reach the Water Shrine but not enter, because the Wardens have put up a barrier. After that the objective becomes 'Talk to the Warden of the Waters'. An old woman by the gondolas, below the bridge stairs west of the round plaza, adds that the Wardens' roles are inherited and that the current Water Maiden took hers very young after her mother fell ill.

The girl in green on the plaza south-west of the inn offers a jump-rope game; see the Chapter 3 side quests page for our result.

Verified (first-hand, our play-test, full game on PC via Steam, Normal difficulty, October 26, 2026). Inn and gondola: the inn costs 100 gil per stay and has a save point inside (a pink ring on the right side of the room). The Sailor at the gondola pier by the arrival plaza offers rides to 'Inn Entrance' and 'Towards Old Town'.

  1. Walk to Olderion, the Aquapolis.
  2. Gather information in the city.
    Spoiler clip · Olderion's town card and the 'Gather information' objective · reveal

    Checked on screen · Oct 25, 2026

    20:47–21:01 · 14 sOlderion's town card and the 'Gather information' objective

    Once you're in Olderion, the Aquapolis, your objective is 'Gather information in Olderion': walk out from the plaza into the canal-side streets.

    CGInfernoFull video ↗
    Credits

    “Final Fantasy Resonance - Full Game Playthrough Part 3 (Chapter 3)” by CGInferno · Oct 21, 2026 · Full game on PlayStation, uploaded Oct 21, 2026; version not shown

    Independent creator · no partnership implied

    Creator? Ask us to remove this

    20:47–21:01Spoiler clip
  3. Talk to the Warden of the Waters.
Sources for this section
2

Finding Nichol and the road to the Cave of Waters

Reveal solution / story details

Spoiler level: Chapter 3 story. The Warden is on a gondola pier by the canal, marked in yellow. From the Youth, step right onto the plaza with the tree, walk west between the two railings (under an aqueduct) to the next plaza, then go right to the stairs down to the pier. The narrow strip between the dome building and the railing is not a way through. The silver-haired man reading a book senses the water is corrupted and wonders about the Maiden; he is Nichol, a strategist in Olderion's military and a Warden of the Waters. When Rain asks to reach the Water Shrine, he says the barrier won't let them in, is shocked to hear the Grandshelt barrier was broken, refuses to admit a non-Warden (they could be the attackers) and leaves in a hurry after some news. The objective becomes 'Go to the Cave of Waters' and the game autosaves.

The way to the cave took us about 20 minutes. Fast travel to Olderion puts you on the arrival plaza; walk south out onto the world map and ride east along the road in front of the city. Keep going east until the road turns north-east into the hills and forks. At the fork step slightly south, then go west (left): the road climbs past a waterfall to a ledge with the cave mouth, whose card reads 'Cave of Waters', Recommended Level 20. Dead ends we tried: the forest pocket just east of the city (blocked by a fence or cliff) and riding straight north into the hills.

Sea Scorpions (Lv.18, packs of four) attack on this road. Fira showed no bonus on them; Blizzara showed +50% on all four, and two or three rounds of Blizzara on all four, plus Hibernal Fury, cleared them. Rain and Lasswell reached Lv.21 on this stretch.
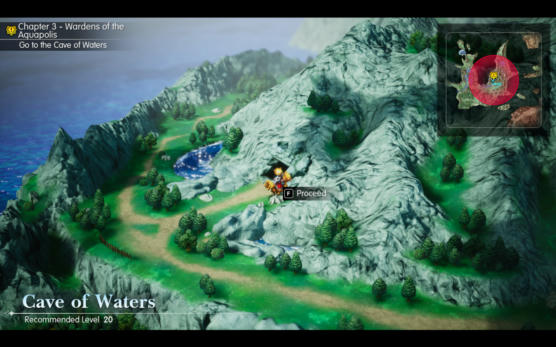
The Cave of Waters area card on the Olderion world map: Recommended Level 20, with the objective Go to the Cave of Waters
Kingy capture from Final Fantasy Resonance (Steam), October 26, 2026 · game © SQUARE ENIX · Open full-size diagram ↗
  1. Find Nichol on the canal pier west of the tree plaza.
  2. Fast travel to Olderion, walk out to the world map and ride east, then north-east to the fork.
  3. At the fork go slightly south, then west, up past the waterfall to the Cave of Waters.
Sources for this section
3

The Cave of Waters: Nichol joins and the boat rooms

Reveal solution / story details

Spoiler level: Chapter 3 story. At the entrance Nichol arrives, alarmed that monsters are in the cave and hoping the Maiden is safe; a song can be heard. The party offers help, he admits he is stretched thin and accepts, and 'Nichol joined the party!' appears with the quest 'Save the Water Maiden'. Two tutorials follow: 'Party Selection' (the Party option in the Main Menu forms a party of up to four) and 'Fighting with Nichol'. Nichol is a strategist whose Formation skills buff allies instead of attacking: Assail raises everyone's stagger power, Charge raises critical hit rate, Bulwark raises physical and magic defence, and Tactic: Fluid Warfare gives an extra action after Formations. He learns more as he levels (see the party page). A save point sits at the cave entrance by the waterfall.

The first chamber is a lake you cross in a small boat. A stone pedestal at the boat dock (south of the lake: from the entrance walk down the ladder path past the waterfall, then north) is examined with F and summons the boat to that dock. Our first press sent the boat away while it was already there; a second press brought it back. Board and disembark with F beside the boat. The boat follows fixed water lanes rather than moving freely: it stops dead at rock walls, and a diagonal input often finds the gap. You can only disembark with the boat right beside a signpost.

First room, the route that worked from the pedestal dock: row west past the island rocks and north up the west wall to the waterfall pocket, east under the waterfall across the north side of the chest island, south-east between the rock clusters into open water, then north up the east wall by the right-hand waterfall and north-west to dock at the signpost shelf on the north. The exit is a narrow gap going north from just right of the signpost, between two rock pillars; it looks like a dead end until you push through. It opens onto a second boat room with two pedestals (north-west and north-east) and a dock with a signpost on the left. The north-east pedestal there summons the boat to the south-west dock.

In the later rooms, row west along the south shore and north up the west lane to a junction room with signposts; the north channel west of the junction leads to a grassy shore with a chest. In the third boat room, from the east entrance beside the waterfall, we rowed north-west to the junction, north to the top wall, east along the top, south down the inner lane to the waterfall base, north up the far-east lane to the top-right corner, then west along the top band, where the Ninja Gear chest is visible on a rock. Go south into open water with a grass strip and signposts on the left. The west end of that strip is a dead end by boat; row north from it to the signpost under a ledge with a pedestal ('F Disembark'). Examining that north-west pedestal lowers the water: the pool drains and a rock path appears, and walking east over it reaches the Ninja Gear chest. Examine it again afterwards to raise the water so the boat can move again.

To finish the cave, row back to the open water and round to the south-west grass strip with two signposts. Disembark only appears at its south-east tip, by the lower signpost. Walk the strip south-west into the waterfall room (a ledge under a waterfall, a ladder down that F Examine knocks down as a shortcut, and a save point). The save point's message says you can now return to the save point at the entrance.

Fights on the boat lanes were Anet (Lv.19) in groups of two or three, sometimes with a Green Soul (Lv.19), and later two rodents (Stunner Rat-type, Lv.18-19) with Anets. Blizzara on all enemies killed the Green Soul quickly but barely hurt Anets, and Fire did little; plain attacks staggered and killed Anets. Escape was unreliable: it worked first try three times running in one stretch, but also failed and then greyed out. A large spiked orange-shelled turtle (we did not read its name) also appears with two Anets: it charges up with a red aura and a flashing icon on the turn bar and then hits hard, and plain attacks staggered it in about eight turns. Anets knocked Lid out in that fight.
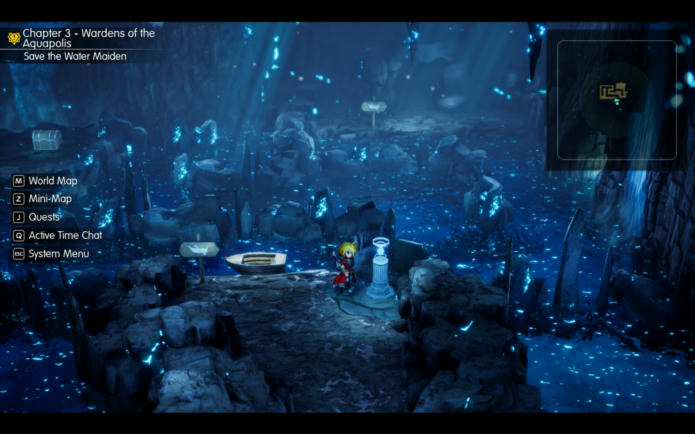
A dock in the Cave of Waters with a small boat, a stone pedestal and a signpost beside a glowing blue lake
Kingy capture from Final Fantasy Resonance (Steam), October 26, 2026 · game © SQUARE ENIX · Open full-size diagram ↗
  1. Examine the stone pedestal at the dock to call the boat, then board with F.
  2. Row to the north signpost shelf, pick up the Tablet Shard on the left and go north through the gap.
  3. Use the pedestals and signposts in the later rooms; examine the north-west pedestal in the third room to lower the water for the Ninja Gear chest.
  4. Finish in the waterfall room: the ladder shortcut, a second Tablet Shard and the save point before the boss.
Sources for this section
4

Chests and Tablet Shards in the Cave of Waters

Reveal solution / story details

Everything below we picked up or saw ourselves on October 26, in the order we met it. The Tablet Shards page lists three shards for this cave from PowerPyx's numbered list; we found two and did not read their numbers, so we don't say which numbers they are.

WhereWhatNotes
Small island west of the first boat dockMagicite Shard (chest)In the first lake, just west of the pedestal dock.
North signpost shelf, left of the signpostTablet Shard (yellow sparkle)Disembark at the signpost; the pick-up message read 'Tablet Shard x1'.
Islet in the middle of the second boat roomShuriken x3 (chest)The north-east pedestal summons the boat to the south-west dock.
Grassy shore up the north channel west of the junction roomIce Scroll I x2 (chest)Row to the junction room with the signposts first.
Rock reached over the lowered water in the third boat roomNinja Gear x1 (chest)Lower the water at the north-west pedestal, then walk east over the rock path.
Tip of the south-west grass stripA small chestWe saw it but did not record what it held.
Ledge under the waterfall in the waterfall roomTablet Shard (yellow sparkle)Our second shard in the cave, by the ladder and the save point.
Sources for this section
5

Wave Lopros, Azure Snapper and Land Snapper (all Lv.20)

Reveal solution / story details

Verified (first-hand, our play-test, full game on PC via Steam, Normal difficulty, October 26, 2026). Spoiler level: Chapter 3 boss. We lost this fight four times and won on the fifth attempt, with Lasswell, Fina, Nichol and Rain at about Lv.22 (Nichol was Lv.21). The first attempt is described first, then what changed.

Save at the waterfall room's save point, then walk north past the waterfall and up the tunnel. In the scene a blue winged dragon sits on a dais with two spiky fish. Nichol says to take out the two in front first and then concentrate on the larger monster. Nichol stays at the side as a guest fighter you can't control. The target labels read Wave Lopros (Lv.20), Azure Snapper (Lv.20) and Land Snapper (Lv.20). Escape is greyed out, and Blizzara on all enemies showed +50% on all three.

What went wrong in our first attempt: Wave Lopros used Bravery, a stacking buff whose counter showed 4-5 on its HP bar, and devoured the Azure Snapper, healing about 2,000. Whenever the snappers die or are eaten it brings in new ones (labelled B, then C), so killing the front pair first did not clear the field for us. Its charged attacks (a red aura and a flashing icon) hit the whole party for roughly 500 to 1,000 or more, and twice knocked out three of four members in one turn. We staggered it once, after Fina's Holy Ray and some attacks, and it still had about 70-80% of its health when the party fell.

What we had in the first attempt: Blizzara on all enemies, Fina's Siren summon (50 MP, stays for 3 turns) and her Limit Burst Holy Ray, Rain's Limit Burst Infinity Drive (fire physical damage, +50% on a staggered target) and Shellga (25 MP, raises magic defence of all allies), Lasswell's Limit Burst Null Moon (makes the target easier to stagger for 3 turns), and Lid's Mug. That setup lost, and the list is what we had available, not a record of what we used each turn. The winning attempt below leaned on physical attacks instead of spells.

Verified (first-hand, our play-test, full game on PC via Steam, Normal difficulty, October 26, 2026). How the winning fight went: we rested and saved at the pink save point by the ladder just south of the arena, and walking north started the scene. Nichol again says to take out the two in front first and then focus on the larger monster. The opening group was Wave Lopros, Azure Snapper and Land Snapper, all Lv.20. When both snappers die, Wave Lopros brings in a fresh pair a few turns later (labelled B, then C). When the snappers live long enough, it eats them one at a time, and each meal adds a numbered buff icon to its HP bar. A party-wide hit followed: it KO'd Lasswell (1,320 max HP) and left Fina at 20 HP. We could not see which move it was, so we do not know its name.

Verified (first-hand, our play-test, full game on PC via Steam, Normal difficulty, October 26, 2026). Weakness: Lasswell's Ice Splitter showed 'Weak' on Wave Lopros in its target preview, so it is weak to Ice. The same preview showed +350% on the staggered boss and +50% on a snapper. Fina's Siren summon (50 MP, stays for 3 turns) showed 'Weak' on the Land Snapper.

Verified (first-hand, our play-test, full game on PC via Steam, Normal difficulty, October 26, 2026). What worked: Formation: Bulwark from Nichol at the start and again after the big hit; Cura on the whole party from Fina and from Rain (using Leah's skills); a Mist Potion (restores 200 HP to all allies); Phoenix Downs (revive at 25% HP); physical attacks and Ice Splitter rather than spells; killing the snappers before they could be eaten; and two staggers.

Verified (first-hand, our play-test, full game on PC via Steam, Normal difficulty, October 26, 2026). The finish: Nichol's Limit Burst, Formation: Steeled Advance, fills allies' Limit gauges as they act (the effect ends for each ally after three actions). Lasswell's and Fina's Limit Bursts were full by the second stagger, and we used Fina's Holy Ray and Lasswell's Null Moon (a night sky and crescent moon animation). The Resonance prompt appeared after the Limit Bursts with four choices: W Hibernal Fury, A Armiger Unleashed, D Healing Wind and S Climax Edge. We chose Hibernal Fury (Ice magic damage to random enemies five times), and it finished the boss.

Verified (first-hand, our play-test, full game on PC via Steam, Normal difficulty, October 26, 2026). Result: 2,700 EXP, 2,700 gil and 78 MRP with the Stagger Finish Bonus, plus a Water Scroll I. Afterwards Lasswell and Rain reached Lv.23 and Lid reached Lv.22 (Lid was benched and still got EXP); Fina stayed at Lv.22 and Nichol at Lv.21. Gil rose to 24,793.

In CGInferno's video (Community-reported (video)) the party is shown facing the dragon and both spiked creatures after Nichol's advice, and Luka calls Nichol her brother afterwards; the same video has a save slot reading 'Cave of Waters', Lv.23, and a detour to the optional Rukh Cave (Recommended Level 26) while the objective is 'Go to the Cave of Waters'.

  1. Rest and save at the pink save point by the ladder just south of the arena, then walk north to start the fight.
  2. Nichol's advice: take out the two spiked guards in front first, then the dragon; killing the snappers before Wave Lopros can eat them worked for us.
    Spoiler clip · Nichol's advice before the Cave of Waters dragon · reveal

    Checked on screen · Oct 25, 2026

    1:27:02–1:27:32 · 30 sNichol's advice before the Cave of Waters dragon

    When the fight starts, deal with the two smaller spiked creatures in front first, then focus everything on the large winged dragon.

    CGInfernoFull video ↗
    Credits

    “Final Fantasy Resonance - Full Game Playthrough Part 3 (Chapter 3)” by CGInferno · Oct 21, 2026 · Full game on PlayStation, uploaded Oct 21, 2026; version not shown

    Independent creator · no partnership implied

    Creator? Ask us to remove this

    1:27:02–1:27:32Spoiler clip
  3. Open with Formation: Bulwark and use it again after the party-wide hit; keep Cura, a Mist Potion and Phoenix Downs ready (Quick Heal does not revive KO'd members).
  4. Attack with physical skills and Ice Splitter (it showed 'Weak') instead of spells, and stagger the boss twice.
  5. Let Formation: Steeled Advance fill the Limit Bursts, use them in the stagger, then pick Hibernal Fury at the Resonance prompt.
Sources for this section
6

Leaving the Cave of Waters after the boss

Reveal solution / story details

Verified (first-hand, our play-test, full game on PC via Steam, Normal difficulty, October 26, 2026). Spoiler level: none for story; this is only the way out. Fast travel is refused inside the cave, so you have to walk out. Use the Teleport option at the pre-boss save point (it reads "Return to dungeon entrance"), which drops you at the entrance save point by the waterfall. From there step a little west, then walk south down the stone causeway; "F Proceed" at its south end leads to the world map.

Verified (first-hand, our play-test, full game on PC via Steam, Normal difficulty, October 26, 2026). Dead end: the passage north-west of the waterfall room only leads to a small crystal chamber. On our way out a random fight with a big turtle and two green dragons KO'd Fina and Nichol; Hibernal Fury finished it for 1,350 EXP, 1,689 gil with the Overkill Bonus, 78 MRP with the Stagger Finish Bonus and a Mist Potion. Quick Heal does not revive KO'd members, so use a Phoenix Down from Items.

  1. Open the save point before the boss and choose Teleport (back to the dungeon entrance).
  2. From the entrance save point, step a little west and follow the stone causeway south.
  3. Press F at its south end to reach the world map, then go to Olderion (fast travel works from there).
Sources for this section
7

Purifying Olderion's waters, the Old Town warning and the Water Dragon (Lv.21)

Reveal solution / story details

Verified (first-hand, our play-test, full game on PC via Steam, Normal difficulty, October 26, 2026). Spoiler level: Chapter 3 story. After the Cave of Waters, fast travel to Olderion plays a scene: Nichol asks Luka to start purifying and says only a Warden can see the corruption. Three spots are crucial to the city's water flow; Nichol surveyed them before leaving for the cave, and you check them one by one. The goal reads 'Purify the waters with Luka'.

Verified (first-hand, our play-test, full game on PC via Steam, Normal difficulty, October 26, 2026). Purification spot 1 is the stone bridge just west of the Moogle of Light's plaza (the tree plaza north-east of the arrival pier, beside the railing). It has a yellow marker and an F Examine prompt. Luka purifies the water under a blue dome, a black screen reads that she has purified the corruption, 'Quest Updated' appears and the game autosaves. Luka then says protecting Olderion's waters and supporting its people is the Wardens' duty, mentions someone who fell to an illness years ago, and says she was taught a Maiden's expectations from a very young age (paraphrased).

Verified (first-hand, our play-test, full game on PC via Steam, Normal difficulty, October 26, 2026). Purification spot 2 is the gondola pier by the steps in front of a gated mansion, north-east of the round fountain plaza. Luka is out of breath afterwards and Fina suggests she rest; back at the tree plaza Luka and Fina talk about travelling with friends, and Fina says she came to Olderion on an airship (paraphrased).

Verified (first-hand, our play-test, full game on PC via Steam, Normal difficulty, October 26, 2026). Purification spot 3 is on the railed walkway under the aqueduct, west of the tree plaza, on the same walkway as the Olderion Tablet Shard: a sparkle by a flower pot, with the pick-up message 'Tablet Shard x1'. We did not read its number.

Verified (first-hand, our play-test, full game on PC via Steam, Normal difficulty, October 26, 2026). Spoiler level: Chapter 3 story. After spot 3 a scene plays. Nichol asks a new character, El (blue-haired, armoured, a sword at his side), whether something is wrong, and says the monsters may return, so Luka should purify as much water as possible. An Olderion Soldier reports a huge pack of monsters back in Old Town, and Nichol orders a defensive line so they cannot reach the city centre. El insists he must be the one to protect 'her'. The new goal is 'Go to Old Town, Olderion'.

Verified (first-hand, our play-test, full game on PC via Steam, Normal difficulty, October 26, 2026). Point of no return: walking west from spot 3 toward Old Town shows a warning that you cannot return until the event in Old Town is completed, that you should be fully prepared, and that the autosave stays at the point before you go in. Fast travel still worked after we saw it. We then went on: the Old Town entrance is at the west end of that walkway, past a plaza full of soldiers, and its area card reads Recommended Level 21 with an F Proceed prompt. A soldier there says Old Town lies beyond but is beset by monsters and asks for help. The gondola stop 'Towards Old Town' is a pier just north of that plaza.

Verified (first-hand, our play-test, full game on PC via Steam, Normal difficulty, October 26, 2026). Preparing before Old Town: the inn costs 100 gil per stay and has a save point inside (a pink ring on the right side of the room), and the gondola Sailor at the arrival pier offers rides to 'Inn Entrance' and 'Towards Old Town'. Rest, restock Phoenix Downs and Mist Potions (Quick Heal does not revive KO'd members) and save there. Our party was Lv.21 to 23 after the Wave Lopros win; the Old Town card reads Recommended Level 21.

Verified (first-hand, our play-test, full game on PC via Steam, Normal difficulty, October 26, 2026). Spoiler level: Chapter 3 story. The first fight in Old Town is forced (Escape is greyed out) and the quest reads 'Defeat the monsters'. The enemies were a Ribosome (Lv.21, a big green slime) and two small green monsters; Lid's opening line is that there are monsters in the city limits. Ice Splitter's preview showed +50% on the Ribosome and 'Weak' on both small ones. Blizzara on all enemies from Lasswell and Fina killed the small ones, and Hibernal Fury finished the staggered Ribosome. Result: 790 EXP, 380 gil, 26 MRP with the Stagger Finish Bonus and a Knife of Poison. The rest of Old Town, from the party split to the Water Dragon, is in the next two sections.

CGInferno's video (Community-reported (video)) shows the same first fight with the full party, then Lasswell staying behind as the party splits and the objective 'Defeat the monsters'; its group of Rain, Fina and Lid fights a Lv.20 Ogre Mage, which matches what we met (see the next section).

  1. Fast travel to Olderion and watch the scene with Nichol and Luka.
  2. Examine spot 1 (the stone bridge west of the Moogle of Light's plaza), spot 2 (the gondola pier in front of the gated mansion) and spot 3 (the railed walkway under the aqueduct).
  3. Pick up the Tablet Shard on that walkway; rest at the inn (100 gil) and save at the pink ring inside.
  4. Walk west from spot 3 to see the point-of-no-return warning; go on into Old Town only when you are ready.
  5. Defeat the monsters, then the Water Dragon (Lv.21); a video shows Lightning marked 'Weak' on it, a marker we did not see.
    Spoiler clip · The Water Dragon's Battle Result in Old Town · reveal

    Checked on screen · Oct 25, 2026

    2:12:14–2:12:27 · 13 sThe Water Dragon's Battle Result in Old Town

    Beating the Water Dragon (Lv.21) pays 1,800 EXP, 3,000 gil, MRP and a Water Scroll I.

    CGInfernoFull video ↗
    Credits

    “Final Fantasy Resonance - Full Game Playthrough Part 3 (Chapter 3)” by CGInferno · Oct 21, 2026 · Full game with PlayStation trophy pop-ups elsewhere in the video, uploaded Oct 21, 2026; version not shown

    Independent creator · no partnership implied

    Creator? Ask us to remove this

    2:12:14–2:12:27Spoiler clip
  6. After the dragon, the next objective is 'Go to Lake Dorr'.
Sources for this section
8

Old Town: the party split, the five fights, the Ether chest and the save point

Reveal solution / story details

Verified (first-hand, our play-test, full game on PC via Steam, Normal difficulty, October 26, 2026). Spoiler level: Chapter 3 story. After the first fight, El says the monsters keep coming and that Arsha is helping evacuate people on the north side of the city (paraphrased). Nichol warns they will spill into the city centre; he and Lasswell hold the line and Rain's group goes north as reinforcements.

Verified (first-hand, our play-test, full game on PC via Steam, Normal difficulty, October 26, 2026). The party screen locks Lasswell and Nichol out and fixes Rain in slot 1. We took Rain, Fina and Lid. Lid had no Vision and no accessories at that point (she wore a Mechabo Hammer and Power Vest), so her battle menu is Attack, Skills, Defend, Items and Escape, with no Vision-skills row. Monsters are visible on the Old Town map, for example a pink plant monster west of the first gated house.

Verified (first-hand, our play-test, full game on PC via Steam, Normal difficulty, October 26, 2026). The five fights in the order we met them are in the table. In fight 2 the Ice and Thunder previews showed no 'Weak' marks and we won with Stonera, Thundara and plain attacks; in the Ogre Mage fight Stonera's preview showed no weakness. Lid's skill menu there lists Mechabo Kick (5 MP, Earth physical damage to an enemy) and Stone and Stonera (Stonera 15 MP, can target all).

Verified (first-hand, our play-test, full game on PC via Steam, Normal difficulty, October 26, 2026). Ogre Mage fight (Rain, Fina and Lid at Lv.22-23): the enemies silenced Rain (a speech-bubble icon, and Leah's skills greyed out) and put stars over Lid and Fina. The damage was heavy: Fina fell to 194 HP and Lid to 61. A 'Weak' marker appeared on the Ogre Mage after Rain's attacks; Rain had Flametongue equipped but we did not confirm the element. What worked: Fina casting Cura on the whole party every other turn, Mist Potions, killing both Goblin Mages first, then Fina's Limit Burst and attacks. The fight at the north-east square (two Gigas Worms) offered only two Resonance choices; see the Resonance section of the stagger guide for why.

Verified (first-hand, our play-test, full game on PC via Steam, Normal difficulty, October 26, 2026). Ether chest: at the north end of the street where the boy was saved, by the railing over the canal. It held one Ether.

Verified (first-hand, our play-test, full game on PC via Steam, Normal difficulty, October 26, 2026). Save point and healer: east of the gate square, by a soldier at the foot of a stone staircase. The menu offers only 'Save progress'. The soldier beside it offers to treat the wounded, so you can rest there for free during the event. He restores HP only: after we talked to him the Main Menu showed full HP but MP not restored (Fina 123/240, Rain 125/190, Lid 145/201), so use Ethers for MP. The Water Dragon is up the central stairs in the square north of this save point; we saved here and went on.

Community-reported (video). CGInferno's Chapter 3 playthrough shows the same split with Rain, Fina and Lid fighting a Lv.20 Ogre Mage (we have not pinned a timestamp). We played it ourselves; the fights, rewards and tips above are our own.

  1. Enter Old Town and win the forced first fight; then open the party screen: Rain is fixed, Lasswell and Nichol are locked, so pick two (we took Fina and Lid).
  2. Fight the groups you see on the street. Take the Ether chest at the north end of the boy's street by the canal railing.
  3. Walk to the save point east of the gate square, let the soldier restore your HP (not MP) and save with 'Save progress'.
  4. Bring Ethers, Phoenix Downs and Mist Potions (what we used), then climb the central stairs in the square north of the save point for the Water Dragon.
FightWhereEnemiesResult
1 (forced)On entering Old Town, after the point-of-no-return warningRibosome (Lv.21) and two small green monsters790 EXP, 380 gil, 26 MRP with Stagger Finish Bonus, Knife of Poison x1
2Street west of the gated house, where a boy cries for helpGigas Worm (Lv.21) and two Worgen (Lv.21)1,270 EXP, 600 gil, 33 MRP with Stagger Finish Bonus, no item
3The long street north (west along the bottom street past the closed gate)Ogre Mage (Lv.20) and two Goblin Mages (Lv.21)1,370 EXP, 900 gil, 20 MRP, Ether x1
4North-east square in front of a big gate, where a soldier says they will not get furtherTwo Gigas Worms (Lv.21)2,000 EXP, 780 gil with Overkill Bonus, 26 MRP with Stagger Finish Bonus
5South-east of the save point, a Ribosome attacking a catRibosome and two Goblin Mages (they silenced all three of us)770 EXP, 500 gil, 26 MRP with Stagger Finish Bonus, Knife of Poison x1
Sources for this section
9

Water Dragon (Lv.21): the strategy that won on our third attempt

Reveal solution / story details

Verified (first-hand, our play-test, full game on PC via Steam, Normal difficulty, October 26, 2026). Spoiler level: Chapter 3 boss. Where: up the central stairs in the square north of the save point. A scene shows El and other soldiers, and Rain jokes that it will be easy with El on their side, but the fight is only Rain, Fina and Lid against one Lv.21 Water Dragon. The Thundara and Blizzara previews showed no weakness, and its affinity row showed two unknown '?' icons.

Verified (first-hand, our play-test, full game on PC via Steam, Normal difficulty, October 26, 2026). Attempt 1 (lost). It hit all three of us hard and often: Lid was KO'd twice and Fina once, and Cura could not keep up. Fina's Holy Ray ('Deal Light magic damage to all enemies. Power scales with sanctity') took it from about 85% to 70%. We used 2 Phoenix Downs and the party fell with the boss near 65%. Attempt 2 (lost, boss near 35%). What helped: Fina's Siren (it stays for 3 turns), Rain's Shellga (a Leah skill, 25 MP, Shell on all three) and a stagger: Armiger Unleashed for a Total of 2,058, plus Rain's Infinity Drive and Fina's Holy Ray. What failed: each Cura on all allies restored only about 200-350 HP, while the dragon KO'd Lid three times and Rain once. With three people we could not out-heal it.

Verified (first-hand, our play-test, full game on PC via Steam, Normal difficulty, October 26, 2026). Attempt 3 (won, Rain Lv.24, Fina 23, Lid 23). What we changed: Lid took Lasswell's Tronn Vision (Lasswell was benched), Earrings of Health and a Hairband, plus the Ninja Gear; Fina wore the Lunar Eclipse Robe. Then we kept everyone topped up and staggered it twice (the steps list the order).

Verified (first-hand, our play-test, full game on PC via Steam, Normal difficulty, October 26, 2026). The red glow. The dragon glows red before its big hit on the whole party. Topping everyone up while it glows avoided wipes.

Verified (first-hand, our play-test, full game on PC via Steam, Normal difficulty, October 26, 2026). Weakness check. Thundara from Fina staggered it for a Total of 1,070, yet the affinity icons never showed 'Weak' in any of our three attempts, and in attempt 2 Thundara gave no 'Weak' either. So we confirmed that Thundara works well enough to stagger it, but we did not confirm a Lightning weakness: the 'Weak' marker below is video-sourced.

Verified (first-hand, our play-test, full game on PC via Steam, Normal difficulty, October 26, 2026). Rewards: 1,800 EXP, 3,899 gil (including an Overkill Bonus), 78 MRP (including a Stagger Finish Bonus) and one Water Scroll I. CGInferno's win paid 3,000 gil; ours included an Overkill Bonus. EXP, total MRP and the drop match CGInferno's.

Verified (first-hand, our play-test, full game on PC via Steam, Normal difficulty, October 26, 2026). Resonance: with Tronn on Lid, the Select Resonance prompt had a third choice, S Hibernal Fury, beside Healing Wind and Armiger Unleashed. Healing Wind on the first stagger healed everyone above max HP and added Regen, which saved the run. Armiger Unleashed on the second stagger finished the dragon.

Verified (first-hand, our play-test, full game on PC via Steam, Normal difficulty, October 26, 2026). Defeat screen. Losing shows 'The party has fallen...' with Retry, Load and Return to Title. Retry restarted the fight with the HP, MP and items we had when the fight began. Load and Return to Title are the other two options.

Community-reported (video). In CGInferno's Chapter 3 playthrough the Water Dragon is a Lv.21 multi-headed Dragon with 24,000 HP that uses Aqua Breath, and a Lightning hit shows 'Weak' (info at about 2:09:20; result at about 2:12:20: 1,800 EXP, 3,000 gil, 78 MRP with a Stagger Finish Bonus, Water Scroll I). NiaMeowDB's datamine (Community-reported) also lists it weak to Thunder, half damage from Water and Double Action; the 24,000 HP figure is the video's, not ours.

Verified (first-hand, our play-test, full game on PC via Steam, Normal difficulty, October 26, 2026). Spoiler level: Chapter 3 story. After the dragon (paraphrased), El can hardly believe they won; Arsha is there, and El admits he ignored Nichol's orders and ran off. Nichol praises El for protecting Arsha. The scene moves to a fountain shrine with two stone statues, where Nichol says the corruption means something has happened to the God of Water. Rain asks what Nichol and Luka were talking about. 'Nichol joined the party!' shows, the Party screen opens (all five characters are selectable; Lid was back on the bench) and the quest updates to 'Chapter 3 - Wardens of the Aquapolis - Go to Lake Dorr', with an autosave. The growth screen then showed Rain 24, Fina 24 (Level Up), Lid 23, Lasswell 24 and Nichol 23 (Level Up). Lid's Tronn Mastery Rank rose to 3 and Nichol's Zidane to MR 5.

  1. Rest at the Old Town soldier (HP only, not MP), save, then climb the central stairs.
  2. What worked in our win, in no fixed order: Rain's Shellga (25 MP, via his Leah skills) for Shell on all three, and Fina's Siren, which silenced the dragon.
  3. Thundara from Fina and Lid staggered it; Lid's Limit Burst March of the Machines also went into the win.
  4. Cast Cura on all allies almost every round from both healers, and pass Ethers to whoever has a spare turn (Lid used 4). When it glows red, top everyone up first.
  5. First stagger: pick Healing Wind at the Resonance prompt. Second stagger: Fina's Holy Ray, then Armiger Unleashed to finish it.
  6. If you lose, choose Retry on the 'The party has fallen...' screen; in our try the fight restarted with the HP, MP and items we had at its start.
Sources for this section
10

Getting to Lake Dorr: the Cave of Waters crystal chamber and the ladder shaft

Reveal solution / story details

Verified (first-hand, our play-test, full game on PC via Steam, Normal difficulty, October 26, 2026). Spoiler level: Chapter 3 story. The 'Go to Lake Dorr' marker sits on the Cave of Waters, not at the lake. Fast travel to the cave (dungeon tab), walk north from the entrance save point and then west past the waterfall into the crystal chamber, which was a dead end before the Water Dragon. Walking in plays a scene.

Verified (first-hand, our play-test, full game on PC via Steam, Normal difficulty, October 26, 2026). Spoiler level: Chapter 3 story. The scene, paraphrased: Luka makes a blue water barrier, a glowing sphere, and it opens the way on. Luka and Fina then talk alone: Luka asks to speak her mind and mentions a special someone, Fina asks what she means, and Luka says to keep moving forward.

Verified (first-hand, our play-test, full game on PC via Steam, Normal difficulty, October 26, 2026). Afterwards the party is in a new rocky area with ladders and a pool of crystal spikes. The ladders zig-zag up a shaft and only climb when you stand exactly at the foot of one and hold up, so nudge sideways one step at a time. On the second ledge, reached by the left ladder, a sparkle gives 'Tablet Shard x1'. We did not read which numbered shard it is or which area the game files it under, so the Tablet Shards page does not count it.

Verified (first-hand, our play-test, full game on PC via Steam, Normal difficulty, October 26, 2026). The top of the shaft shows 'F Proceed' (the keyboard prompt on our PC), which leads out onto the world map on the hills above the Cave of Waters, with Lake Dorr and ruins standing in the water just to the north. Walk along the south shore to the stone pillars at the water's edge; the area card reads 'Lake Dorr - Recommended Level 23' with 'F Proceed'. CGInferno's video shows the same Recommended Level 23 on its Lake Dorr card (about 2:21:24; Community-reported (video)).

  1. Fast travel to the Cave of Waters (dungeon tab of the map).
  2. Walk north from the entrance save point, then west past the waterfall into the crystal chamber, and watch the scene.
  3. Climb the ladder shaft, standing exactly at each ladder's foot and holding up; take the Tablet Shard on the second ledge.
  4. Press the Proceed prompt at the top to reach the world map, walk the south shore of Lake Dorr to the stone pillars and proceed.
Sources for this section
11

Leviathan at Lake Dorr (Lv.23): the Orbs of Light and what won on our second attempt

Reveal solution / story details

Verified (first-hand, our play-test, full game on PC via Steam, Normal difficulty, October 26, 2026). Spoiler level: Chapter 3 boss. Our party was Fina, Rain, Lasswell and Nichol (Lv.23-24). Before the fight a scene shows Alluvion, one of the Sworn Six, at the lake ruins, taunting the party about the 'gifts' she sent to Old Town; then a corrupted Leviathan rises. The fight has two targets: Leviathan (Lv.23) and 'Orbs of Light' (Lv.23, a glowing orb). At the start Nichol hints that the orbs stop Luka's song from reaching the God of Water, so break the orbs first. This is a story fight; Leviathan joins you as an Esper only later, through the side quest 'Nichol's Duty' (see the Esper locations page).

Verified (first-hand, our play-test, full game on PC via Steam, Normal difficulty, October 26, 2026). The orb loop. Killing the Orbs of Light with physical attacks shows 'Rampage weakened!', and Nichol says the God of Water's fury has abated and to strike now. Leviathan then takes normal damage for a few turns, after which it uses a big multi-hit water attack (many hits of about 50 to 217 on everyone; Nichol fell to 87 HP once) and the orbs come back (Rain: 'there's those orbs of light again'). Each return changes the orb's colour. Blue resisted Ice (a shield icon on its Ice affinity), orange took Ice for +50%, and green resisted Fina's Light attack, Warp-Strike ('Deal Light physical damage to an enemy with a chance to add self to bonus phase'). The orbs need 2 to 4 physical hits each; a Limit Burst aimed at an orb broke it in one go.

Verified (first-hand, our play-test, full game on PC via Steam, Normal difficulty, October 26, 2026). Weakness. Early in the fight the Thundara and Ice previews showed no 'Weak' on Leviathan (Ice Splitter showed +50% and Lasswell's attack +80% after Assail). With the green orb up, Fina's Thundara preview first showed 'Weak' at +290%. From then on Leviathan's affinity panel showed a Thunder icon in the weak slot and a Water icon under the shield (resist), and Thundara previews read 'Weak' at +200% to +290%, up to +440% with Assail up in the second attempt. So Lightning is the damage to use, but we did not see it marked until the panel revealed it, and we did not work out what triggers the reveal. This matches the datamine and the video badge in the weaknesses section below.

Verified (first-hand, our play-test, full game on PC via Steam, Normal difficulty, October 26, 2026). The red glow and attempt 1 (lost). A red glow on Leviathan's turn icon warns of the big hit: heal everyone to full and have Bulwark and Shellga up before it acts. Its hits are heavy (Nichol fell to 61 HP and Lasswell to 617 at different points). In attempt 1 we cleared four orb cycles (blue, orange, green, blue) and lost with Leviathan at about 30%: the fourth big multi-hit landed while the orange orb respawned, KO'd Lasswell and left Nichol at 1 HP, and a follow-up wiped the party. We had given two Ethers to Rain and one to Fina, but MP ran dry on both healers.

Verified (first-hand, our play-test, full game on PC via Steam, Normal difficulty, October 26, 2026). Attempt 2 (won). Retry restarts the fight after Leviathan's opening hit. It took three orb cycles (blue, orange, green). Siren's song broke the blue orb on its own (it showed 'Rampage weakened!'), Ice Splitter took the orange one, and physical attacks took the green one. Each time the red glow showed, both healers cast Cura on everyone and Nichol cast Bulwark before Leviathan acted, and nobody fell. Damage came from Thundara by Fina and Lasswell at 'Weak' +440% with Assail up. Leviathan staggered once; in the bonus phase Armiger Unleashed hit for a Total of 2,867, and Nichol's Steeled Advance, then Thundara, finished it. What helped overall: Bulwark, Shellga, Siren, Assail and Cura on everyone from both healers. In this fight each character's attack cursor remembered its last target, so check the target name before you confirm.

Verified (first-hand, our play-test, full game on PC via Steam, Normal difficulty, October 26, 2026). Resonance prompt. The key layout of the Select Resonance prompt changes between uses. At Lake Dorr it read W Armiger Unleashed, A Healing Wind, D Climax Edge and S Hibernal Fury; at the Wave Lopros fight it had read W Hibernal Fury, A Armiger Unleashed, D Healing Wind and S Climax Edge. Read the labels every time instead of relying on muscle memory.

Verified (first-hand, our play-test, full game on PC via Steam, Normal difficulty, October 26, 2026). Rewards: 4,500 EXP, 2,400 gil, 60 MRP and one Magicite Shard; no overkill or stagger bonus was shown. Growth afterwards: Fina 24, Rain 24, Lasswell 24 and Nichol 23, and Lid, who was benched, also reached Lv.24.

Community-reported (video). In CGInferno's Chapter 3 playthrough Leviathan's info card reads Lv.23, type Aquatic and 40,000 HP, with a Weak-style badge beside the Lightning icon, and the result screen includes a Magicite Shard (card about 2:29:30; result about 2:30:25). The 40,000 HP figure is the video's, not ours: we did not record an HP number. Our result also included a Magicite Shard and our Thunder weakness matches the badge; the video-sourced claims here do not cover the Orbs of Light, their colours or the red glow.

Verified (first-hand, our play-test, full game on PC via Steam, Normal difficulty, October 26, 2026). Spoiler level: Chapter 3 story. After Leviathan (paraphrased), Luka's song starts to calm it inside a blue barrier. Alluvion then attacks in a cutscene and knocks the whole party down, boasts that the beast now hears only her voice, and channels red magic over the sphere. Luka checks that everyone is all right and says she must go down to the depths of the lake to pray, which is the destiny of a Warden; when she prays, a purifying light will shine in Olderion's waters, and Fina promises to remember her. Luka goes into the lake and the scene fades. On the world map at Lake Dorr the quest reads 'Chapter 3 - Wardens of the Aquapolis - Go to Olderion, the aquapolis'.

  1. Walk the south shore of Lake Dorr to the stone pillars and proceed; watch Alluvion's scene.
  2. Defeat Leviathan: break each Orbs of Light with physical attacks (Limit Bursts break one in a go), heal everyone when its turn icon glows red, and use Thundara once its panel shows Thunder as the weakness.
    Spoiler clip · Leviathan's info card at Lake Dorr · reveal

    Checked on screen · Oct 25, 2026

    2:29:13–2:29:27 · 14 sLeviathan's info card at Lake Dorr

    Check Leviathan's card (Lv.23, Aquatic) before you pick your spells for the fight.

    CGInfernoFull video ↗
    Credits

    “Final Fantasy Resonance - Full Game Playthrough Part 3 (Chapter 3)” by CGInferno · Oct 21, 2026 · Full game on PlayStation, uploaded Oct 21, 2026; version not shown

    Independent creator · no partnership implied

    Creator? Ask us to remove this

    2:29:13–2:29:27Spoiler clip
  3. Have Bulwark and Shellga up and both healers ready to cast Cura on everyone before each red glow; Ethers for the healers.
  4. At the Resonance prompt read the key labels first; Armiger Unleashed hit for 2,867 in our bonus phase.
  5. If you lose, Retry restarts the fight after Leviathan's opening hit.
  6. After the scenes, the goal reads 'Go to Olderion, the aquapolis'.
Sources for this section
12

Back in Olderion: the inn and the Archwitch Fina twist (major Chapter 3 spoiler)

Reveal solution / story details

Verified (first-hand, our play-test, full game on PC via Steam, Normal difficulty, October 26, 2026). Spoiler level: Chapter 3. Back in Olderion after Lake Dorr, a scene has Lid asking whether the water has cleared up, and the new goal is 'Stay at the inn in Olderion'. The quest-log summary, paraphrased: Olderion's God of Water is the esper Leviathan; Alluvion is 'the Veritas of the Waters'; Leviathan had been driven mad by the Divine Signet; Luka's prayer reached Leviathan and the group drove Alluvion off; to cleanse the waters the Water Maiden must descend to the bottom of the lake, and Luka accepted that duty as a Warden and bade the party farewell. El's wife is Arsha, who helps with the evacuations.

Verified (first-hand, our play-test, full game on PC via Steam, Normal difficulty, October 26, 2026). Spoiler level: Chapter 3, MAJOR TWIST. Resting at the inn (100 gil) starts a long story sequence. We skipped most of its text, so what follows is what we saw on screen plus the quest-log summary. On screen: a flooded city; Alluvion taunting that 'aquapolis' fits better now; Fina speaking oddly ('Rain, darling'); then a red-gowned 'Archwitch Fina' appears in a burst of red light, with El present.

Verified (first-hand, our play-test, full game on PC via Steam, Normal difficulty, October 26, 2026). For the rest we rely on the quest-log summary only (paraphrased): Luka's prayers cleanse the city's waters, but Alluvion returns and floods Old Town; as they battle Alluvion, Fina is transformed into a black-robed witch, and 'another Fina, Archwitch Fina, joins the party' as they head for Waterfall Way. We did not see a playable battle in this sequence: no battle started while we advanced the text. Because we skipped most of the dialogue, we cannot say whether the Alluvion clash is playable, or exactly how Fina and Archwitch Fina relate beyond that summary.

Verified (first-hand, our play-test, full game on PC via Steam, Normal difficulty, October 26, 2026). The new goal is 'Chapter 3 - Wardens of the Aquapolis - Go to Waterfall Way', with 35,641 gil left after the inn. CGInferno's video shows the same goal (about 2:43:45) and labels Fina as Archwitch Fina from about 2:41:30 (Community-reported (video)). Her stats, skills and role from our Party screen are on the party members page.

Archwitch Fina's stats and skills

  1. Return to Olderion when the goal reads 'Go to Olderion, the aquapolis' and talk through the scenes.
  2. Rest at the inn when the goal reads 'Stay at the inn in Olderion' (100 gil).
  3. Watch the sequence; the next goal reads 'Go to Waterfall Way'.
Sources for this section
13

Olderion shop prices (Chapter 3, visited after the Waterfall Way altar)

Reveal solution / story details

Verified (first-hand, our play-test, full game on PC via Steam, Normal difficulty, October 26, 2026). The shop building is north-east of the arrival plaza, marked with bag, sword and armour signs. Inside are three clerks: items on the left, weapons in the middle and armour on the right. We did not record the armour list. After buying gear the shop asks 'X purchased. Equip now?'. Smoke Bomb (3), Unicorn Horn (5) and Water Scroll I (5) show a 'Remaining' count. The party we shopped with held 38,891 gil and spent 34,350.

Verified (first-hand, our play-test, full game on PC via Steam, Normal difficulty, October 26, 2026). None of our party (Rain, Lasswell, Archwitch Fina, Nichol and Lid) could equip the Elfin Bow. The + gains in the table are the shop's comparison for that character (for Lid's Warpick, over the Mechabo Hammer). The Warpick also shows +20 in a third stat we did not name in our notes.

ItemGilNotes
Potion100
Antidote Herb100
Phoenix Down200
Eye Drops200
Smoke Bomb3003 remaining
Tent300
Mist Potion500
Ether500
Unicorn Horn5005 remaining
Hi-Potion800
Water Scroll I1,0005 remaining
Mist Ether2,500
Elfin Bow4,500Phys. Atk. 52, Mag. Atk. 50, third stat 48 (our notes label it ACC; unconfirmed)
Cross Pein Hammer5,000Phys. Atk. 51, Mag. Atk. 49 (Lid)
Hototogisu5,250Phys. Atk. 65, Mag. Atk. 43 (Lasswell +13 / +7)
Greatsword5,500Phys. Atk. 66, Mag. Atk. 31 (Rain +14 / +7)
Warpick5,500Phys. Atk. 61, Mag. Atk. 59 (Lid +28 / +26 over the Mechabo Hammer)
Sources for this section
14

Waterfall Way route: two Tablet Shards, the Altar and the way out

Reveal solution / story details

Verified (first-hand, our play-test, full game on PC via Steam, Normal difficulty, October 26, 2026). Spoiler level: Chapter 3. Waterfall Way is north-west of Olderion. Leave the town by its world-map exit, ride north-west to the river and cross the wooden bridge west. A mountain sits on the valley floor: go round it to the north, then straight north up the strip of grass between the waterfalls. On the map it is the cave icon below the lake, and its card reads 'Waterfall Way - Recommended Level 24'.

Verified (first-hand, our play-test, full game on PC via Steam, Normal difficulty, October 26, 2026). The entrance scene sets the goal 'Chapter 3 - Wardens of the Aquapolis - Go to the Altar' and the game autosaves. Nichol explains that the magic deep inside undoes the seal around the Water Shrine. There is a save point at the entrance with Save progress, Rest in a tent and Teleport. Fast Travel is refused in here ('Fast Travel cannot be used while you are in a dungeon').

Verified (first-hand, our play-test, full game on PC via Steam, Normal difficulty, October 26, 2026). Enemies here hit hard: sharks, spiky fish and purple spiky beasts. One shark glowed red before a big hit. They KO'd Nichol in the first fight and Lasswell in the third. With Archwitch Fina now a Saboteur, Rain (Leah Vision) was our only Cura caster. Bring Phoenix Downs and Ethers. We went back to shop in Olderion after the third fight (holding 38,891 gil) and bought 8 Phoenix Downs, 7 Ethers, 10 Hi-Potions, 2 Mist Ethers, a Greatsword, a Hototogisu and a Warpick. Bulwark was part of how we won the first fight.

Verified (first-hand, our play-test, full game on PC via Steam, Normal difficulty, October 26, 2026). At the altar, Rain finds an amulet and talks with El. A voice recognises them as Wardens and a glowing orb of light appears. Nichol explains that a being called Alluvion has flooded the city. The next goal is 'Go to Warden's Cape'. South of the altar corridor, a pink circle by the cliff is a shortcut link: examining it shows 'You can now return to the save point at the entrance'. Teleport then works both ways: the entrance tip reads 'Teleport to the deepest part of the dungeon' and the circle's reads 'Return to dungeon entrance'.

Verified (first-hand, our play-test, full game on PC via Steam, Normal difficulty, October 26, 2026). A big green beast, Destroyer (Lv.24), attacked us in the open area south of the altar corridor. It was a long fight; we staggered it with attacks and finished it with the Armiger Unleashed Resonance. We can't say whether it is a fixed encounter, and we didn't record its weakness icons. Destroyer is also a Mechabo Evolved hunt monster (see the side quests page); we have not played that hunt and don't know whether this fight counts toward it.

Verified (first-hand, our play-test, full game on PC via Steam, Normal difficulty, October 31, 2026). On reloading our save a Destroyer (Lv.24) ambushed us again in the corridor north of the circle, paying the same 1,800 EXP, 900 gil and 65 MRP. Our autosave was made before the first fight or it comes back; we can't say which. The corridor itself is a dead end at the Altar, so the way out is east of the circle.

  1. From the entrance save point, walk east past the first waterfall pool and cross the shallow pool. The sparkle just right of the ladder on the east side is the first Tablet Shard.
  2. Climb that ladder. On the ledge above, walk west into the waterfall: the mini-map shows a path, and a stone bridge runs behind it.
  3. Cross the bridge and keep west through the curtain of water. On a flat rock in the plunge pool, the sparkle is the second Tablet Shard. The camera turns as you move, so nudge toward the glint.
  4. Go back north into the falls and keep west. Come out on a rocky ledge, climb the stone steps north, then the ladder.
  5. Follow the wooden boardwalks east across the plunge pools, then the stone bridge east behind another waterfall. It ends at the altar cave.
  6. After the altar scene, head south. Use the pink circle by the cliff to link back to the entrance save point.
  7. From the pink circle by the cliff, walk east to the rocks at the foot of the big waterfall. The prompt there is 'F Proceed', and it leads out to the world map.
FightEXPGilMRPBonus or drop
Red fish monster and two purple spiky beasts56064026Stagger Finish Bonus
Two sharks and a spiky fish6301,56052Overkill and Stagger Finish Bonus
Shark and two purple beasts (leaving the altar)54069033None recorded
Destroyer (Lv.24)1,80090065Stagger Finish Bonus
Sources for this section
15

Waterfall Way and Gilgamesh

Reveal solution / story details

Verified (first-hand, our play-test, full game on PC via Steam, Normal difficulty, October 26, 2026). We played Waterfall Way from the entrance to the Altar and the goal 'Go to Warden's Cape'. The route, its Tablet Shards and its fights are in the section above.

Community-reported (video), CGInferno. Our notes do not record this scene. In Waterfall Way (about 2:48:45-2:49:05) Gilgamesh says the Genji Gloves are for warriors who are truly worthy, and Lasswell demands the armament he stole back.

Verified (first-hand, our play-test, full game on PC via Steam, Normal difficulty, October 31, 2026). We reached Warden's Cape and the Water Shrine without meeting any pirates, so the pirate fight in CGInferno's video (about 3:22:16-3:25:30) wasn't needed on our route. The side quests page covers The Tide from the Sky, which involves them.

  1. Stay at the inn in Olderion.
  2. Go through Waterfall Way to the Altar.
    Spoiler clip · Gilgamesh and the Genji Gloves in Waterfall Way · reveal

    Checked on screen · Oct 25, 2026

    2:48:44–2:49:14 · 30 sGilgamesh and the Genji Gloves in Waterfall Way

    In Waterfall Way you meet Gilgamesh on the lit ledge by the waterfall; he keeps the Genji Gloves for now, so carry on toward the Altar.

    CGInfernoFull video ↗
    Credits

    “Final Fantasy Resonance - Full Game Playthrough Part 3 (Chapter 3)” by CGInferno · Oct 21, 2026 · Full game on PlayStation, uploaded Oct 21, 2026; version not shown

    Independent creator · no partnership implied

    Creator? Ask us to remove this

    2:48:44–2:49:14Spoiler clip
  3. Go to Warden's Cape.
Sources for this section
16

Town of Amore and Warden's Cape

Reveal solution / story details

Verified (first-hand, our play-test, full game on PC via Steam, Normal difficulty, October 31, 2026). Leaving Waterfall Way puts you on the world map north of the falls, and a bridge runs north straight to the Town of Amore. Its card shows no level. Arriving starts a scene: Rain's arm acts up, and Nichol says Rain can't go on and they stop here. We skipped most of it. The party was fully restored afterwards, and the game autosaves.

Verified (first-hand, our play-test, full game on PC via Steam, Normal difficulty, October 31, 2026). The inn is in front of where you start, at 100 gil. The item and equipment shops are side by side on the boardwalk to the north-east, and the equipment shop has two clerks: weapons on the left, armour and accessories on the right. There's a Tablet Shard by the rocks under the tree just south-east of the north bridge.

Verified (first-hand, our play-test, full game on PC via Steam, Normal difficulty, October 31, 2026). From the north bridge, go north to the road, west past a signpost, then north up the headland toward the glowing dome. Reaching the tip starts the scene: Nichol uses his magic, and a stone bridge rises from the sea to the Water Shrine. The goal becomes 'Go to the Water Shrine'. We reached the shrine with no Tents, so 'Rest in a tent' showed x0 at its save points. Amore's item shop doesn't sell them; Olderion's does, at 300 gil.

Verified (first-hand, our play-test, full game on PC via Steam, Normal difficulty, October 31, 2026). Prices are below; the armour clerk also sold Monk's Prayer Beads, so it's a good stop before the boss. We bought the Knight Armor for Rain, replacing a Phalanx, for +31 / +14 and more HP.

ItemGilNotes
Potion100
Antidote Herb100
Phoenix Down200
Smoke Bomb3003 remaining
Mist Potion500
Ether500Restores 50 MP
Unicorn Horn500
Hi-Potion800
Gold Needle800
Mist Ether2,500Restores 50 MP for all allies
Icebrand7,700Phys. Atk. 75, Mag. Atk. 36; adds Ice to non-elemental physical attacks (Rain +9 / +5)
Shiranui7,35076 / 50 (Lasswell +11 / +7)
Buster Mace7,00058 / 57 (Lid -3 / -2 against the Warpick)
Leather Whip7,00067 / 94, third stat 10 (Fina +6 / +9)
Disciple's Grimoire4,50037 / 69
Knightly Tactics6,30045 / 81 (Nichol +8 / +12)
Bard's Tunic4,500Phys. Def. 65, Mag. Def. 73, third stat 21
Kenpo Gi5,00085 / 66
Knight Armor5,500103 / 62, third stat -25, HP +140 (Rain +31 / +14)
Idaten's Shoes600Third stat 5
Mage's Glasses800MP +15
Heart Anklet1,000HP +10%
Monk's Prayer Beads1,500Prevents Charm
Jeweled Ring2,000Prevents Petrify and Paralysis
Calm Armlet2,000Prevents Confuse and Berserk
Sources for this section
17

Water Shrine route: pillars, crystals and crates

Reveal solution / story details

Verified (first-hand, our play-test, full game on PC via Steam, Normal difficulty, October 31, 2026). The card reads 'Water Shrine - Recommended Level 26', and inside the goal is 'Go deeper into the Water Shrine'. The shrine is one puzzle: the three white pillars we found share one water level, floating crates become bridges when it rises, and you can walk into a loose crate to push it when it's low. Tall crystals open the next part. This is the order that worked for us; there may be a shorter one.

Verified (first-hand, our play-test, full game on PC via Steam, Normal difficulty, October 31, 2026). The three chests we opened hold a Lightning Scroll I x3, a Piercing Mace and a Calm Armlet. The scrolls are worth keeping for Alluvion, and the Calm Armlet prevents Confuse and Berserk; we saw Berserk in that fight. The small orange glows by the arch statue and in the octagon chamber are torches, not items. We also saw a chest and a ladder in the second boat room that we didn't reach.

Verified (first-hand, our play-test, full game on PC via Steam, Normal difficulty, October 31, 2026). A Viridian Pot (Lv.22) roams the east terrace of the second boat room. Examining it starts a fight. A physical attack did 2 damage, and we saw no visible change to its HP bar from magic or Gravity over five turns. It didn't attack us in that time, and we used Escape. We don't know what beats it or what it pays.

Verified (first-hand, our play-test, full game on PC via Steam, Normal difficulty, October 31, 2026). Fights here came as Megalodon (Lv.26) with two Red Marshmallows (Lv.25), who cast Fire on the whole party; Ribosome (Lv.25) with two blue spirits; two Objet d'Art (Lv.23) with a green winged imp; and two imps, who cast Silence, with two Red Marshmallows. Archwitch Fina's Dystopia killed the two blue spirits.

  1. From the entrance, go north up the stairs to a terrace, then west through the arch at its west end.
  2. In the waterfall room, stand at the north-east corner of the terrace under the marker post for 'F Board'. Row north, west under the rail, then north through the west arch.
  3. Get off at the steps with F Disembark and examine the tall crystal. The water drops.
  4. Board again from the top of those steps, row back to the enclosure's dock and walk to the first terrace. At its east end a ladder goes down over the east wall to the drained level. Follow it to the central platform.
  5. Take the corridor east from the central platform to the crate room. Stand just south of the white pillar and examine it: the water drops and stairs appear to the south-east.
  6. Down the stairs, go east along the top of the crate row into a lane. Up the steps at the lane's north end is a chest: Lightning Scroll I x3.
  7. Get on the north side of the lane's loose crate and walk south twice, so it joins the east end of the row as a fifth crate.
  8. Back up the stairs, examine the pillar again. The water rises and the five crates float as a bridge east from the terrace's south-east corner.
  9. Cross to the east room and examine the big crystal from its west side. A short scene shows the arch between the statues.
  10. Cross back along the north side of the rail and examine the pillar to lower the water. Leave by the door at the south end of the terrace's west wall (the arch north of it is solid) and return west to the central platform: the arch between the statues now has a floor. Go north through it.
  11. Stairs lead down to a walkway and a line of arches. West under the arches, six crates lead to a chest: Piercing Mace.
  12. Go back east to a corridor, north, then west up a stair to a terrace with a second pillar. Examine it: the water rises and the six crates become a bridge west.
  13. Cross, go south along the west terrace and over a crate bridge to a small platform with a third pillar. Examine it from just south-east: the water drops, showing stairs south.
  14. The stairs end at a dock and a second boat. Board with F, row north, then slightly east to the landing below a tall block. Get off and climb the ladder on its south face to a crystal. Examining it shows the central stairway.
  15. For the Calm Armlet: from that landing, walk the lane on the block's west side and push its crate north to the end. Row back to the dock, climb to the third pillar and raise the water. The crates then join up east from the west terrace to the walled chest.
  16. Lower the water at the second pillar so the stairs are clear, return through the arch and go south along the central walkway.
  17. At its south end, take the south-west staircase down, go north along the wall and climb down the ladder. A walkway runs east to an octagon with four blue flames.
  18. Examine the octagon's centre: it's a lift. In the chamber below, the save point is north-west of the lift. Save, then go through the arch north of it. A long scene starts and leads straight into the boss.
Sources for this section
18

The Water Shrine and Alluvion (Lv.26)

Reveal solution / story details

The last objectives are 'Go to the Water Shrine' (Recommended Level 26) and 'Go deeper into the Water Shrine'. At the end you fight Alluvion (Lv.26) with two Prism Cores (also Lv.26), going by their target labels. This section is from CGInferno's video; our own fight and the chapter's ending are in the next two sections.

CGInferno's win paid 6,520 EXP, 10,374 gil (with an Overkill Bonus), 91 MRP (with a Stagger Finish Bonus) and an Azure Amulet. Then the card 'Chapter 3 Wardens of the Aquapolis COMPLETE' appears with the trophy 'Olderion Blues'.

  1. Go to the Water Shrine and head deeper.
  2. Defeat Alluvion and the two Prism Cores.
    Spoiler clip · Alluvion and its two Prism Cores (all Lv.26) under one attack · reveal

    Checked on screen · Oct 25, 2026

    3:56:46–3:56:54 · 8 sAlluvion and its two Prism Cores (all Lv.26) under one attack

    Alluvion (Lv.26) is fought with two Lv.26 Prism Cores at the end of the Water Shrine.

    CGInfernoFull video ↗
    Credits

    “Final Fantasy Resonance - Full Game Playthrough Part 3 (Chapter 3)” by CGInferno · Oct 21, 2026 · Full game with PlayStation trophy pop-ups elsewhere in the video, uploaded Oct 21, 2026; version not shown

    Independent creator · no partnership implied

    Creator? Ask us to remove this

    3:56:46–3:56:54Spoiler clip
Sources for this section
19

Alluvion (Lv.26): how we won on the first attempt

Reveal solution / story details

Verified (first-hand, our play-test, full game on PC via Steam, Normal difficulty, October 31, 2026). Party: Rain, Lasswell and Archwitch Fina at Lv.26, Nichol at Lv.25. We won on the first attempt, paying 6,850 EXP, 8,700 gil, 70 MRP and an Azure Amulet, with no bonuses. Escape is greyed out, and Nichol's Steal reported 'There's nothing to steal!'.

Verified (first-hand, our play-test, full game on PC via Steam, Normal difficulty, October 31, 2026). Thunder is the weakness. Its 'Weak' tag appears once you've hit her with it. Lasswell's Thundara (Tronn Vision, 15 MP) did about 710 to 730 a cast, or 1,086 while she was staggered. Weak previews read +200% to +290%, +440% with Nichol's Formation: Assail up, and up to +602% just after Null Moon. A thrown Lightning Scroll II did 1,980. Banishra did just 144.

Verified (first-hand, our play-test, full game on PC via Steam, Normal difficulty, October 31, 2026). Prism Cores keep coming, in waves of two, two, three and three. They're also weak to Thunder. Archwitch Fina's Dystopia hits everything: 1,254 on Alluvion on its first cast and up to 1,442 later, with the cores taking roughly 1,160 to 1,370. Its text adds 10% per consecutive use. It's what we'd bring again.

Verified (first-hand, our play-test, full game on PC via Steam, Normal difficulty, October 31, 2026). Watch for a red glow and a warning triangle on her icon in the turn queue. After the first two cores had gone she said 'Take this!' and used Graceful Deluge, which took 235 to 409 from each of us and added two debuffs. The worse one came with three cores up: it removed all three, KO'd Lasswell and Nichol through Bulwark and left Fina on 38. Top everyone up when the warning shows, though a red glow doesn't always mean a big attack is next.

Community-reported (datamine), NiaMeowDB: Alluvion's special skill grows stronger with each Prism Core. That fits what we saw, but we can't say whether killing the cores first prevents it.

Verified (first-hand, our play-test, full game on PC via Steam, Normal difficulty, October 31, 2026). She also casts Gravity, which halved Rain's HP, plus Ruin and Water. Nichol was Charmed, and Rain and later Lasswell went Berserk, which took Rain, our only healer, out of our control. The shrine's Calm Armlet should block Berserk, and Monk's Prayer Beads should block Charm. We hadn't equipped the Armlet, and our notes don't record who wore Beads in this fight.

Verified (first-hand, our play-test, full game on PC via Steam, Normal difficulty, October 31, 2026). Staggered, she takes far more. Fina's Limit Burst Chaotic Convergence did 5,016 in the stagger window. 'Tch...not enough power...' with her HP low isn't the end, as three new cores follow. Items used: one Lightning Scroll II, four Lightning Scroll I, one Mist Ether and one Phoenix Down.

  1. Open with Nichol's Formation: Bulwark (8 MP, raises both defences for 3 turns). Renew it as it runs out.
  2. Have your Thunder user cast every turn. Throw any Lightning Scrolls you have.
  3. Use Dystopia while cores are up, if you have Archwitch Fina.
  4. Keep Rain on Cura for everyone (Q at targeting selects all). A Mist Ether restores 50 MP to everyone.
  5. Cast Formation: Assail (6 MP, +30% stagger power for 3 turns) before you start pushing her stagger.
  6. Save Limit Bursts for the stagger. Null Moon also makes her easier to stagger for 3 turns.
  7. Drain (12 MP) heals the caster: it took Fina from 583 to full 1,220 once. A Phoenix Down revives at 25% HP.
Sources for this section
20

After Alluvion: El, the Crystal, Fina's return and the end of Chapter 3 (major spoiler)

Reveal solution / story details

Verified (first-hand, our play-test, full game on PC via Steam, Normal difficulty, October 31, 2026). Spoiler level: Chapter 3, major. The scene before the fight has El alone before the Water Crystal, trying to use a Warden's life to strengthen it. Alluvion strikes him down and shatters the Crystal as the party arrives.

Verified (first-hand, our play-test, full game on PC via Steam, Normal difficulty, October 31, 2026). We skipped most of the text after the fight, so this comes from what we saw plus the quest-log summary, paraphrased. Alluvion, dazed, asks what she's doing there and leaves through a dark portal; Fina names the Paladian Divine Signet. El is fatally wounded. With the last of his strength he wishes to protect everyone as a Warden, and the Crystal shards glow in response. Archwitch Fina uses their power to treat Rain's arm. Rain's childhood dream continues and he recalls having met her. Having used up her power, she turns back into her other self.

Verified (first-hand, our play-test, full game on PC via Steam, Normal difficulty, October 31, 2026). The game then shows 'Archwitch Fina left the party.' and 'Fina joined the party!'. The goal becomes 'Go to Olderion, the aquapolis'. Fast Travel doesn't work inside the shrine: Teleport to the entrance, walk south to 'F Proceed', then use the Destination List (M, then 1). Arriving starts a scene with Arsha, and the goal becomes 'Go after Arsha'.

Verified (first-hand, our play-test, full game on PC via Steam, Normal difficulty, October 31, 2026). A choice comes up in that scene: how Rain answers Nichol. The options are to ask for strategy pointers, to say you're a proper team now, or to tell him to be himself. We picked the first, then saw 'Nichol's HP increased by 30!'. We don't know what the others give. We skipped most of the rest.

Verified (first-hand, our play-test, full game on PC via Steam, Normal difficulty, October 31, 2026). The card 'Chapter 3 Wardens of the Aquapolis COMPLETE' follows, with the Steam achievement 'Olderion Blues' ('Clear chapter 3'). You return to the world map outside Olderion with the goal 'Go to Zoldaad from the port'.

  1. Save at the pink circle where you regain control after the scene.
  2. Teleport to the entrance, walk out and fast-travel to Olderion.
  3. For 'Go after Arsha': from the arrival plaza go east down the steps, along the canal and up the bridge stairs on the north side.
  4. At the top go west over the bridge's crown to a walkway, not on to the Moogle, which is a dead end. Go east along the walkway to the long staircase beside the water wheel.
  5. Climb it, go east along the bridge and north across a plaza to the stairs at its north end. The scene starts there.
Sources for this section
21

Boss weaknesses and what to watch for

Reveal solution / story details

From NiaMeowDB's datamine (Community-reported; built from the game's files, no version stated), which lists the Lightning element as Thunder. That matches a Lightning hit marked Weak on the Water Dragon and the weak-style badge beside the Lightning icon on Leviathan's card in CGInferno's video.

Verified (first-hand, our play-test, full game on PC via Steam, Normal difficulty, October 26, 2026). Wave Lopros (Lv.20): weak to Ice. Lasswell's Ice Splitter showed 'Weak' on it in the target preview, and Blizzara showed +50% in an earlier attempt. We did not test other elements, and we have no datamine entry for it.

Community-reported (datamine), from NiaMeowDB: Water Dragon (Lv.21): weak to Thunder, takes half damage from Water, and has Double Action. Leviathan (Lv.23): weak to Thunder and takes half damage from Water; it becomes weakened when the Orbs of Light are defeated, and enraged if the battle drags on.

Verified (first-hand, our play-test, full game on PC via Steam, Normal difficulty, October 26, 2026). Water Dragon: we did not see a 'Weak' marker. The Thundara and Blizzara previews showed no weakness and the affinity icons stayed '?', yet Thundara still staggered it (Total 1,070). So the Thunder weakness above is Community-reported (datamine and video) for us, not confirmed.

Verified (first-hand, our play-test, full game on PC via Steam, Normal difficulty, October 26, 2026). Leviathan (Lv.23): the datamine's Thunder weakness, Water resist and weakened state all showed up in our play. Thunder: its affinity panel put a Thunder icon in the weak slot once revealed, and Thundara previews then read 'Weak'. Water: a Water icon sat under the shield. Weakened: killing the Orbs of Light with physical attacks showed 'Rampage weakened!'. The 'Weak' marker was not there at the start of the fight, so check the panel again after the first orb cycles. We did not record the enraged state the datamine mentions, and the orbs have their own resistances (blue resists Ice, green resisted Light), covered in the Leviathan section above.

Alluvion (Lv.26): weak to Thunder and immune to Water. Its special skill grows stronger with each Prism Core (NiaMeowDB doesn't say whether that counts cores still standing or cores it has absorbed), and it counters when KO'd.

Spoiler clip · The Water Dragon's info card after Libra · reveal

Checked on screen · Oct 25, 2026

2:09:15–2:09:29 · 14 sThe Water Dragon's info card after Libra

Use Libra on the Water Dragon to read its card: Lv.21, Dragon, 24000 HP, and it drops Water Scroll I.

CGInfernoFull video ↗
Credits

“Final Fantasy Resonance - Full Game Playthrough Part 3 (Chapter 3)” by CGInferno · Oct 21, 2026 · Full game on PlayStation, uploaded Oct 21, 2026; version not shown

Independent creator · no partnership implied

Creator? Ask us to remove this

2:09:15–2:09:29Spoiler clip
Sources for this section

You’re ready when…

Your checklist

0 of 5 complete · Loading saved progress…

Did this answer your question?

Sources · 4Reported · Walkthrough · checked 31 Oct 2026 · Research checked 31 Oct 2026
Kingy play test: Final Fantasy Resonance full game, demo save transfer to Felicitas ↗First-hand play of the full game on Steam (app 3259780, Steam build 24250053, title screen 1.0.1.0) on the same Windows 11 PC and Steam account as the October 21 and 22 demo tests, keyboard, Normal difficulty, October 24, 2026. Covers the first launch of the full game with demo saves on the PC (automatic transfer), loading the demo autosave after Hell's Rider, the rest of the capital (shops and pickups), the sub-quest Dream of an Idealist from start to reward, Fina joining, the desert crossing to the Village of Kol and its chocobos, and the road to the Town of Felicitas and its equipment shop, with the party at Lv.9-11 and Fina at Lv.6-10. Screenshots of the game window, other windows masked; story cutscenes were skipped with the skip key. Play then went on that afternoon and evening through the Kolobos Ruins and its boss, The Hunger (party Lv.11, Fina Lv.9), back to Felicitas, its item shop and the start of the sub-quest Secrets Unearthed. Later that evening: Secrets Unearthed through to its reward, the desert crossing to Grandport Harbor (party Lv.12, Fina Lv.10-11), an optional Antlion battle we fled, Grandport's shops and notice board, the ship's captain who sets 'Visit Siren', and the sub-quest The Weight of Mercy from start to reward; Tronn's and Leah's Vision Details screens were read again. Play then reached the Grandport inn and the first floors of Siren's Tower (party Lv.11-13), where Leah reached Mastery Rank 6. Late that night: the rest of Siren's Tower, Gilgamesh (party Lv.13/13/12), Siren (Lv.14/14/13), the Moogle of Light in Grandport, the end of Chapter 1 and the start of Chapter 2 on Dirnado (Lv.15); from Siren's Tower onward, cutscene dialogue was read on screen. Later still: The Weight of Mercy completed in Felicitas, and its reward, the Iwakirimaru, inspected in Lasswell's weapon list; the tooltips of the weapons the party was wearing (Crimson Saber, Shiden, Reincarnation; likely their starting weapons, not confirmed) were read on the Equipment & Abilities screen. Fina on joining (Lv.6): Role Medic, skills Shining Arrow, Cure and Esuna, Limit Burst Holy Ray (Light magic damage to all enemies, scaling with sanctity). Played October 24-25, 2026: Chapter 2 on Dirnado from the landing pier to Dilmagia (shops, the Gather information leads, the shipyard), Lid joining at Lv.11, and Mt. Thunderclap (Recommended Level 13) through its paid 'easy route' to the boss Liquid Thunder (Lv.13); party Lv.15, Lid Lv.11-12, Fina Lv.14-15. The normal (unpaid) route over the mountain was explored for about 25 minutes without finding the way up, so it is not mapped. We used Shiney's video to find the boss's spot after not finding it ourselves. Played October 25, 2026: the Dwarven Forge (Borin, its layout, shops, inn, Moogle of Light, chest and back exit), the Mom Bomb fight (Lv.14) with our first Esper summon (Siren), the two Dirnado Sanctums of Light for the Zidane and Noctis Visions, Zidane's first awakening, and the world-map road to the Mobliz Shipyard (card Recommended Level 16) as far as its entrance scene and the Security Eye fight; party Lv.16-17, Lid Lv.13-14. We used Shiney's video for the Mom Bomb trigger spot and the Forge's back exit after not finding them ourselves, and to see the approach to the second sanctum. Played October 25, 2026: the rest of the Mobliz Shipyard (entrance hall, portrait hall save point, the offline centre elevator, the west lift, the generator-room power switch, the floor numbers 5, 3 and 8, Borin on the roof, the lever room and lever 16, the blocked portrait hall, the Epimetheus event fight, the cargo-train tunnel with Evan and Mechabo, and the Adrastea boss fight, Lv.16), ending at the Dwarven Forge tunnel and the objective 'Go to the Wind Shrine'; party Lv.16-18 and Lid Lv.14-16. The power switch was found and used in game. Later on October 25, 2026 (party Lv.18): the Forge corridor scene with Verun and the Chapter 2 sub-quests Arise, Mechabo! (completed), Lyrical Riddles (completed, including the Mobliz Shipyard portraits and the old man in Dilmagia) and the start of Mechabo Evolved (accepted, no hunt done), plus Quick Heal, field Phoenix Down use and the Dwarven Forge inn. Played October 25, 2026: the world-map road from the Mobliz Shipyard to the Wind Shrine (area card Recommended Level 18), the shrine's entrance scene, its lamps, lifts and floating pads, the route from the entrance to the save balcony (walked three times), the Tsukiyo no Tachi chest, the shrine's enemies, both save points and their menu, the Dwarven Forge restock, the Wind Crystal scene, Aether (Lv.18; lost twice, won on the third attempt) and the scene after him, then (October 26) Dilmagia, the rooftop scene with Lid, the Chapter 2 complete card and the airship deck up to Lid's Strength +3 box; party Lv.18-20 and Lid Lv.18-19. We never saw an HP number for Aether, and we did not test Wind against him or what Sylph's Tiara does. We used Shiney's video only as a cross-check for one staircase and to see a route we could not make connect. Played October 26, 2026 (same Steam install, Normal difficulty, keyboard; party Lv.19-22): the end of Chapter 2 in Dilmagia, the crash and the start of Chapter 3 on the Olderion Federation world map, Olderion (arrival, inn and save point, The Drofox Gazette Vol. 3, the leads, the jump-rope girl, Nichol on the canal pier), the road to the Cave of Waters (Recommended Level 20), Nichol joining and his two tutorials, the cave's boat rooms (Magicite Shard, Shuriken x3, Ice Scroll I x2 and Ninja Gear chests, two Tablet Shards, the pre-boss save point), Nichol's Lv.20 level-up screen, Fina's Lv.21 level-up screen and Noctis's Mastery Rank 5 screen, and five attempts at the Cave of Waters boss, Wave Lopros (four lost, the fifth won at party Lv.22 with Lasswell, Fina, Nichol and Rain; the result screen, rewards and level-ups were read in game). Later that day: the way out of the cave, Lid's Level Up screen at Lv.22, then Olderion again after the boss: the scene with Nichol and Luka, the Moogle of Light's Vision Enhancement screen, the three purification spots, the Olderion Tablet Shard, the scene with El, the point-of-no-return warning for Old Town and, after it, the first forced fight in Old Town against a Ribosome and two small monsters (the Old Town card reads Recommended Level 21). Then, still on October 26 (party Lv.22-24): the rest of Old Town with the party split (Rain, Fina and Lid), four more street fights including the Ogre Mage, an Ether chest, the Old Town save point and the soldier beside it, and the Water Dragon (two lost attempts and a win on the third; the defeat screen, the result screen and the growth screen were read in game), the story scenes after it and the objective 'Go to Lake Dorr'; plus Lid's Level Up screen at Lv.23, the Equipment & Abilities screens and Vision pickers for Rain, Fina and Lid, and the skill texts of Lid and Fina. Then, still on October 26 (party Lv.23-24): the Lake Dorr route (the Cave of Waters crystal chamber scene, the ladder shaft and its Tablet Shard, the world-map walk to Lake Dorr and its area card, Recommended Level 23), Leviathan (Lv.23; lost once with it near 30% HP, won on the second attempt after Retry; the result screen was read in game), the scenes after it and the growth screen, then Olderion again (Lid's scene, the quest-log summary and the inn) and the long Archwitch Fina story sequence. We skipped most of that sequence's text and rely on the quest-log summary for the twist, and we saw no playable battle in it. Last came the new goal 'Go to Waterfall Way', Archwitch Fina's Party screen at Lv.24 and the in-game texts of eight of her skills. We then played Waterfall Way to the Altar on October 26: the route and its two Tablet Shards, the Altar scene, the entrance link, four fights including Destroyer (Lv.24), Olderion's item and weapon prices, the Level 2 Limit Burst tutorial and more of Archwitch Fina's skill texts. We stopped before Warden's Cape. The Olderion inn price, its save point and the gondola Sailor's destinations were also noted. For the route we also glanced at text guides (RPG Site, Game8) that agree with the chest contents; they are not our evidence.Reported ·
Kingy play test: Final Fantasy Resonance full game, Water Shrine, Alluvion and Chapter 4 to the capital (October 31, 2026) ↗First-hand play of the full game on Steam (app 3259780, title screen 1.0.1.0) on the same Windows 11 PC and Steam account as the October 24 to 26 tests, keyboard, Normal difficulty, October 31, 2026, continuing the same save. Covers leaving Waterfall Way, the Town of Amore and its shops, Warden's Cape, the Water Shrine route with its pillars, crystals, crates and three chests, the Viridian Pot encounter, Alluvion (beaten on the first attempt) the scenes after it, and Olderion to the 'Chapter 3 COMPLETE' card and the Steam achievement 'Olderion Blues'. We skipped most of the text of the scenes after Alluvion and rely on the quest-log summary for it. We got stuck in the shrine and read the route summary on NiaMeowDB's Chapter 3 page; it isn't our evidence, and everything here is what we then saw ourselves. Later the same night: the Olderion Federation port and ship, the Zoldaad landing, the route to Mozul Station and its shop, the train's party talks and three soldier fights, the walk to the capital with Red Elemental, Vamplant and Magma Tortoise fights, then Zoldaad's station square, its notice board (The Drofox Gazette Vol. 4), the Imperial Hotel, one esper rumour and the World Map's Destination List (party Lv.26-27). We skipped most train and volcano scene text. We stopped at the goal 'Gather information in Zoldaad' without finding what advances it; while stuck we searched and read KeenGamer's walkthrough summary and NiaMeowDB's Chapter 4 objective list, but neither is our evidence and neither told us the spot.Reported ·
Final Fantasy Resonance - Full Game Playthrough Part 3 (Chapter 3) ↗Community-reported (video), not a Kingy play test. Video KEVsfpqDP-I, uploaded October 21, 2026: a 4 h 15 min playthrough of Chapter 3 with PlayStation trophy pop-ups; version not shown, no chapter markers. Frames checked October 24 (HUD objectives, all headed 'Chapter 3 - Wardens of the Aquapolis'): an airship crash on a beach (6:45–8:10), 'Go to Olderion, the aquapolis' (8:38), 'Gather information in Olderion' with the area card 'Olderion, the Aquapolis' (20:53), 'Talk to the Warden of the Waters' (30:30), 'Go to the Cave of Waters' (34:20–1:14:20; a detour to Rukh Cave, Recommended Level 26, and the Lv.26 Rukh at 1:01:52–1:14:00), Nichol in the party (1:26:00), a save slot 'Cave of Waters, Lv.23' (1:26:52; the save screen lists the slots as 'Normal'; version not shown), Nichol saying to take out the two in front first (1:27:05), an unlabelled blue winged dragon guarded by two smaller spiked creatures (1:27:27–1:30:50), Luka calling Nichol her brother (about 1:31:40), 'Go to Olderion, the aquapolis' then 'Purify the waters with Luka' (1:32:55–1:34:10), 'Go to Old Town, Olderion' (1:54:15) and its area card, Recommended Level 21 (1:56:00), a Lv.21 Ribosome fought by the full party (1:56:55), Lasswell staying behind as the party splits (1:58:40–1:59:40), 'Defeat the monsters' (2:00:40) and a Lv.20 Ogre Mage fought by Rain, Fina and Lid (2:02:50), the Water Dragon (Lv.21, Dragon, 24,000 HP, drop Water Scroll I, uses Aqua Breath, a Lightning hit marked Weak; info at 2:09:20; result EXP 1800, Gil 3000, MRP 78 with a Stagger Finish Bonus, Water Scroll I x1 at 2:12:20), 'Go to Lake Dorr' (2:16:55) and its card, Recommended Level 23 (2:21:24), Leviathan (Lv.23, Aquatic, 40,000 HP on its info card at 2:29:30; a Weak-style badge beside the Lightning icon; result with a Magicite Shard x1 at 2:30:25), 'Stay at the inn in Olderion' (2:37:00), Fina labelled Archwitch Fina (from 2:41:30), 'Go to Waterfall Way' (2:43:45) and its card, Recommended Level 24 (2:44:12), 'Go to the Altar' (2:47:10), Gilgamesh saying the Genji Gloves are for warriors who are truly worthy, and Lasswell demanding the stolen armament back (2:48:45–2:49:05), 'Go to Warden's Cape' (2:57:40), the area card 'Town of Amore' with no level (2:58:52), an optional Mindflayer Cave fight (about 3:11:40–3:19:10), a pirate saying a Warden can forget about talking to their captain (3:22:30) and a battle against two pirates on a dirt path (3:22:45, one using 'Knife of Poison'; 3:22:56), the party back on the path after the battle (3:24:37), then the jetty (from 3:24:49), a fight with pirates on a jetty path and a scene with the pirate Mercedes on the jetty (3:22:16–3:25:30; no area card shown), 'Go to the Water Shrine' (3:34:18), then the area card 'Water Shrine', Recommended Level 26, with 'Go deeper into the Water Shrine' (3:36:51), Alluvion (Lv.26) with two Lv.26 Prism Cores (target labels at 3:56:50), Alluvion's result, settled, at 4:00:02 (EXP 6520, Gil 10374 including a 2394 Overkill Bonus, MRP 91 including a 21 Stagger Finish Bonus, Azure Amulet x1) and 'Chapter 3 Wardens of the Aquapolis COMPLETE' with the trophy 'Olderion Blues' (4:15:16).Walkthrough ·
Enemies: story bosses (NiaMeowDB) ↗Community-reported (datamine), not a Kingy play test and not affiliated with Square Enix. Enemy pages built from the game's files (/db/final-fantasy-resonance/enemies/<name>-<id>); no game version stated; its reuse page allows individual facts with credit. Checked October 25, 2026, one page per boss: Adrastea (407: Lv.16, 25,000 HP, Machina, weak to Thunder and Water, readies a special skill when its stagger gauge is reduced); Aether (409: Lv.18, 34,000 HP; 2063: Lv.46, 200,000 HP; weak to Ice, immune to Wind, summons minions); Water Dragon (2012: Lv.21, 24,000 HP, weak to Thunder, Water halved, Double Action); Leviathan (459: Lv.23, 40,000 HP, weak to Thunder, Water halved, weakened when the Orbs of Light are defeated, enraged if the battle drags on); Alluvion (411: Lv.26, 48,000 HP; 2065: Lv.48, 210,000 HP, First Strike; weak to Thunder, immune to Water, its special skill grows with each prism core, counters when KO'd); Ignis (413: Lv.27, 56,000 HP; 2064: Lv.47, 205,000 HP; weak to Water, Fire halved, enraged when attacked, rage intensifies when hit with its weakness); Emperor of Zoldaad (426: Lv.30, 52,000 HP, weak to Water, summons praetorians, Poison attacks); Lazarov (415: Lv.30, 45,000 HP, weak to Earth, summons experiments, Sleep attacks); No. 999 (2031: only a Lv.32 entry, 24,000 HP, weak to Wind); Slagworm (305: Lv.33, 90,000 HP, weak to Wind, immune to Earth, swallows a target); Liquid Flame (439: Lv.34, 78,000 HP, weak to Ice and Water, absorbs Fire, counters physical attacks, high physical defense); Tellus (421: Lv.39, 135,000 HP; 2066: Lv.49, 220,000 HP; weak to Wind, Earth halved, counterattacks when its rules of engagement are disobeyed); Archwitch Fina (416: Lv.38, 100,000 HP, weak to Water and Light, Dark halved, Paradise Lost strengthens Dark, full power at low HP); Lux (417: Lv.41, 125,000 HP, weak to Dark, Light halved, Blind attacks, dispels buffs, a powerful physical attack); Elfdrit (418: Lv.42, 120,000 HP, weak to Fire and Light, Dark halved, restores its stagger gauge, Poison, Sleep and Paralysis attacks); Archaeoaevis (448: Lv.40, weak to Wind, weakness changes, Double Action); Dad Bomb (446: Lv.40, 140,000 HP, weak to Fire, Ice halved, self-destructs at low HP, Double Action); Test Rider (160: Lv.40, weak to Earth and Light, switches between enraged and calm states); Yakhanati (250: Lv.40, weak to Wind and Dark, shifts between states that make physical or magic attacks ineffective); Arch Gargoyle (2058: Lv.40, weak to Wind and Light, revives the other Arch Gargoyle when alone); Dragon (443: Lv.42, weak to Thunder, a powerful breath when its countdown reaches zero); Gelidus (420: Lv.43, 200,000 HP, weak to Fire, Ice halved, Deprotega, behaviour changes when the whole party's physical defense is lowered); Umbra (2067: Lv.50, 260,000 HP, weak to Light, Dark halved, counters Light attacks, charges power when taking non-Light damage); Behemoth (422: Lv.52, 320,000 HP, weak to Wind and Light, Earth halved, extremely high physical and magic defense, Double Action); Sol (423: Lv.52, 210,000 HP, weak to Dark, the three traits on its Libra card); Left Hand (593: Lv.55, 60,000 HP, weak to Wind, resurrects when the Right Hand is defeated); Right Hand (594: Lv.55, 60,000 HP, weak to Earth); Chaotic Darkness (424: Lv.55, 180,000 HP, weak to Light, special skill with both hands present, counters when KO'd; 425 and 697: Lv.55, 320,000 HP, weak to Light, immune to Dark, 425 consuming The Keen of Fury to buff and heal at low HP); The Keen of Fury (690: Lv.53, 180,000 HP, weak to Earth, big attack and defense boosts at low HP). Not found: Prism Core, Wraith Praetorian, Byblos and the other four named foes of the last battle; a Lv.55 Sol entry (2068) lists 13,500 HP and isn't used. Pages: https://meowdb.com/db/final-fantasy-resonance/enemies/aether-409, https://meowdb.com/db/final-fantasy-resonance/enemies/mom-bomb-447, https://meowdb.com/db/final-fantasy-resonance/enemies/adrastea-407, https://meowdb.com/db/final-fantasy-resonance/enemies/water-dragon-2012, https://meowdb.com/db/final-fantasy-resonance/enemies/leviathan-459, https://meowdb.com/db/final-fantasy-resonance/enemies/alluvion-411, https://meowdb.com/db/final-fantasy-resonance/enemies/ignis-413, https://meowdb.com/db/final-fantasy-resonance/enemies/emperor-of-zoldaad-426, https://meowdb.com/db/final-fantasy-resonance/enemies/lazarov-415, https://meowdb.com/db/final-fantasy-resonance/enemies/no-999-2031, https://meowdb.com/db/final-fantasy-resonance/enemies/slagworm-305, https://meowdb.com/db/final-fantasy-resonance/enemies/liquid-flame-439, https://meowdb.com/db/final-fantasy-resonance/enemies/tellus-421, https://meowdb.com/db/final-fantasy-resonance/enemies/archwitch-fina-416, https://meowdb.com/db/final-fantasy-resonance/enemies/lux-417, https://meowdb.com/db/final-fantasy-resonance/enemies/elfdrit-418, https://meowdb.com/db/final-fantasy-resonance/enemies/archaeoaevis-448, https://meowdb.com/db/final-fantasy-resonance/enemies/dad-bomb-446, https://meowdb.com/db/final-fantasy-resonance/enemies/test-rider-160, https://meowdb.com/db/final-fantasy-resonance/enemies/yakhanati-250, https://meowdb.com/db/final-fantasy-resonance/enemies/arch-gargoyle-2058, https://meowdb.com/db/final-fantasy-resonance/enemies/dragon-443, https://meowdb.com/db/final-fantasy-resonance/enemies/gelidus-420, https://meowdb.com/db/final-fantasy-resonance/enemies/aether-2063, https://meowdb.com/db/final-fantasy-resonance/enemies/ignis-2064, https://meowdb.com/db/final-fantasy-resonance/enemies/alluvion-2065, https://meowdb.com/db/final-fantasy-resonance/enemies/tellus-2066, https://meowdb.com/db/final-fantasy-resonance/enemies/umbra-2067, https://meowdb.com/db/final-fantasy-resonance/enemies/behemoth-422, https://meowdb.com/db/final-fantasy-resonance/enemies/sol-423, https://meowdb.com/db/final-fantasy-resonance/enemies/left-hand-593, https://meowdb.com/db/final-fantasy-resonance/enemies/right-hand-594, https://meowdb.com/db/final-fantasy-resonance/enemies/chaotic-darkness-424, https://meowdb.com/db/final-fantasy-resonance/enemies/chaotic-darkness-425, https://meowdb.com/db/final-fantasy-resonance/enemies/chaotic-darkness-697, https://meowdb.com/db/final-fantasy-resonance/enemies/the-keen-of-fury-690.Reported ·

Stuck? Tell us where

Say where you’re stuck in Final Fantasy Resonance. You get one hint at a time from a published kingy.wiki guide, and the answer and its clip stay covered until you ask.

If nothing matches, we keep your words (without emails, links or long numbers) to decide which answers to write next. Privacy