Gilgamesh: every fight, and the Battle at the Big Bridge
Quick answer
Gilgamesh first turns up in Siren's Tower in Chapter 1, steals the Genji Gloves and flees. In Chapter 6 he challenges the party on the airship deck at Lv.40; a Cactuar, a Tonberry and a Bomb join in, and the win paid 10,000 EXP, 12,000 gil and 100 MRP in one run. Afterwards he decides bridges are the key to his memories and asks to be taken to bridges he has marked on the map. That is the side quest 'Battle at the Big Bridge': visit the bridges in each region, then head for the Kolobos Bridge and cross a stone bridge with him; the fight there paid 22,000 EXP and 20,000 gil in two runs, and he leaves through a portal.
Open marked sections to reveal solutions or story details.
Before you start
Full-game content with story spoilers. From three creator videos of the full game uploaded October 22–23, 2026 (Community-reported (video)), one of them the Japanese-language version; Square Enix's Latest Updates Vol. 4 mentions the final battle on a big bridge. Kingy hasn't played these fights.
1
Chapter 1: Siren's Tower
Reveal solution / story details
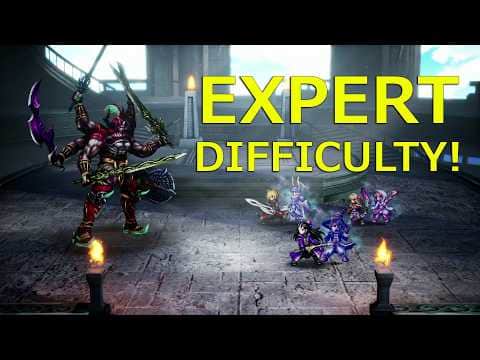
The first meeting is in Siren's Tower. In JRPG Game's run the fight starts right after the party opens a chest with the Genji Gloves; Gilgamesh, Lv.11 in vanijelli's Expert run, steals them mid-battle, then flees, and the battle ends without a result screen. The Chapter 1 walkthrough has the details and a clip. In Kingy's own full-game fight (Normal, October 24) he was Lv.11 too, sized up Rain and Lasswell, then stole the gloves about three rounds in and left without a result screen.
Spoiler clip · Gilgamesh steals the Genji Gloves and flees · reveal
“Gilgamesh Boss Battle - Final Fantasy Resonance” by vanijelli · Sep 4, 2026 · Public demo on Expert per the description, uploaded Sept 4, 2026; demo version not shown
Chapter 6: the challenge on the airship deck (Lv.40, with a Tonberry)
Reveal solution / story details
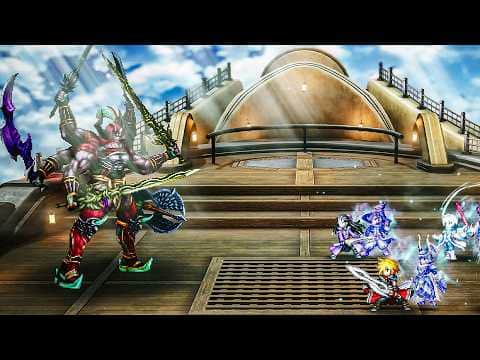
In both Sirloin's video and ポポ・みすたー's Japanese-language one, Gilgamesh confronts the party on the airship deck; Sirloin's run shows the area card 'Deck' and a Chapter 6 header. His target label reads 'Lv.40 Gilgamesh'.
Partway in he calls for his friend Enkidu, but a Lv.30 Cactuar turns up instead and he complains it isn't Enkidu. Later a Lv.42 Tonberry arrives, and then a Lv.13 Bomb. Sirloin's result screen counts up from zero and settles at 10,000 EXP, 12,000 gil and 100 MRP, with no items.
Afterwards Gilgamesh says the key to restoring his memories is bridges, and Rain remarks, 'These are... those gloves from before.' Gilgamesh has marked a few bridges on the map and asks the party to lead the way, which sets up the side quest below; in ポポ・みすたー's video the quest is accepted right there on the deck.
Expect company: a Lv.30 Cactuar, then a Lv.42 Tonberry and a Lv.13 Bomb join him during the fight.Spoiler clip · Gilgamesh calls for Enkidu and a Cactuar turns up · reveal
“FINAL FANTASY RESONANCE - Full Gilgamesh Boss Fight” by Sirloin · Oct 22, 2026 · Full game with PlayStation button prompts, uploaded Oct 22, 2026; difficulty and version not shown
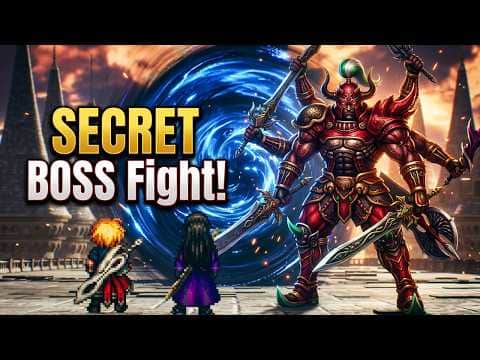
In Sirloin's second video the quest is called 'Battle at the Big Bridge'. Its first objective is to visit the bridges in each region, with a counter out of four; the run shows 1/4 to 3/4, then Gilgamesh insists the bridge he remembers was enormous. Rain then suggests the Kolobos Bridge and the objective becomes 'Head for the Kolobos Bridge'. Whether that counts as the fourth bridge isn't shown.
The objective changes while the party is in the Zoldaad Empire Territory; the run then goes through the Town of Felicitas to a stone bridge, where a prompt asks whether to cross it with Gilgamesh. On the far side the fight takes place on a wide stone span with spired towers along its sides, in both Sirloin's and ポポ・みすたー's videos. Neither shows his level here.
The result screen settled at 22,000 EXP and 20,000 gil in both videos; ポポ・みすたー's shows 100 MRP, and Sirloin's MRP gets a Stagger Finish Bonus on top. Afterwards Gilgamesh says goodbye and walks into a blue portal; Rain thanks him in ポポ・みすたー's video.
Square Enix's Latest Updates Vol. 4 says the final battle with Gilgamesh happens on 'a distinctly big bridge'. This is the last fight in these videos, and the quest is on screen under a Chapter 8 header in Sirloin's run; we don't know when it first appears.
Visit the bridges in each region with Gilgamesh (the counter runs to four).Spoiler clip · 'Battle at the Big Bridge' starts: visit the bridges (1/4) · reveal
“FINAL FANTASY RESONANCE - Full Gilgamesh Story & Secret Boss Fight” by Sirloin · Oct 23, 2026 · Full game with PlayStation button prompts, recorded under a Chapter 8 header, uploaded Oct 23, 2026; difficulty and version not shown
Sources · 7Official · Reported · Walkthrough · checked 26 Oct 2026 · Research checked 24 Oct 2026
Square Enix English systems update · Vol. 4 ↗English Square Enix article describing Limit Bursts, Visions, awakening and related battle systems, and naming the Vision characters Amelia, Camille, Wilhelm, Victoria and Ayaka and the legacy Visions Firion, Onion Knight, Vaan, Lightning, Noctis and Clive; under the heading 'Battles with Gilgamesh' it also says you will meet him during the adventure and that a final battle waits on 'a distinctly big bridge'. Under 'Defeating Ultima Weapon' it says Ultima Weapon waits at journey's end as the most formidable foe and needs perfect preparation. Announcement evidence, not gameplay testing.Official ·
Kingy play test: Final Fantasy Resonance full game, demo save transfer to Felicitas ↗First-hand play of the full game on Steam (app 3259780, Steam build 24250053, title screen 1.0.1.0) on the same Windows 11 PC and Steam account as the October 21 and 22 demo tests, keyboard, Normal difficulty, October 24, 2026. Covers the first launch of the full game with demo saves on the PC (automatic transfer), loading the demo autosave after Hell's Rider, the rest of the capital (shops and pickups), the sub-quest Dream of an Idealist from start to reward, Fina joining, the desert crossing to the Village of Kol and its chocobos, and the road to the Town of Felicitas and its equipment shop, with the party at Lv.9-11 and Fina at Lv.6-10. Screenshots of the game window, other windows masked; story cutscenes were skipped with the skip key. Play then went on that afternoon and evening through the Kolobos Ruins and its boss, The Hunger (party Lv.11, Fina Lv.9), back to Felicitas, its item shop and the start of the sub-quest Secrets Unearthed. Later that evening: Secrets Unearthed through to its reward, the desert crossing to Grandport Harbor (party Lv.12, Fina Lv.10-11), an optional Antlion battle we fled, Grandport's shops and notice board, the ship's captain who sets 'Visit Siren', and the sub-quest The Weight of Mercy from start to reward; Tronn's and Leah's Vision Details screens were read again. Play then reached the Grandport inn and the first floors of Siren's Tower (party Lv.11-13), where Leah reached Mastery Rank 6. Late that night: the rest of Siren's Tower, Gilgamesh (party Lv.13/13/12), Siren (Lv.14/14/13), the Moogle of Light in Grandport, the end of Chapter 1 and the start of Chapter 2 on Dirnado (Lv.15); from Siren's Tower onward, cutscene dialogue was read on screen. Later still: The Weight of Mercy completed in Felicitas, and its reward, the Iwakirimaru, inspected in Lasswell's weapon list; the tooltips of the weapons the party was wearing (Crimson Saber, Shiden, Reincarnation; likely their starting weapons, not confirmed) were read on the Equipment & Abilities screen. Fina on joining (Lv.6): Role Medic, skills Shining Arrow, Cure and Esuna, Limit Burst Holy Ray (Light magic damage to all enemies, scaling with sanctity). Played October 24-25, 2026: Chapter 2 on Dirnado from the landing pier to Dilmagia (shops, the Gather information leads, the shipyard), Lid joining at Lv.11, and Mt. Thunderclap (Recommended Level 13) through its paid 'easy route' to the boss Liquid Thunder (Lv.13); party Lv.15, Lid Lv.11-12, Fina Lv.14-15. The normal (unpaid) route over the mountain was explored for about 25 minutes without finding the way up, so it is not mapped. We used Shiney's video to find the boss's spot after not finding it ourselves. Played October 25, 2026: the Dwarven Forge (Borin, its layout, shops, inn, Moogle of Light, chest and back exit), the Mom Bomb fight (Lv.14) with our first Esper summon (Siren), the two Dirnado Sanctums of Light for the Zidane and Noctis Visions, Zidane's first awakening, and the world-map road to the Mobliz Shipyard (card Recommended Level 16) as far as its entrance scene and the Security Eye fight; party Lv.16-17, Lid Lv.13-14. We used Shiney's video for the Mom Bomb trigger spot and the Forge's back exit after not finding them ourselves, and to see the approach to the second sanctum. Played October 25, 2026: the rest of the Mobliz Shipyard (entrance hall, portrait hall save point, the offline centre elevator, the west lift, the generator-room power switch, the floor numbers 5, 3 and 8, Borin on the roof, the lever room and lever 16, the blocked portrait hall, the Epimetheus event fight, the cargo-train tunnel with Evan and Mechabo, and the Adrastea boss fight, Lv.16), ending at the Dwarven Forge tunnel and the objective 'Go to the Wind Shrine'; party Lv.16-18 and Lid Lv.14-16. The power switch was found and used in game. Later on October 25, 2026 (party Lv.18): the Forge corridor scene with Verun and the Chapter 2 sub-quests Arise, Mechabo! (completed), Lyrical Riddles (completed, including the Mobliz Shipyard portraits and the old man in Dilmagia) and the start of Mechabo Evolved (accepted, no hunt done), plus Quick Heal, field Phoenix Down use and the Dwarven Forge inn. Played October 25, 2026: the world-map road from the Mobliz Shipyard to the Wind Shrine (area card Recommended Level 18), the shrine's entrance scene, its lamps, lifts and floating pads, the route from the entrance to the save balcony (walked three times), the Tsukiyo no Tachi chest, the shrine's enemies, both save points and their menu, the Dwarven Forge restock, the Wind Crystal scene, Aether (Lv.18; lost twice, won on the third attempt) and the scene after him, then (October 26) Dilmagia, the rooftop scene with Lid, the Chapter 2 complete card and the airship deck up to Lid's Strength +3 box; party Lv.18-20 and Lid Lv.18-19. We never saw an HP number for Aether, and we did not test Wind against him or what Sylph's Tiara does. We used Shiney's video only as a cross-check for one staircase and to see a route we could not make connect. Played October 26, 2026 (same Steam install, Normal difficulty, keyboard; party Lv.19-22): the end of Chapter 2 in Dilmagia, the crash and the start of Chapter 3 on the Olderion Federation world map, Olderion (arrival, inn and save point, The Drofox Gazette Vol. 3, the leads, the jump-rope girl, Nichol on the canal pier), the road to the Cave of Waters (Recommended Level 20), Nichol joining and his two tutorials, the cave's boat rooms (Magicite Shard, Shuriken x3, Ice Scroll I x2 and Ninja Gear chests, two Tablet Shards, the pre-boss save point), Nichol's Lv.20 level-up screen, Fina's Lv.21 level-up screen and Noctis's Mastery Rank 5 screen, and five attempts at the Cave of Waters boss, Wave Lopros (four lost, the fifth won at party Lv.22 with Lasswell, Fina, Nichol and Rain; the result screen, rewards and level-ups were read in game). Later that day: the way out of the cave, Lid's Level Up screen at Lv.22, then Olderion again after the boss: the scene with Nichol and Luka, the Moogle of Light's Vision Enhancement screen, the three purification spots, the Olderion Tablet Shard, the scene with El, the point-of-no-return warning for Old Town and, after it, the first forced fight in Old Town against a Ribosome and two small monsters (the Old Town card reads Recommended Level 21). Then, still on October 26 (party Lv.22-24): the rest of Old Town with the party split (Rain, Fina and Lid), four more street fights including the Ogre Mage, an Ether chest, the Old Town save point and the soldier beside it, and the Water Dragon (two lost attempts and a win on the third; the defeat screen, the result screen and the growth screen were read in game), the story scenes after it and the objective 'Go to Lake Dorr'; plus Lid's Level Up screen at Lv.23, the Equipment & Abilities screens and Vision pickers for Rain, Fina and Lid, and the skill texts of Lid and Fina. Then, still on October 26 (party Lv.23-24): the Lake Dorr route (the Cave of Waters crystal chamber scene, the ladder shaft and its Tablet Shard, the world-map walk to Lake Dorr and its area card, Recommended Level 23), Leviathan (Lv.23; lost once with it near 30% HP, won on the second attempt after Retry; the result screen was read in game), the scenes after it and the growth screen, then Olderion again (Lid's scene, the quest-log summary and the inn) and the long Archwitch Fina story sequence. We skipped most of that sequence's text and rely on the quest-log summary for the twist, and we saw no playable battle in it. Last came the new goal 'Go to Waterfall Way', Archwitch Fina's Party screen at Lv.24 and the in-game texts of eight of her skills. We then played Waterfall Way to the Altar on October 26: the route and its two Tablet Shards, the Altar scene, the entrance link, four fights including Destroyer (Lv.24), Olderion's item and weapon prices, the Level 2 Limit Burst tutorial and more of Archwitch Fina's skill texts. We stopped before Warden's Cape. The Olderion inn price, its save point and the gondola Sailor's destinations were also noted. For the route we also glanced at text guides (RPG Site, Game8) that agree with the chest contents; they are not our evidence.Reported ·
FINAL FANTASY RESONANCE Full Demo Walkthrough – Complete Chapter 1 (PS5 No Commentary) ↗Community-reported (video), not a Kingy play test. Video vTlBTFmXklU, uploaded October 20, 2026 (US Pacific date), before launch: the public demo on PS5 per the title, with PlayStation button prompts; demo version and difficulty not shown. The uploader's chapter list was used only to find the scene. Frames checked October 24 at 3:12:01–3:12:05 (a hall with twin staircases in Siren's Tower, objective 'Visit Siren', 'Genji Gloves x1'), 3:12:15 (Lasswell calls them some kind of heirloom), 3:12:36–3:12:42 (Lasswell tells the voice to show itself; Gilgamesh answers), 3:12:55 (the battle opens on Gilgamesh), 3:15:20 (the move he practises 'before bed every night'), 3:15:28–3:15:35 ('Steal', then 'Genji Gloves stolen!' in a battle banner; 'the stealee becomes the stealer'), 3:15:40–3:15:50 (overpowered equipment early 'takes all the fun out of fighting', then his farewell), 3:15:52–3:15:54 ('Flee' banner, golden fire), 3:15:55–3:16:00 (back in the hall with no result screen; Rain shouts at him to give 'those' back), 3:16:08–3:16:20 (Gilgamesh on a ledge beside a closed chest says what he stole is his, then falls) and 3:16:30–3:16:40 (Lasswell on the fall; Rain: 'haven't seen the last of him').Walkthrough ·
Gilgamesh Boss Battle - Final Fantasy Resonance ↗Community-reported (video), not a Kingy play test. Video H3jdrHc6wy0, uploaded September 4, 2026 (US Pacific date): the public demo on Expert per its description, with keyboard prompts; demo version not shown. Frames checked October 24 at 0:05 (objective 'Visit Siren'), 0:40 (Gilgamesh answers Lasswell in the twin-staircase hall), 1:20 (target label 'Lv.11 Gilgamesh', affinities row empty), 4:00 (the 'before bed every night' line), 4:11 (Rain: 'Hey! The gloves...'), 4:16 ('the stealee becomes the stealer'), 4:31–4:34 (his farewell), 4:35 ('Flee' banner), 4:36 (he breaks up into golden sparks; no result screen), 4:40 (Rain beside the opened chest in the hall) and 4:52–5:04 (Gilgamesh on a ledge says what he stole is his, then falls).Walkthrough ·
FINAL FANTASY RESONANCE - Full Gilgamesh Boss Fight ↗Community-reported (video), not a Kingy play test. Video LvGvMXAPe9k, uploaded October 22, 2026: the full game with PlayStation button prompts; difficulty and version not shown. Frames checked October 24 at 0:00 (area card 'Deck', a 'Chapter 6 - Tranquility' header), 0:30–1:00 (Gilgamesh on the airship deck challenging the party), 4:00 (info card 'Lv.40 Gilgamesh', HP 37xxx/54000), 4:30–4:46 (a 'Lv.30 Cactuar' arrives and Gilgamesh complains it is not Enkidu), 7:10–7:40 (a Tonberry arrives; 'Lv.42 Tonberry' beside 'Lv.40 Gilgamesh'), 9:45 ('Lv.13 Bomb'; HP 54000 legible at 9:47), 12:22–12:25 (Battle Result counts up from 0 and settles at EXP Gained 10000, Gil Obtained 12000, MRP Gained 100, no items), 13:30–14:15 (Gilgamesh: the key to restoring his memories is bridges), 14:50 (Rain: 'These are... those gloves from before.') and 14:56 (Gilgamesh has marked spots on the map and asks the party to lead the way).Walkthrough ·
FINAL FANTASY RESONANCE - Full Gilgamesh Story & Secret Boss Fight ↗Community-reported (video), not a Kingy play test. Video 7bw-KVKJ_ck, uploaded October 23, 2026: the full game with PlayStation button prompts, recorded with a Chapter 8 header; difficulty and version not shown. Frames checked October 24 at 0:00 (map label 'Battle at the Big Bridge'), 1:00 (quest update 'Battle at the Big Bridge - Visit the bridges in each region (1/4)'), 1:40–2:00 ((2/4) on the Kingdom of Grandshelt map), 2:16–2:52 ((3/4)), 3:30 (Rain suggests the Kolobos Bridge), 3:20 (Gilgamesh: the bridge he remembers was enormous), 3:40 (quest update 'Head for the Kolobos Bridge'; area card 'Zoldaad Empire Territory'), 4:02 (area card 'Town of Felicitas'), 4:28 (prompt 'Cross the bridge with Gilgamesh?'), 5:00 (Gilgamesh lists bridges it wasn't), 6:00 (battle on a wide stone span with spired towers along its sides; no info card shown), 11:40 onward (Battle Result counts up from 0 and settles at EXP 22000 and gil 20000, with MRP above 100 including a Stagger Finish Bonus; the gil total then rises from 54,325 to 74,325), 12:00 (Gilgamesh's farewell), 12:40 (he walks into a blue portal and leaves) and 13:40 (Lasswell's parting remark).Walkthrough ·
FFレゾナンス ボス戦 ギルガメッシュ 2戦目 3戦目 ビッグブリッヂの死闘【FINAL FANTASY RESONANCE】 ↗Community-reported (video), not a Kingy play test. Video rmJcdKKnXvs, uploaded October 22, 2026: the Japanese-language version of the full game; its title calls these Gilgamesh's second and third fights. Frames checked October 24 at 0:20 (Gilgamesh on the airship deck), 2:30–2:34 (in battle on the deck he says he will introduce the party to a friend and calls for Enkidu, then says the newcomer is not Enkidu), 8:20–8:30 (talking on the deck after the fight; the quest is accepted there), 11:40 (the next battle on a stone span with spired towers), 15:00 (Gilgamesh staggered), 17:16 (Battle Result: EXP 22000, gil 20000, MRP 100) and 19:10 (Gilgamesh beside a blue portal as Rain thanks him).Walkthrough ·
Stuck? Tell us where
Say where you’re stuck in Final Fantasy Resonance. You get one hint at a time from a published kingy.wiki guide, and the answer and its clip stay covered until you ask.
If nothing matches, we keep your words (without emails, links or long numbers) to decide which answers to write next. Privacy
 4:10–4:37 · 27 sGilgamesh steals the Genji Gloves and flees
 4:27–4:47 · 20 sGilgamesh calls for Enkidu and a Cactuar turns up
 0:57–1:12 · 15 s'Battle at the Big Bridge' starts: visit the bridges (1/4)